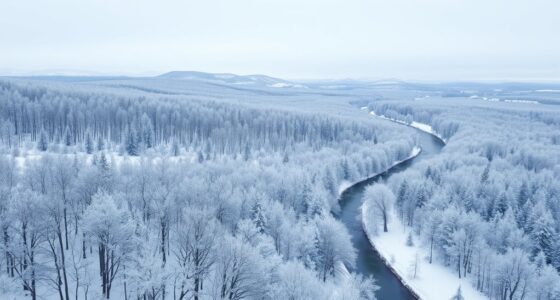

To improve your drone photos in Lightroom, start by adjusting exposure and contrast to bring out details and balance uneven lighting. then, tweak white balance and vibrance to create natural, vivid colors. Crop and straighten your image to enhance composition and focus on key elements. Use clarity and texture sliders to boost detail, and apply noise reduction and sharpening for clarity. Finish with graduated or radial filters for localized edits—if you continue, you’ll learn even more tips to perfect your shots.
Key Takeaways
- Use basic exposure and contrast adjustments to reveal details and balance uneven lighting caused by drone movement.
- Correct white balance and boost vibrance to achieve natural, striking colors in aerial landscapes.
- Crop and straighten images to improve composition, focus on main subjects, and align horizon lines for visual balance.
- Enhance details and textures with clarity, HDR, and subtle sharpness adjustments to showcase landscape richness.
- Apply localized edits with graduated and radial filters to emphasize focal points and refine exposure and color balance.
Top picks for "edit drone photo"
Open Amazon search results for this keyword.
As an affiliate, we earn on qualifying purchases.
Adjusting Basic Exposure and Contrast
When editing drone photos, adjusting the basic exposure and contrast is essential for bringing out the image’s true details. You want to guarantee that sky reflections are accurately represented, highlighting the mirror-like surfaces that can add depth. Brightening or darkening the exposure helps balance the overall scene, especially when drone movement causes uneven lighting. Contrast adjustments emphasize the difference between the lighter and darker areas, making details pop. For instance, subtle tweaks can reveal textures in the sky or reflections that might otherwise be lost. Be cautious not to overdo it, as excessive contrast can obscure sky reflections or distort the natural look of the scene. Proper exposure and contrast set the foundation for a stunning aerial shot. Additionally, understanding how to adjust basic settings enables you to create a calm and visually appealing image that accurately reflects your scene’s visual impact. Developing a good sense of image editing techniques can further enhance your overall results. To further enhance your editing process, considering color calibration can help ensure your colors are true to life and consistent across different displays. Incorporating connected equipment like calibrated monitors can support this process.
Enhancing Colors With White Balance and Vibrance
Adjusting the white balance helps you make your drone photos look more natural by correcting color casts. Boosting vibrance levels enhances the intensity of muted colors without oversatuating the entire image. Together, these tools allow you to create striking, true-to-life colors that truly stand out. Additionally, understanding how cookie management affects your editing workflow can improve your overall experience with photo enhancement tools. Properly managing your browser cookies ensures smoother access to online editing platforms and safeguards your preferences during your editing sessions. Being aware of digital privacy considerations can help you maintain control over your online activity while editing. Incorporating user experience principles into your editing process can further optimize your workflow and results. Recognizing the importance of website performance metrics can also help you understand how your editing environment functions and improve it accordingly.
Adjusting White Balance
White balance is essential for capturing true-to-life colors in your drone photos, ensuring that the scene’s hues appear natural rather than overly warm or cool. Adjusting the color temperature helps you control whether the image feels warm (more yellow/orange) or cool (blue tones). Use the slider to fine-tune this setting until the colors look balanced and accurate. Tint adjustment further refines the white balance by shifting the image’s hue toward green or magenta, correcting color casts caused by lighting conditions. Proper white balance guarantees your skies, foliage, and structures look realistic, preventing color shifts that can distract viewers. Take your time adjusting these settings to match the scene’s natural lighting, creating a more authentic and appealing aerial shot. Additionally, understanding color correction techniques can help you enhance your images further and achieve professional-looking results. Mastering color calibration can also contribute to more consistent and high-quality aerial photography outcomes. Incorporating color consistency practices ensures your photos maintain a uniform look across different shooting sessions, which is especially important when using appliance testing to verify equipment safety and performance in various environments. For drone photographers, paying attention to white balance settings can significantly improve the overall quality of your aerial images.
Boosting Vibrance Levels
Boosting vibrance levels can make your drone photos pop by enhancing the intensity of colors without oversaturating them. Unlike increasing overall color saturation, vibrance selectively boosts muted tones, preserving natural skin tones and subtle hues. This adjustment helps you achieve a more dynamic image while maintaining a balanced look. By fine-tuning vibrance, you can elevate the mood of your aerial shots, making landscapes look more vivid and engaging. It’s especially useful when working with photos that have dull or washed-out colors, as it adds life without risking unnatural color shifts. Keep an eye on the overall color palette to avoid overshooting, and use vibrance alongside white balance adjustments to create a well-balanced, eye-catching image that captures the true essence of your scene. For optimal results, consider advanced editing techniques to further enhance your aerial photography. Additionally, understanding color science can help you make more informed decisions when adjusting colors for a natural yet striking look. Incorporating knowledge of color perception can also help you better judge how subtle shifts in vibrance affect the overall visual impact of your images. Recognizing the influence of visual psychology can further refine your editing process by aligning your adjustments with how viewers perceive color and mood. Furthermore, being aware of credit card security best practices can help protect your digital assets when sharing or storing your edited photos online.
Cropping and Straightening for Better Composition
Cropping and straightening help you create a more balanced and attractive composition by aligning horizon lines and sharpening focus areas. When you adjust the frame, you enhance the overall clarity and draw attention to the main subjects. Properly framing your shot guarantees the image feels natural and visually appealing. Incorporating precision techniques can further improve your editing process, ensuring your aerial shots truly stand out.
Align Horizon Lines
Aligning horizon lines is a crucial step in enhancing your drone photos, as it guarantees your images feel balanced and visually appealing. Proper horizon correction ensures your photo doesn’t look tilted or skewed, which can distract viewers and diminish the shot’s impact. Use tilt adjustment tools in Lightroom to straighten the horizon quickly and effectively. Start by selecting the crop tool and enabling the straighten feature, then drag the ruler along the horizon line to correct any tilt. This simple adjustment improves the overall composition and makes your aerial shot feel more natural and professional. Remember, a level horizon not only enhances aesthetic appeal but also directs the viewer’s focus where you want it, creating a more compelling image.
Enhance Focus Areas
To improve your drone photos, focusing on cropping and straightening can substantially enhance the overall composition. Proper cropping tightens the focus on key elements, emphasizing depth of field and reducing distractions. Straightening corrects tilted horizons, creating a balanced look that guides the viewer’s eye. Be mindful of motion blur; cropping can help minimize its impact by removing blurred edges. When straightening, aim for a natural line, avoiding excessive adjustments that distort perspective. Use the following table to see how cropping and straightening influence focus areas:
| Technique | Effect on Focus Area |
|---|---|
| Cropping | Highlights main subjects, reduces distractions |
| Straightening | Aligns horizon, creates stability and balance |
| Depth of Field | Emphasizes focus, blurs background for depth |
| Motion Blur | Can be minimized with careful cropping/straightening |
These steps sharpen your aerial shots, making focus areas stand out vividly.
Improve Frame Balance
Adjusting the framing of your drone photos through cropping and straightening can considerably improve overall composition. Use cropping to emphasize leading lines that guide the viewer’s eye toward the main subject, creating a stronger visual flow. Straighten horizons or architectural elements to achieve symmetrical balance, making your image more harmonious. Properly aligned shots feel more professional and pleasing. Focus on removing distractions or unnecessary space that detracts from the core scene. When cropping, consider the rule of thirds to position key elements effectively. Straightening ensures your photo isn’t tilted, which can disrupt the viewer’s experience. By refining the frame, you enhance the photo’s visual impact, making it more balanced and engaging for your audience.
Improving Details With Clarity and Texture
Enhancing the clarity and texture of drone photos can considerably bring out the fine details that might otherwise go unnoticed. To achieve this, start by adjusting the clarity slider to increase midtone contrast, making textures pop without overdoing it. Use HDR techniques to combine multiple exposures, revealing intricate details in both shadows and highlights. Color grading also plays a role; by fine-tuning hues and saturation, you can emphasize textures and add depth to your image. Be cautious with these adjustments—too much can create an unnatural look. Focus on subtle enhancements that preserve realism while sharpening fine details. These steps help your aerial shots stand out, showcasing the landscape’s richness and complexity with enhanced clarity and texture.
Reducing Noise and Sharpening Images

When working with drone photos, noise can quickly detract from their quality, especially in low-light or high ISO situations. To address this, use noise reduction techniques in Lightroom to smooth out grain without losing too much detail. Adjust the luminance and color sliders carefully to find the right balance. After reducing noise, sharpening methods help bring back crispness. Use the sharpening slider sparingly to enhance edges without introducing artifacts. Consider applying a mask to sharpen only the main subject, preserving smooth backgrounds. Fine-tuning these adjustments ensures your aerial shots look clear and professional. Remember, moderation is key—over-sharpening or excessive noise reduction can harm image quality, so always review your edits at 100% zoom.
Applying Graduated and Radial Filters for Focused Edits

Applying graduated and radial filters allows you to make precise, localized adjustments to your drone photos, directing viewers’ attention exactly where you want it. Gradient masks are perfect for enhancing skies, gradually balancing exposure or color from top to bottom. Radial filters, on the other hand, are ideal for focal point editing, highlighting specific areas like a building or tree while subtly darkening the surroundings. With these tools, you can fine-tune brightness, contrast, clarity, and saturation without affecting the entire image. This focused approach ensures your main subject stands out and the overall composition feels balanced. Using these filters effectively elevates your aerial shots, creating a professional and polished look with targeted edits.
Exporting Your Final Aerial Photo for Sharing
Once you’ve finished editing your drone photo, the next step is to export it in a format suitable for sharing. To do this effectively, consider these key points:
- Choose the right file format—JPEG for quick sharing or TIFF for high quality and printing.
- Adjust image metadata to include your copyright info or keywords for easier organization.
- Set the resolution and size based on your sharing platform, like social media or print.
- Use Lightroom’s export settings to optimize quality without creating huge files.
Frequently Asked Questions
How Can I Correct Lens Distortion in Drone Photos?
To correct lens distortion in your drone photos, start by applying lens correction in Lightroom. Enable the lens profile to automatically fix distortion and vignetting. For additional refinement, use the manual perspective adjustment tools to straighten lines and correct any skewed angles. This combination guarantees your aerial shots look natural and professional, with minimal distortion and accurate perspective, enhancing the overall quality of your drone photography.
What Are the Best Shortcuts for Faster Editing Workflows?
Imagine you’re editing drone photos and want to speed up your workflow. You can use keyboard shortcuts like ‘D’ for develop module or ‘Ctrl+E’ to export images quickly. These shortcuts streamline your editing workflow, saving time and effort. Practice regularly to memorize essential keys, enabling you to navigate Lightroom faster. This approach helps you focus more on creativity and less on clicking through menus, making your editing process more efficient.
How Do I Batch Edit Multiple Aerial Images Efficiently?
To batch edit multiple aerial images efficiently, use Lightroom’s synchronized editing feature. First, select all the photos you want to edit in the Library module. Make your adjustments on one image, then click “Sync” to apply those settings to the rest. This process streamlines your workflow through batch processing, saving time and ensuring consistency across all your aerial shots.
Which Lightroom Presets Work Best for Aerial Drone Shots?
Your drone photos deserve presets that elevate every shot to breathtaking heights. For aerial shots, try presets focused on vibrant color grading and subtle vignette effects—they’re like a magic wand for enhancing depth and mood. Look for those that boost clarity and contrast, making skies pop and landscapes stand out. Experiment with presets designed for natural yet dramatic looks, and you’ll transform ordinary aerial images into stunning visual stories effortlessly.
How Can I Recover Details in Overexposed or Underexposed Areas?
To recover details in overexposed or underexposed areas, start by using the Highlights and Shadows sliders in Lightroom. Adjust Highlights to preserve highlight details and Shadows to bring out details in darker areas. For more precise control, use the Exposure slider for overall brightness, but focus on highlight preservation to prevent blown-out highlights. This technique helps balance your aerial shots and reveals hidden details effectively.
Conclusion
By mastering these Lightroom tips, you’ll transform your drone photos from good to breathtaking, making them feel as vivid and dynamic as the real world. Don’t be afraid to experiment—you might just discover techniques that turn your aerial shots into masterpieces that captivate viewers and leave them in awe. With a little practice, you’ll be crafting stunning images so powerful, they could easily be mistaken for the work of professional photographers. Keep editing and keep soaring!