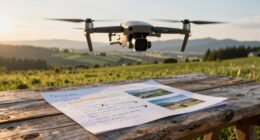

As a beginner, avoid flying without a clear plan to prevent scattered shots and wasted battery life. Don’t film at high speeds, as shaky footage looks unprofessional; practice smooth movements instead. Always check your camera settings and adjust for lighting to get vibrant images. Flying too high can make subjects tiny, so stay lower for better detail. Relying only on wide shots limits storytelling—mix in close-ups. Keep these tips in mind, and you’ll discover more ways to upgrade your drone skills.
Key Takeaways
- Avoid flying without a clear plan; pre-define shots, angles, and sequences for better storytelling.
- Always check weather and regulatory guidelines to ensure safe, legal drone operation.
- Use smooth, controlled movements and stabilization to produce professional, jitter-free footage.
- Adjust camera settings properly, including ISO, white balance, and use ND filters to optimize image quality.
- Fly at appropriate altitudes and incorporate varied shot types like close-ups and angles to enhance visual interest.
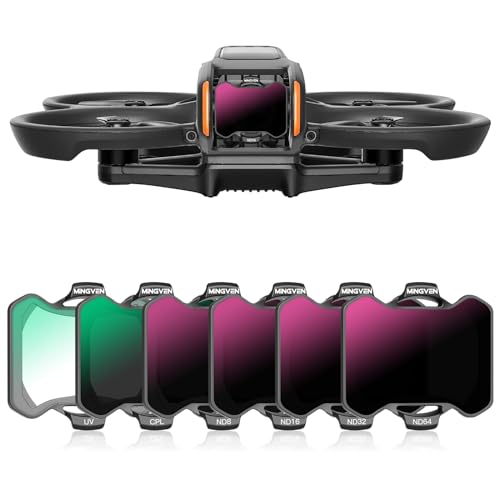
MINGVEN Avata 2 ND Filters, UV + CPL + ND Filters Set Camera Lens for DJI Avata 2 Drone Accessories – 6 Pack (CPL, UV, ND8, ND16, ND32, ND64)
MINGVEN Avata 2 nd filters set includes 6-pack filters (UV, CPL, ND8, ND16, ND32, and ND64). Offer precise…
As an affiliate, we earn on qualifying purchases.
As an affiliate, we earn on qualifying purchases.
Flying Without a Clear Plan

Flying without a clear plan often leads to amateurish footage and wasted resources. Without identifying your starting point, ending point, and camera angles beforehand, your shots will lack focus and professionalism. Take the time to visualize your scenes and determine the best angles to highlight your subject. Structured drone movements, like close-up reveals or tracking shots, make your footage more engaging and cinematic. Planning also helps conserve battery life by avoiding unnecessary flying and redundant footage collection. When you fly aimlessly, your videos tend to look unpolished, with scattered scenes that fail to tell a coherent story. A well-thought-out plan guarantees each flight serves a purpose, resulting in high-quality, compelling footage that captures your vision effectively. For example, studying professional drone footage can inspire you to develop a more effective shooting strategy. Incorporating pre-flight checklists ensures all your equipment and plans are ready, minimizing disruptions during your shoot. Additionally, understanding the capabilities of your drone’s camera allows you to optimize settings for the best possible images. Familiarity with flight planning tools can further streamline your preparation process and help you anticipate potential obstacles. Moreover, considering environmental conditions like weather and lighting can significantly impact your results, so planning accordingly is essential.

CAPART Drone Repair Tools Kit for DJI Mini 4/3 Pro Mavic 3 2 Air 2 2S Avata FPV Drone, Precision Screwdriver Set for Laptops Camera Watches Eyeglass (36 in 1)
1- Repair Tools for RC Car/Drone like DJI Mavic 3/Mavic Air 2/Mavic Air 2S/Mavic Mini 2/DJI FPV/DJI Avata,…
As an affiliate, we earn on qualifying purchases.
As an affiliate, we earn on qualifying purchases.
Filming at High Speed

Filming at high speed can considerably undermine the quality of your drone footage, as rapid movements often lead to shaky, unstable images that look unprofessional. When you move too quickly, your footage becomes jittery and hard to follow, distracting viewers from the scene’s beauty. To improve your shots, keep your drone movements slow and steady, mimicking cinematic techniques. Gentle controls and avoiding sudden, jerky motions create smooth, polished footage. Lower speed settings give viewers time to appreciate details and scene elements below. Remember, slow and deliberate movements enhance the cinematic feel and make your videos more engaging. Practice controlling your drone carefully, focusing on smooth progressions rather than rapid, frantic motions. This approach will elevate your footage and give it a more professional look. Incorporating adaptive flight modes can also help maintain stability and smoothness during complex maneuvers. Additionally, understanding connected equipment can aid in stabilizing your drone and enhancing your filming precision, especially in challenging conditions. Being aware of environmental factors such as wind and lighting can further improve your control and footage quality. Using weather-resistant gear can also protect your drone and ensure consistent performance in various conditions.

Camera Stabilizer, High Technology Drone Camera Gimbal Metal Brushless Gimbal Board BGC 2.2 for 3/3+ / 4 Camera RC Drone Quadcopter Part (Black) Gimbal Drone
[Ready-to-fly 12v Rtf Version] This complete rtf (ready-to-fly) gimbal comes fully assembled with all necessary components including screws…
As an affiliate, we earn on qualifying purchases.
As an affiliate, we earn on qualifying purchases.
Ignoring Camera Settings
Ignoring your camera settings can lead to overexposed or underexposed footage, ruining the shot’s detail. Mastering controls like ISO, aperture, and white balance gives you consistent results and better image quality. Using ND filters helps balance exposure in bright conditions, preventing blown-out highlights and loss of detail. Additionally, understanding how industry trends influence camera choices ensures your equipment and settings stay optimized for various shooting scenarios. Being aware of sensor technology developments can help you select gear that performs better in different lighting environments. Staying informed about latest camera innovations allows you to adapt your techniques and gear to evolving visual standards, just as choosing the right esthetician magnifying lamp can improve precision in skincare photography.
Proper Exposure Techniques
Proper exposure is essential for capturing high-quality drone footage, but it’s often overlooked when camera settings are neglected. Without proper exposure, your videos can look washed out or too dark, losing important details. To fix this, pay attention to the 180-degree shutter rule: at 24 fps, set your shutter speed to around 1/50. Use ND filters to prevent overexposure in bright conditions, allowing for smooth, cinematic motion. Keep your ISO low to avoid graininess, and manually adjust white balance to keep colors consistent. Avoid relying solely on automatic settings, which can cause flickering or inconsistent brightness. Monitoring your exposure throughout the flight helps guarantee your footage looks professional and vibrant, making your shots more engaging and visually appealing. Camera settings play a crucial role in achieving the desired exposure and overall image quality.
Mastering Camera Controls
Have you fully harnessed your drone’s camera controls? Mastering them is key to capturing professional-quality footage. Focus on smooth adjustments for tilt, pan, and rotation to avoid jerky shots. Practice steady movements rather than sudden, sharp changes that can distract viewers. Use the gimbal to keep the camera level and stabilize your footage, especially during complex maneuvers. Pay attention to framing and composition as you fly, adjusting the camera angle to highlight your subject. Incorporate slow, deliberate tilts and pans to add cinematic flair. Remember, controlling your camera with purpose creates a more polished look. Avoid rushing through controls—precision and deliberate movements translate into smoother, more engaging footage. Consistent practice will help you intuitively manage your camera for the best results. Being aware of modern consumer electronics and their features can also enhance your overall drone photography experience. Additionally, understanding camera settings like ISO, shutter speed, and aperture can give you greater creative control over your shots. Developing a pre-flight checklist can ensure you’re prepared to make fine-tuned adjustments during your shoot.
Using ND Filters
Using ND filters is essential for achieving ideal exposure and image quality, especially in bright lighting conditions. They help prevent overexposure and maintain the cinematic look you’re aiming for. Without them, your footage can appear washed out or too bright, losing detail in highlights. To get the most out of ND filters, consider:
- Reducing glare and unwanted reflections on water or glass
- Maintaining proper shutter speed for smooth motion
- Achieving consistent exposure across different lighting environments
- Enhancing color saturation and contrast
- Allowing longer shutter times for motion blur effects
Using ND filters also helps you control exposure more precisely, which is crucial for professional-looking drone footage. Imagine capturing a sunset with rich colors and smooth, cinematic motion, all thanks to the right ND filter. Proper filter selection ensures optimal results and helps you adapt to changing lighting conditions, making your footage look polished and professional.

X-shop Drone with 1080P Camera for Kids Adults, Foldable RC Quadcopter with One Key Take Off/Land, Gesture Selfie, 3D Flip, 2 Batteries, Carrying Case, Toy Gift for Beginners
1080P HD Adjustable Camera: This drone is equipped with a 90° adjustable 1080P HD camera, providing a wide…
As an affiliate, we earn on qualifying purchases.
As an affiliate, we earn on qualifying purchases.
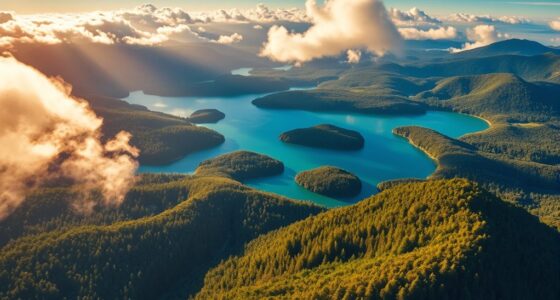
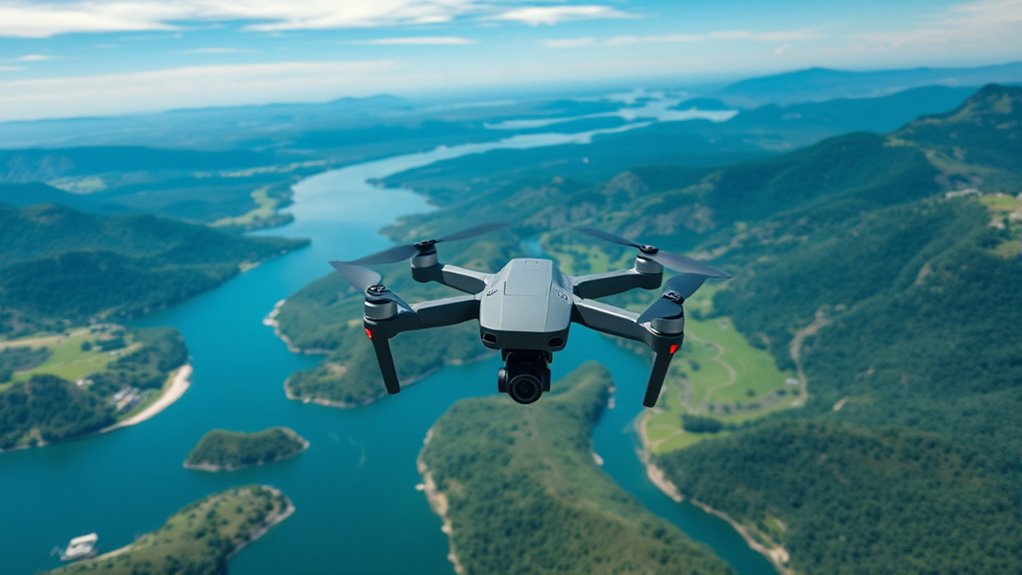
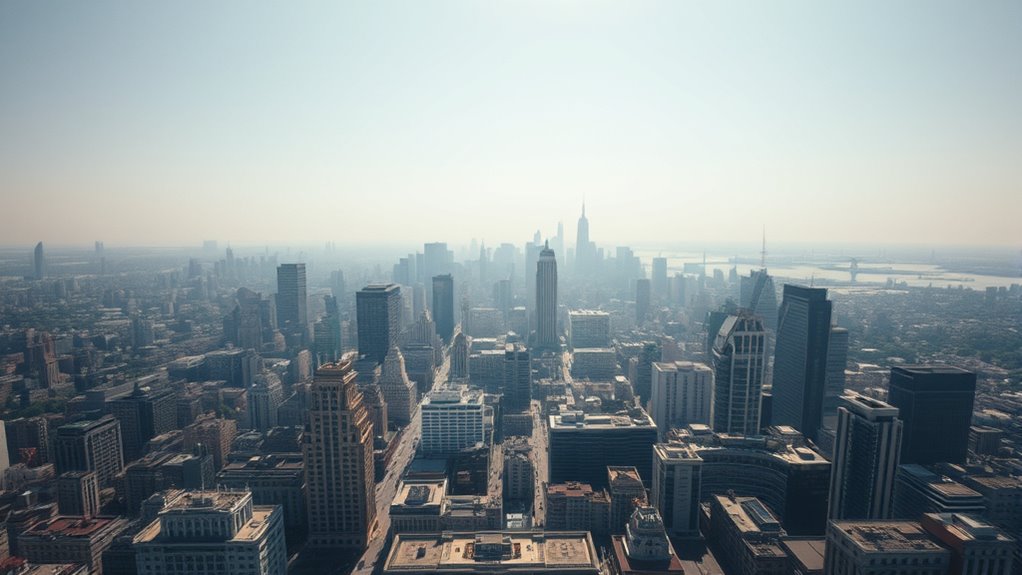
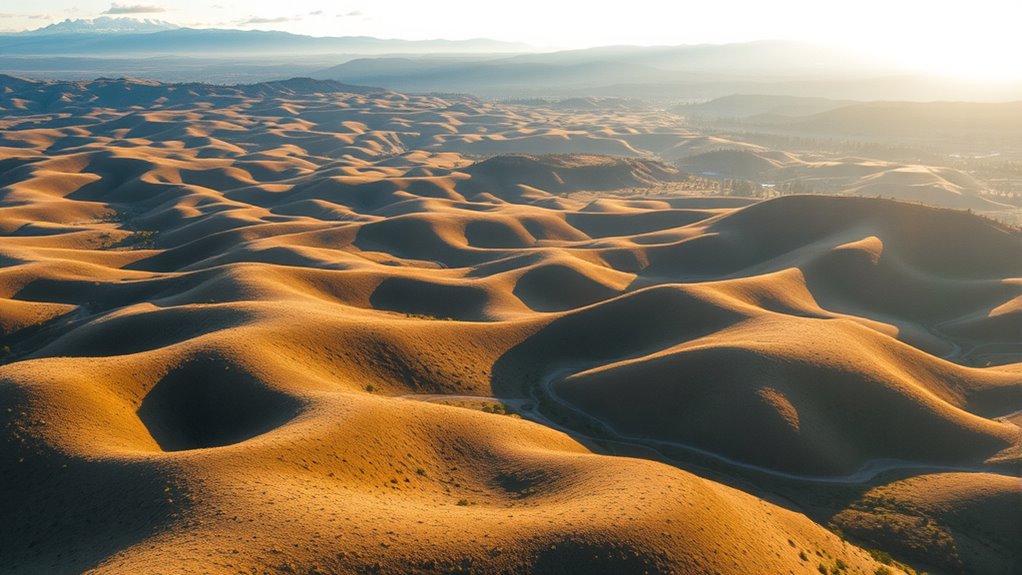
Flying Too High

Flying too high makes your subjects look tiny and disconnected from the scene, reducing the impact of your footage. By maintaining closer altitudes, you can capture more dynamic perspectives and add depth to your shots. Lower flying heights help viewers feel immersed and more engaged with the action. Additionally, understanding evidence‑informed guidance can help you make better decisions about altitude to improve your drone photography.
Maintain Closer Altitudes
When you fly too high, your subjects can appear tiny and disconnected from the scene, making it harder for viewers to engage with the action. To fix this, lower your altitude to create a more intimate and immersive perspective. Flying closer allows you to capture details like facial expressions, textures, and surroundings that tell a richer story. Imagine:
- Seeing a person’s face clearly rather than just a dot
- Capturing intricate patterns on a building’s façade
- Highlighting textures of leaves or rocks
- Showing motion blur of moving objects
- Creating a sense of immediacy and connection with the scene
Maintaining closer altitudes emphasizes the story and helps your footage feel more dynamic and engaging. It also provides better control over framing and composition, elevating your drone photography.
Capture Dynamic Perspectives
Shooting from too high an altitude can flatten your footage and diminish its visual impact. When you’re too elevated, your subjects appear tiny and disconnected, making it harder for viewers to feel immersed. Instead, fly lower to keep the scene engaging and allow details to stand out clearly. This approach creates more cinematic shots that convey movement and energy effectively. Vary your altitude between shots—sometimes fly closer for intimacy, other times higher for context—to add depth and interest. Avoid the temptation to stay at a single, high altitude, as it results in monotonous, less compelling footage. By maintaining a balanced altitude, you’ll capture more dynamic perspectives that keep viewers engaged and enhance the storytelling quality of your aerial videos.
Enhance Scene Immersion
Elevating your drone too high can make your footage feel detached and less engaging. When you’re too far above your subject, it becomes tiny and disconnected from the scene’s action. To create a more immersive experience, fly lower and closer to your subject, capturing details and movement that draw viewers in. Think about:
- Flying just above treetops to reveal texture and motion
- Approaching buildings for dramatic architectural shots
- Hovering near people to capture expressions and interactions
- Tracking animals or moving objects for a dynamic perspective
- Shooting from a lower angle to emphasize depth and scale
Relying Only on Wide Shots

Relying solely on wide shots limits the storytelling potential of your drone footage. While sweeping landscapes set the scene, they don’t reveal details that add depth and interest. To create compelling videos, you need a mix of shot types, including medium and close-ups. These shots highlight specific subjects, like architecture, foliage, or people, making your story more engaging. Incorporate varied angles and distances to keep viewers visually stimulated and prevent your footage from feeling monotonous. Close-up shots also add emotional impact and context that wide shots can’t convey alone. By blending different shot types, you’ll craft a more dynamic narrative and maintain viewer interest throughout your footage. Diversifying your shots elevates your drone cinematography from basic to professional.
Poor Flight Control and Jerky Movements

Poor flight control can quickly undermine the professionalism of your drone footage, as jerky and abrupt movements distract viewers and break immersion. To avoid this, focus on smooth, controlled motions. Instead of quick, erratic starts and stops, aim for steady, gentle movements that flow naturally. Avoid moving in multiple directions at once, which creates cluttered shots. Instead, plan simple paths, like a slow forward push or a gentle turn. Use slow, deliberate adjustments to keep footage fluid. Also, practice maintaining consistent altitude and speed, avoiding sudden drops or accelerations. This creates a cinematic feel and keeps your shots polished. Remember, controlled flight transforms basic footage into mesmerizing visuals, elevating your drone photography to a professional level.
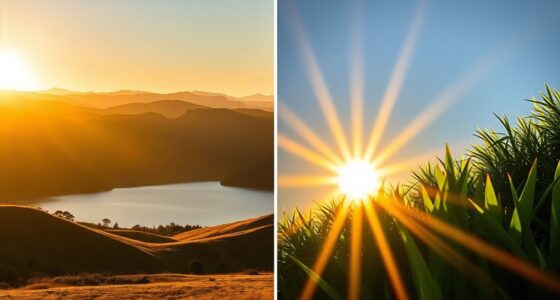
Neglecting Proper Lighting Conditions
Neglecting proper lighting conditions can substantially harm the quality of your drone footage, making scenes appear flat, dull, or overly contrasty. Poor lighting can hide details, distort colors, or create harsh shadows that distract viewers. To improve your shots, aim to film during golden hour—shortly after sunrise or before sunset—when natural light is soft and warm. Avoid shooting in harsh midday sunlight, which causes strong shadows and highlights. Check the weather forecast; overcast days provide even, diffused light ideal for capturing detail. Adjust your camera settings accordingly, using manual exposure to prevent blown-out highlights or underexposed shadows. Proper lighting isn’t just about visibility—it sets the mood and enhances the cinematic quality of your footage.
Overusing Auto Settings

Overusing auto settings on your drone’s camera can lead to inconsistent and subpar footage. When you rely on auto modes, the camera constantly adjusts exposure, white balance, and focus, which can cause flickering, loss of detail, and flat images. Instead, take control by manually setting key parameters. Imagine locking in sharp focus on a distant mountain, fine-tuning exposure to avoid blown highlights, and balancing white tones for true colors. Consider these impacts:
- Unpredictable brightness fluctuations during changing light conditions
- Loss of detail in bright skies or shaded areas
- Colors that look unnatural or washed out
- Flickering or shifting exposure during movement
- Lack of consistency across different shots
Mastering manual settings allows you to craft cohesive, professional-looking footage with clear, vibrant visuals.
Not Planning for Battery Life
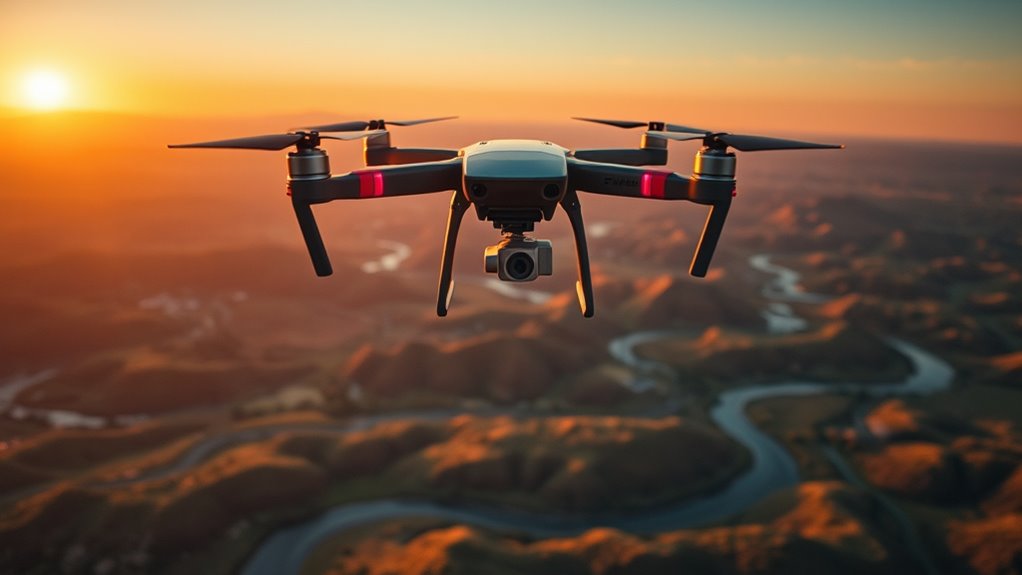
Planning for battery life is essential to guarantee your drone session isn’t cut short unexpectedly. Before flying, check your drone’s battery level and carry extra batteries if possible. Estimate how long your flight will take based on your planned shots and keep track of time during the session. Avoid pushing your battery to the limit; aim to land with at least 20-30% remaining to prevent crashes. Remember that cold weather can reduce battery performance, so plan accordingly. Use intelligent flight modes or set your drone to return home when battery levels drop too low. Proper planning ensures you capture all your desired shots without panic or rushed movements, and it helps protect your investment from unexpected power loss.
Ignoring Legal and Safety Regulations

Ignoring legal and safety regulations can lead to serious consequences, including fines, license suspension, or legal action. You might fly in restricted areas, risk hitting people or property, or disturb wildlife. To avoid these pitfalls, keep in mind:
Ignoring regulations risks fines, license loss, legal action, and endangering people, property, and wildlife. Stay informed and fly responsibly.
- Checking local laws and airspace restrictions before flying
- Respecting privacy by avoiding intrusive shots of private property
- Maintaining visual line of sight to stay in control
- Avoiding flying near airports or crowds
- Following altitude and distance limits set by authorities
Failing to adhere to these rules not only puts others at risk but can also result in hefty penalties. Stay informed, plan your flights carefully, and always prioritize safety to enjoy drone photography responsibly.
Frequently Asked Questions
How Can I Improve My Drone Shot Composition Effectively?
To improve your drone shot composition, plan your shots before flying. Decide your starting and ending points, camera angles, and movements to create structured, cinematic footage. Mix wide, medium, and close-up shots to tell a compelling story. Fly at lower altitudes for more immersive results, and keep your movements smooth and slow. Avoid random flying and jerky motions to guarantee professional-looking, engaging videos that captivate your viewers.
What Are the Best Settings for Smooth, Cinematic Footage?
Think of your drone’s camera settings as the brushstrokes of a master painter. Keep your shutter speed at 1/50 for smooth motion, and use ND filters to balance brightness like adjusting light on a canvas. Switch to manual ISO and white balance to capture true colors, ensuring consistency. These settings act as your palette, helping you craft cinematic footage that flows seamlessly, mesmerizing viewers with every shot.
How Do I Choose the Right Altitude for Different Scenes?
When choosing the right altitude, consider your scene’s story and desired impact. Fly lower to add intimacy and detail, especially for close-ups or action shots, keeping viewers engaged. Use higher altitudes for sweeping landscapes or establishing shots to showcase scale. Vary your altitude to keep shots dynamic and interesting. Always adapt to the environment and subject, ensuring your footage feels natural and immersive without losing connection or detail.
What Techniques Help Prevent Shaky Drone Footage?
To keep your footage smooth as silk, you gotta stay in the slow lane. Use gentle, controlled movements and avoid sudden jerks or quick turns. Practice steady throttle control and plan your shots with deliberate, smooth progressions. Keep the drone at consistent altitude and avoid rapid speed changes. Think of your drone as a ballet dancer—graceful, precise, and in harmony with your filming rhythm.
How Can I Maximize Battery Life During Filming Sessions?
To maximize battery life during filming, plan your shots carefully before flying to avoid unnecessary movements. Use smooth, slow maneuvers instead of rapid or erratic ones, which drain power quickly. Keep your drone at ideal altitude and avoid flying at high speeds. Turn off unnecessary features like live streaming or extra sensors when not needed. Regularly check your battery levels and land promptly when power drops to prevent unexpected shutdowns, ensuring longer filming sessions.
Conclusion
By avoiding these common mistakes, you’ll set yourself up for successful drone photography. Planning ahead, understanding your camera settings, and respecting regulations are key steps to improve your skills. Remember, Rome wasn’t built in a day—learning takes time, so be patient and practice regularly. Keep these tips in mind, and you’ll be flying high in no time. Don’t let small errors hold you back—it’s all about learning the ropes and soaring to new heights.