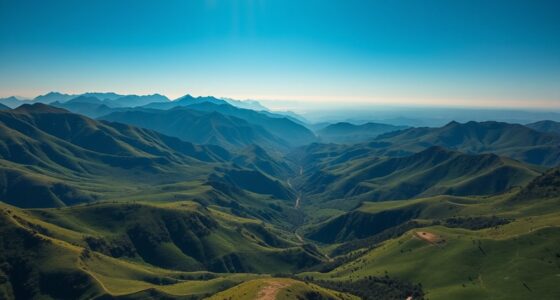
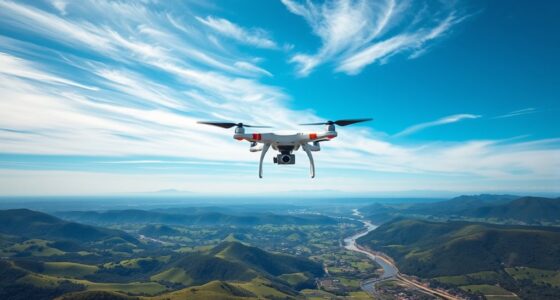
To master drone camera settings, start by adjusting ISO to match lighting conditions—use low ISO in bright light to keep images clear, and higher ISO in low light but watch for noise. Set shutter speed based on motion; faster speeds freeze action, while slower speeds create a cinematic look. Balance aperture with ISO and shutter for best exposure. Keep experimenting with these settings to improve your shots—more tips follow to elevate your drone photography skills.
Key Takeaways
- Adjust ISO based on lighting conditions: keep it low in bright environments and increase only when necessary in low light to minimize noise.
- Set shutter speed according to drone movement: faster speeds for sharp images with moving subjects, slower for cinematic effects and low light.
- Balance aperture with ISO and shutter speed to achieve proper exposure and desired depth of field for the scene.
- Maintain consistent camera calibration and perform regular maintenance to ensure optimal image quality and reliable settings.
- Understand the interplay of ISO, shutter speed, and aperture to customize settings for various shooting scenarios and lighting conditions.
Understanding ISO and Its Impact on Aerial Shots

Have you ever wondered how ISO settings affect your drone’s aerial shots? ISO controls your camera’s sensor sensitivity to light. When you increase ISO, your sensor becomes more sensitive, allowing you to shoot in lower light conditions without extra lighting. However, higher ISO levels can introduce ISO noise, which appears as grainy or speckled images, reducing clarity. Keeping ISO low helps maintain image quality, especially in bright conditions. Conversely, lowering ISO diminishes noise but requires more light, which may not always be available. Understanding this balance is key for sharp, professional-looking shots. Adjusting ISO thoughtfully ensures you get clear, detailed images without unwanted grain, no matter the lighting situation. Proper ISO management is essential for a high-quality aerial image, especially when lighting conditions are less than ideal. Mastering camera sensor sensitivity allows you to optimize your drone photography under various lighting environments. Additionally, understanding how exposure settings interact can further improve your results in challenging lighting, and being aware of camera calibration and maintenance can help keep your equipment performing at its best.
Adjusting Shutter Speed for Motion and Lighting Conditions

Adjusting shutter speed is essential for capturing sharp images and smooth footage with your drone, especially when dealing with motion or varying lighting conditions. A fast shutter speed reduces motion blur, keeping moving subjects crisp. Conversely, a slower shutter speed allows more light exposure, helpful in low-light situations but can introduce unwanted motion blur if not careful. To optimize your shots, consider these tips:
- Use a fast shutter speed (1/1000s or faster) for fast-moving objects.
- Slow down the shutter (1/60s or slower) in dim lighting to increase light exposure.
- Match shutter speed to your drone’s speed to prevent motion blur.
- Adjust based on whether you want sharp stills or smooth, cinematic footage.
Balancing Aperture and Other Settings for Optimal Results

Balancing aperture and other camera settings is essential for capturing high-quality drone footage and images. Your aperture controls depth of field, affecting how much of the scene stays in focus. A wider aperture creates a shallow depth of field, perfect for isolating subjects, while a narrower one ensures more of the landscape remains sharp. Lens selection also impacts this balance; a versatile lens allows you to adjust aperture settings effectively, depending on lighting conditions and desired results. To achieve ideal results, tweak your aperture alongside ISO and shutter speed, ensuring proper exposure and focus. Keep in mind that adjusting aperture influences depth of field, so choose settings that complement your scene’s composition and lighting for crisp, professional footage.
Frequently Asked Questions
How Do Drone Camera Settings Affect Battery Life?
Adjusting drone camera settings impacts battery life by influencing battery drain and power optimization. Using high ISO or slow shutter speeds can cause the sensor to work harder, consuming more power. Additionally, recording at higher resolutions or frame rates increases data processing, further draining the battery. To extend flight time, optimize your settings by balancing image quality with power efficiency, ensuring you’re not overloading the drone’s power system.
What Are the Best Settings for Low-Light Aerial Photography?
For low-light aerial photography, you should set your ISO as low as possible to minimize noise during night photography. Use a slower shutter speed to let in more light, but be careful to keep the drone steady to avoid motion blur. Enable noise reduction features if available, and consider shooting in RAW for better post-processing. These settings help you capture clearer, detailed night shots with less grain.
How Can I Prevent Overexposure in Bright Conditions?
Did you know that overexposure ruins about 40% of drone shots? To prevent this in bright conditions, always use ND filters—they reduce light entering your camera. Polarizing filters are also great for cutting glare and enhancing colors. Adjust your shutter speed and ISO accordingly, and review your histogram to guarantee proper exposure. These tools help you capture stunning, balanced images even in intense sunlight.
Are There Specific Settings for Capturing Fast-Moving Objects?
To capture fast-moving objects, set your drone’s camera to a fast shutter speed, like 1/1000 sec, to freeze motion and reduce motion blur. Keep ISO low to maintain image quality. Using a fast shutter allows you to freeze rapid movement clearly, making your shots sharp. Adjust your settings based on lighting conditions, but always prioritize a quick shutter to capture swift subjects without blurring.
How Do Weather Conditions Influence Camera Adjustments?
Weather conditions greatly influence your camera adjustments; over 70% of drone pilots adjust settings based on atmospheric effects. Rain, fog, and bright sunlight create different challenges, requiring weather adaptation. For instance, in fog, increase ISO for clarity, while in bright sunlight, lower ISO and use faster shutter speeds to prevent overexposure. Understanding these atmospheric effects helps you capture sharp, well-exposed images regardless of the weather.
Conclusion
Now that you understand ISO, shutter speed, and other settings, you hold the key to revealing stunning aerial shots. Think of your drone as a painter’s brush—each setting adds a stroke of brilliance. With practice, you’ll craft images as vivid as a sunrise sky. Keep experimenting, and soon your camera will sing in harmony with every flight, turning your aerial adventures into a masterpiece that captures the world’s beauty from above.