
To make your drone shots feel finished, start with a gradual reveal, like a slow ascent or a smooth side approach, to build anticipation and guide the viewer’s eye. For a seamless end, use downward tilts or pull-backs to create a natural wrapping-up motion. Pay attention to lighting, aiming for golden-hour tones or natural shadows to enhance mood, and choose angles that add depth. Keep experimenting with these techniques to craft polished, professional scenes—there’s always more to discover.
Key Takeaways
- Begin with slow, smooth reveals or creeping shots to build anticipation and establish context.
- Use gradual upward or downward tilts to transition naturally into and out of scenes.
- Optimize lighting conditions, like golden hour, for flattering, organic transitions at start and end.
- Incorporate dynamic angles and framing to add depth and visual interest throughout the shot.
- Ensure seamless flow by planning transitions that connect scenes cohesively and feel intentional.

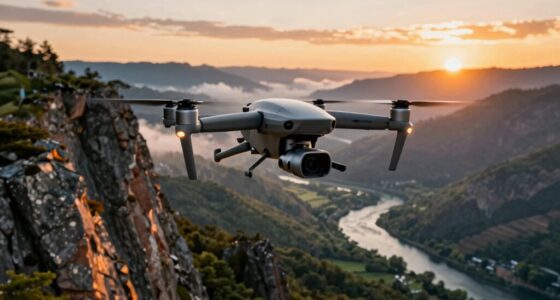
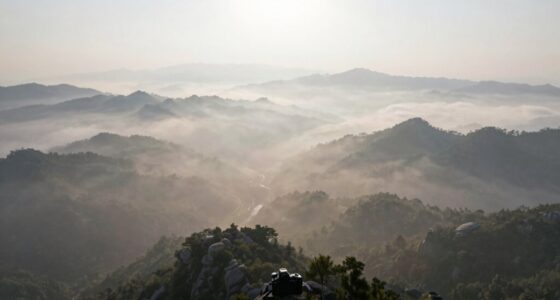
Starting and ending drone shots effectively can make your videos feel polished and professional. The way you initiate and conclude each shot sets the tone and leaves a lasting impression on your viewers. One of the most essential elements is choosing the right camera angles. When starting a shot, consider a gradual reveal rather than a sudden jump into action. For example, slowly ascending from a low angle or creeping in from the side can create anticipation and curiosity. This approach guides the viewer’s eye smoothly into the scene. As the shot progresses, shifting camera angles subtly can add depth and interest, making the footage feel more intentional and engaging. Conversely, when ending a shot, think about how it will seamlessly connect to the next scene. A common technique is to use a downward tilt or a pull-back to give a sense of closure, as if the scene is gently retreating or wrapping up. Using dynamic camera angles at the start and end also helps establish perspective and context, making the footage feel cohesive. Additionally, paying attention to lighting techniques can significantly enhance the beginning and ending of your shots. Proper lighting enhances the overall mood and emphasizes your subject or landscape. When beginning a shot, aim for lighting conditions that complement your scene. Soft, golden-hour light often works best, as it reduces harsh shadows and creates a warm, inviting atmosphere. You can also use natural shadows to add texture and depth when framing your shot. When ending your shot, consider how the lighting will change or fade. If you’re shooting during sunset, allow the light to dip naturally, creating a smooth transition that feels organic. In cases where lighting isn’t ideal, you can use drone movements to adjust the angle slightly, capturing more flattering light or avoiding glare. Additionally, controlling exposure settings on your drone helps prevent overexposed highlights or underexposed shadows, ensuring your shots look consistent and professional from start to finish. Adjusting camera settings based on lighting conditions can also make a noticeable difference in the quality of your footage. Experimenting with different camera angles during both the start and end of your shots can add an extra layer of storytelling and visual interest. Moreover, utilizing shot composition principles can further enhance how your shots feel complete and thoughtfully crafted. Paying attention to movement techniques can also help create smooth transitions that enhance the overall flow of your footage.

DJI RS 3 Mini, 3-Axis Gimbal Stabilizer for Cameras Canon/Sony/Panasonic/Nikon/Fujifilm, 2 kg (4.4 lbs) Tested Payload, Camera Gimbal with Native Vertical Shooting, Black
795g (1.75lbs) Lightweight and Portable – DJI RS 3 Mini is an ultra-compact gimbal stabilizer for camera convenient…
As an affiliate, we earn on qualifying purchases.
As an affiliate, we earn on qualifying purchases.
Frequently Asked Questions
What Camera Settings Are Best for Smooth Drone Shots?
For smooth drone shots, set your camera to a low ISO to reduce noise, and use a shutter speed twice your frame rate for natural motion blur. Choose wide-angle lenses for expansive views, and experiment with camera angles like high or low for dynamic shots. Stabilize your drone and avoid abrupt movements. These settings combined with appropriate lens choices help create fluid, professional-looking footage that feels seamless and polished.
How Do Weather Conditions Affect Drone Shot Quality?
Weather impact greatly influences your drone shot quality. Clear skies and minimal wind help you achieve stable, crisp footage, while overcast conditions can soften images and reduce contrast. Cloud coverage adds drama but might limit visibility or cause inconsistent lighting, affecting exposure and color accuracy. Always check weather forecasts before flying, and avoid windy or stormy conditions to ensure smooth, high-quality shots that look professional and polished.
What Are Common Mistakes to Avoid When Ending Drone Shots?
When ending drone shots, avoid abrupt cuts or stopping too suddenly, which can disrupt the flow. Instead, focus on creative framing and smooth changes that maintain dynamic pacing. Keep your camera movement consistent and plan your ending to naturally follow the scene’s flow. This helps your shot feel finished and professional. Practicing these techniques ensures your drone footage ends on a high note, leaving a lasting impression.
How Can I Improve Drone Shot Stability During Filming?
To improve drone shot stability during filming, focus on maintaining a consistent drone altitude and smooth camera angles. Keep your drone steady by avoiding abrupt movements and using gentle, controlled controls. Adjust your altitude carefully to prevent jerky shifts, and choose camera angles that stay level and fluid. Using a gimbal helps stabilize your footage further, ensuring your shots look professional and smooth, even in challenging conditions.
What Editing Techniques Enhance the Finished Look of Drone Footage?
To enhance your drone footage’s finished look, focus on color grading to create a consistent, cinematic tone that matches your mood. Incorporate sound design, adding subtle ambient sounds or music to elevate the visuals. Use smooth fades and adjust contrast and saturation during editing to make your shots pop. These techniques help your footage feel polished and professional, drawing viewers in and delivering a compelling visual story.

NEEWER ND Filter Set Compatible with DJI Mini 3 / Mini 3 Pro, CPL ND8 ND16 ND32 ND64 ND128 Neutral Density Filter Drone Video Photography Accessories, 6 Pack
【Lightweight Design】 The filter frame is made of aviation aluminum alloy, and the edge of the frame adopts…
As an affiliate, we earn on qualifying purchases.
As an affiliate, we earn on qualifying purchases.
Conclusion
Mastering how to start and end your drone shots guarantees your videos feel polished and professional. By paying attention to smooth handoffs, establishing a clear beginning, and wrapping up with a memorable finale, you’ll keep viewers hooked from start to finish. Remember, it’s all about making your footage flow naturally—don’t just rush through it. With practice, you’ll find your drone shots come together like a well-oiled machine, proving that patience truly pays off.
NEEWER ND Filter Set Compatible with DJI Mini 3 / Mini 3 Pro, CPL ND8 ND16 ND32 ND64 ND128 Neutral Density Filter Drone Video Photography Accessories, 6 Pack
【Lightweight Design】 The filter frame is made of aviation aluminum alloy, and the edge of the frame adopts…
As an affiliate, we earn on qualifying purchases.
As an affiliate, we earn on qualifying purchases.

for DJI Mavic Mini 4K Gimbal Camera Protector Lens Dustproof Replacemen for DJI Mini 2/Mini 4K/Mini 2 SE Gimbal Camera Lens Cover Cap Drone Accessories Parts (Black Transparent)
Compatible with : This protective gimbal cover is designed for DJI Mini 2/Mini 4K/Mini 2 SE gimbal camera…
As an affiliate, we earn on qualifying purchases.
As an affiliate, we earn on qualifying purchases.