To create a drone hyperlapse, start by planning your shot to determine the best scene, flight path, and camera angles. Make certain your drone is well-prepared with calibrated equipment and set to the right settings. During the flight, maintain smooth, controlled movements and capture images at consistent intervals. Afterward, transfer, organize, and stitch the footage to produce a stunning hyperlapse. Continue exploring this guide to learn detailed techniques for professional results.
Key Takeaways
- Plan your shot carefully, considering angles, lighting, and flight path to ensure smooth, visually appealing hyperlapse footage.
- Select a drone with stable gimbal and high-resolution settings, and perform safety checks before flight.
- Execute controlled, gradual drone movements, maintaining consistent speed, altitude, and camera angle for seamless shots.
- Transfer and organize footage promptly, backing up data and using clear naming conventions for efficient editing.
- Use specialized software to stitch images, enhance visuals, and add creative effects for a polished hyperlapse video.
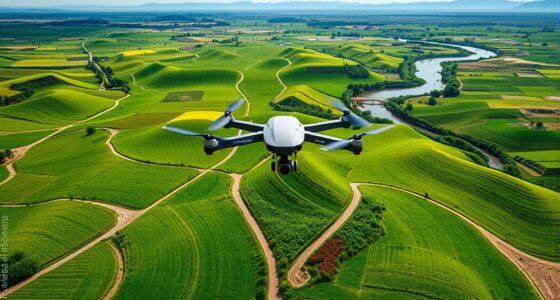
Understanding What a Drone Hyperlapse Is

Have you ever wondered how filmmakers create stunning, fast-moving footage that captures a landscape or city from multiple angles? A drone hyperlapse combines advanced drone technology with the art of hyperlapse photography, resulting in dynamic, time-lapse videos from aerial views. Understanding what a drone hyperlapse is means recognizing its roots in hyperlapse history, which dates back to traditional camera techniques before drones made it more accessible. Today, drone regulations shape how you can shoot these videos, ensuring safety and legality. A drone hyperlapse allows you to smoothly move through scenes, creating a sense of motion that’s impossible with static shots. It’s a powerful tool for capturing expansive landscapes or bustling urban environments with incredible perspective and clarity. Additionally, mastering European cloud innovation can enhance your workflow by providing reliable, scalable, and secure data storage options that support high-quality hyperlapse production.
Planning Your Hyperlapse Shot

Planning your hyperlapse shot is crucial to achieving smooth, visually compelling results. Start by considering the camera angles that best showcase your subject or scene. Think about how changing angles can add depth and interest to your footage. Next, evaluate the lighting conditions; aim for consistent lighting to prevent jarring exposure shifts during the shot. Early planning helps you identify the ideal time of day and weather to capture the scene at its best. Visualize your flight path and camera movements, ensuring they align with your creative vision. By carefully planning your camera angles and lighting, you set a strong foundation for a successful hyperlapse that looks professional and engaging.
Choosing the Right Equipment and Settings

Selecting the right equipment and settings is essential for capturing smooth, high-quality drone hyperlapse footage. Start with a drone model that offers reliable camera stabilization, which minimizes shakiness during flight. Look for drones with gimbal systems that keep the camera steady, ensuring sharp, professional results. When choosing settings, prioritize a high frame rate and appropriate resolution to create fluid motion. Use manual controls to lock exposure and focus, preventing unwanted shifts during the sequence. Opt for a drone with good battery life and stable flight capabilities, especially for longer shots. Your goal is to minimize vibrations and vibrations-induced motion, so selecting equipment with strong camera stabilization features and fine-tuning your settings will set a solid foundation for your hyperlapse. Additionally, consider the drone’s ability to perform Free Floating movements smoothly, which can greatly enhance the overall quality of your hyperlapse footage. Being aware of stabilization technology features can make a significant difference in achieving professional-looking results. To further improve footage quality, choosing a drone with advanced motion control capabilities can help execute complex hyperlapse sequences more precisely. Moreover, selecting equipment that incorporates eco-friendly materials and energy-efficient components aligns with current sustainability trends.
Preparing Your Drone for the Flight

Before your flight, make sure your drone’s batteries are fully charged to avoid interruptions. Next, calibrate the flight compass to guarantee accurate navigation, and then inspect the propellers and frame for any damage or loose parts. Taking these steps helps you fly safely and smoothly for your hyperlapse. Additionally, understanding drone safety protocols can prevent accidents and ensure a successful shoot.
Check Battery Levels
Have you checked your drone’s battery levels recently? Ensuring good battery health is vital for a successful flight. Before heading out, verify that your battery is fully charged and in prime condition. Avoid using old or damaged batteries, as they can impact performance or safety. Follow proper charging tips, such as charging in a cool, dry place and not overcharging. Keep an eye on the battery indicator to confirm it’s holding a sufficient charge for the entire hyperlapse. Remember, a well-maintained battery not only extends flight time but also reduces the risk of sudden power loss mid-air. Taking a few moments to check and care for your drone’s battery now can save you time and frustration during your shoot. Battery maintenance is essential to prolong your drone’s lifespan and ensure safety. Additionally, consider battery storage practices when your drone is not in use to preserve battery health over time. Proper battery management can also help maintain optimal performance over multiple flights. Moreover, regularly monitoring battery capacity can help prevent unexpected shutdowns during critical moments of your hyperlapse.
Calibrate Flight Compass
Did you remember to calibrate your drone’s flight compass before takeoff? Proper gyro calibration and compass alignment are essential for a safe flight. Start by placing your drone on a flat, level surface. Follow your drone’s instructions to initiate compass calibration, usually involving a series of rotations or specific gestures. This process ensures the compass data aligns correctly with the drone’s gyro system. Accurate gyro calibration helps your drone maintain stability, while proper compass alignment prevents navigation errors. Don’t skip this step, as an uncalibrated compass can cause erratic flight or difficulty in waypoint navigation. Once calibration is complete, verify the compass status in your drone’s app or controller. This setup step is critical for a smooth, controlled hyperlapse flight.
Inspect Propellers and Frame
Inspecting your drone’s propellers and frame is a crucial step to guarantee safe and reliable flight. Begin with a thorough propeller inspection, checking for cracks, chips, or warping that could compromise flight stability. Make sure all propellers are securely attached and balanced. Next, examine the frame for any signs of damage, such as dents, loose screws, or corrosion. Frame maintenance is essential to prevent in-flight failures. Ensure that all components are tightened and clean, removing any debris or dirt that could interfere with sensors or motors. This proactive check helps identify potential issues before takeoff, reducing the risk of crashes or malfunctions. Proper propeller inspection and frame maintenance are key to achieving a smooth, safe drone hyperlapse experience. Additionally, understanding drone safety protocols can further help prevent accidents during flight. Regularly performing pre-flight checks and scheduled maintenance can also extend your drone’s lifespan and improve overall performance, especially when applying quality assurance principles to your maintenance routines.
Executing Smooth Flight Movements

To achieve smooth flight movements, you need to focus on precise control and gradual adjustments. Keep your drone’s camera angles steady and consistent to avoid jarring progressions. Use gentle, smooth inputs on the control sticks rather than quick jerks. Adjust your drone speed carefully; maintaining a steady pace helps create fluid motion. Practice small, controlled movements to prevent sudden shifts that can disrupt the hyperlapse’s flow. Constantly monitor your drone’s altitude and orientation, making subtle corrections as needed. Smooth flight is all about deliberate, even motions, so stay relaxed and avoid overcorrecting. Incorporating stabilization techniques into your flying routine can help maintain consistent movements and reduce unnecessary adjustments. Additionally, utilizing flight planning tools can assist in mapping out smoother paths and transitions. Being aware of drone handling fundamentals can significantly improve your control and the quality of your hyperlapse footage. Developing a flight rhythm that emphasizes steady, predictable movements can further enhance the fluidity of your shots. This approach guarantees your footage remains stable and visually appealing, setting a solid foundation for capturing seamless, professional-looking hyperlapse videos.
Capturing Consistent Images During the Flight

Maintaining consistent images during a drone hyperlapse requires careful planning and attention to detail throughout the flight. To achieve this, focus on camera stabilization to keep footage steady, preventing jitter or unwanted movement. Guarantee you maintain sufficient image overlap—typically 70-80%—so you can smoothly stitch frames during editing. Consistent altitude and speed help keep perspective uniform, reducing gaps or misalignments. Additionally, understanding ventilation considerations can be crucial for managing the drone’s operating environment, especially during prolonged flights. Proper airflow management can also prevent overheating of the drone’s components and ensure optimal performance. Remember these key points: – Use camera stabilization features or gimbals for steady shots – Maintain consistent speed and altitude throughout the flight – Keep image overlap high enough for seamless stitching – Monitoring airflow can help prevent overheating and ensure optimal drone performance
Transferring and Organizing Footage for Editing

When transferring your footage, use clear file naming strategies to keep everything organized and easy to find later. Store your files on dedicated devices and back them up to prevent data loss. Taking these safety measures guarantees your footage stays secure and ready for seamless editing.
File Naming Strategies
Organizing your footage with a clear file naming strategy guarantees a smooth editing process and prevents confusion later on. Using consistent file naming conventions helps you quickly identify shots, dates, and camera angles. It also streamlines your digital organization, making it easier to locate files when needed. To maximize efficiency, develop a naming system that includes key details like shoot date, location, and sequence number. Keep names simple and uniform to avoid errors.
- Use descriptive, concise labels for easy identification
- Incorporate dates in a standard format (e.g., YYYYMMDD)
- Avoid special characters that can cause issues across devices
Adopting effective file naming conventions simplifies your workflow and saves time during editing, ensuring your drone hyperlapse project stays organized from start to finish.
Organizing Storage Devices
Transferring your footage from your drone and storage devices to your editing workspace is a crucial step that sets the foundation for a smooth editing process. To keep things efficient, focus on digital organization from the start. Use clear, consistent naming conventions for your files and create dedicated folders for different shoots or locations. Implement reliable storage solutions, such as external drives or SSDs, to securely hold your footage. Regularly transfer files from your SD cards and drones, avoiding clutter on your primary editing system. This organized approach minimizes confusion and speeds up the editing workflow. By maintaining a structured system, you’ll easily find your clips later and ensure your footage remains safe and accessible throughout your hyperlapse project.
Backup and Safety Measures
To guarantee your footage remains safe and accessible, implementing robust backup and safety measures is essential as you organize your files for editing. Start by transferring your footage promptly to a secure storage device to prevent data loss. Always prioritize battery safety by removing batteries from your drone and controller when not in use, and avoid exposing them to extreme temperatures. Regularly create data backups on multiple drives or cloud services to protect against hardware failure. This ensures your footage stays safe even if one device malfunctions.
- Use reliable external drives for immediate backups
- Label folders clearly for easy access during editing
- Keep batteries charged and stored safely to prevent accidents
Stitching Images and Creating the Hyperlapse

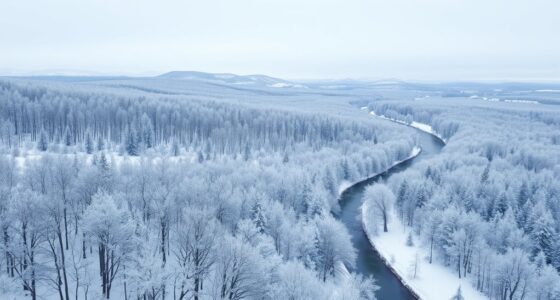
Once you’ve captured a series of overlapping images with your drone, the next step is to stitch them together seamlessly to create a smooth hyperlapse. Focus on image blending to guarantee each frame flows naturally into the next. Use editing software that supports alignment and blending features for seamless transitions. Imagine the following scenes:
| Mountain Range | City Skyline | Forest Path | Coastal View | Desert Dunes |
|---|---|---|---|---|
| Towering peaks | Bright lights | Leafy trail | Sunset coast | Rolling dunes |
Tips for Enhancing and Sharing Your Final Video

Have you considered ways to make your drone hyperlapse stand out? Enhancing your final video with creative effects can captivate viewers and boost engagement on social media. To do this, experiment with color grading, speed ramps, and sequences that add a dynamic feel. When sharing your video, choose platforms that support high-quality footage to showcase your work effectively. Engaging captions and hashtags can also increase visibility. Remember, the key is to highlight your unique perspective while maintaining a polished look. Incorporating creative effects makes your hyperlapse more memorable and shareable. Keep your edits clean and intentional, ensuring your final product resonates with your audience. With these tips, your drone hyperlapse will not only impress but also inspire others.
Frequently Asked Questions
How Do Weather Conditions Affect Drone Hyperlapse Quality?
Weather impact profoundly affects your drone hyperlapse quality. Wind can cause instability, making your footage shaky and uneven, while rain or fog reduces visibility and risks drone damage. Sunny, calm days provide the best drone stability, ensuring smooth shots and clear images. Always check weather conditions before flying, as adverse weather can compromise your hyperlapse’s clarity and safety, ultimately affecting your final results.
Can I Create Hyperlapses With Beginner-Level Drone Models?
Yes, you can create stunning hyperlapses with beginner drones, but don’t expect perfection right away. These models often have limited camera controls, making advanced hyperlapse techniques trickier. Still, with patience and practice, you’ll master smooth, mesmerizing shots. Start simple, experiment with basic movements, and gradually push your skills. The key is to keep your drone steady and plan your route carefully—soon, your hyperlapses will impress even seasoned drone pilots.
What Are Common Mistakes to Avoid During Hyperlapse Filming?
You should avoid shaky footage by ensuring your drone’s camera stabilization is steady throughout the shot. Keep an eye on your battery levels to prevent sudden power loss during filming. Also, don’t rush your movements or change angles abruptly, as this can cause jitter. Planning your route and maintaining smooth, consistent motion helps create a professional-looking hyperlapse, while managing stability and power keeps your footage clean and your drone safe.
How Long Does the Editing Process Typically Take?
Think of the editing process as shaping a sculpture; it can take anywhere from a few hours to several days, depending on your project’s complexity. Your post-production workflow involves organizing footage, selecting the best shots, and refining passages. Use editing software tips like adjusting speed, adding stabilization, and color correction to speed things up. Be patient and meticulous—your hyperlapse will shine once polished!
Are There Legal Restrictions for Drone Hyperlapse Filming in Urban Areas?
Yes, there are legal restrictions for drone hyperlapse filming in urban areas. You need to follow local drone laws, which often include altitude limits, no-fly zones, and restrictions on flying near people or private property. Privacy concerns are also vital; avoid capturing individuals without permission. Check your local regulations beforehand, and always fly responsibly to prevent legal issues and respect others’ privacy.
Conclusion
Creating a drone hyperlapse is like painting a moving masterpiece—each step building on the last to craft something stunning. With patience, planning, and practice, you’ll transform simple shots into mesmerizing journeys through motion. So, take your time, stay steady, and let your creativity soar. Before you know it, you’ll be capturing breathtaking videos that turn everyday landscapes into cinematic adventures—your own visual symphony in the sky.