TL;DR
Moving your rig into a closet can massively cut noise, but it requires smart placement, proper dampening, and ventilation. This article shows you how to make it work without overheating or losing sound quality.
Imagine your high-power AI workstation humming loudly, disturbing your focus or annoying your neighbors. Now, picture slipping that same machine into a closet — silent as a whisper. The trick isn’t just in stuffing it behind a door, but in smart placement, effective dampening, and proper airflow.
This guide will show you how to turn a small closet into a quiet, functional space for your rig. Whether you’re after better acoustics or simply want your setup out of sight, understanding the balance between sound dampening and heat management is key.
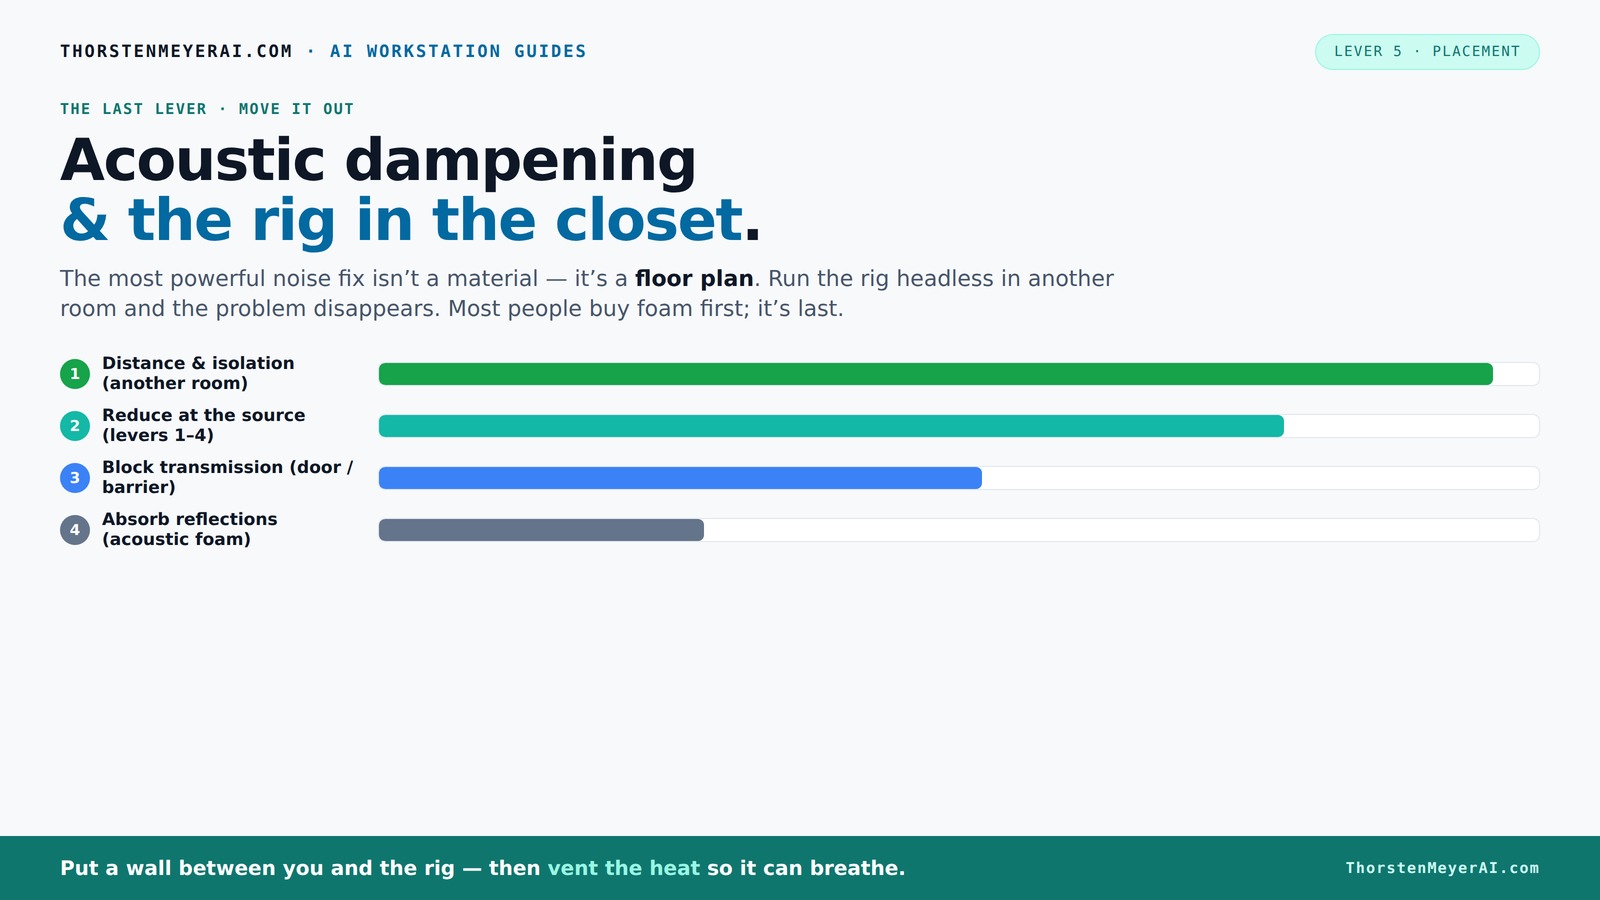
Acoustic dampening
& the rig in the closet.
The most powerful noise fix isn’t a material — it’s a floor plan. A rig you can’t hear because it’s in another room beats any amount of foam. Tap the approaches in Part 1 to see what actually works.
(another room)
(levers 1–4)
(door / barrier)
(acoustic foam)
Contain the noise, not the heat
Key Takeaways
- Moving your rig into a different room or closet drastically reduces noise without heavy treatments.
- Proper ventilation is non-negotiable in enclosed spaces — otherwise, heat kills performance and invites fan noise.
- Use a mix of acoustic dampening (foam, panels) and soundproofing (sealing gaps) for best results.
- Bass traps and low-frequency control are vital in small, enclosed spaces to avoid muddy recordings.
- Decouple equipment from the walls with rubber mounts to eliminate vibration noise.

Focusound 52 Pack Acoustic Foam Panels 1" x 12" x 12" Sound Proof Foam Panles Soundproofing Noise Cancelling Wedge Panels for Home Office Recoding Studio with 300PCS Double-Side Adhesive
Soundproofing - Acoustic foam panels triangular grooves structure for better noise absorption, helps to reduce and absorb unwanted...
As an affiliate, we earn on qualifying purchases.
As an affiliate, we earn on qualifying purchases.
Why Moving Your Rig Can Be the Best Sound Solution
The simplest way to cut noise? Put as much distance between your rig and your ears. A rig in another room or a closet isn’t just quieter — it’s practically silent to your ears. Think about it: a GPU tower roaring in a closet is silent outside that space, especially if you use a wired connection to control it remotely.
Plus, this approach keeps your workspace clean and free of clutter. It’s a clear win for noise reduction and workspace organization. Just remember, the key is good ventilation and reliable remote access.
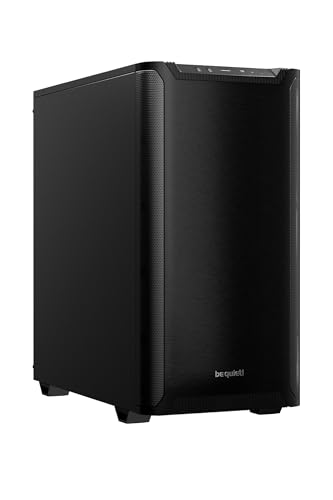
be quiet! Pure Base 501 Black ATX Case | 2 Preinstalled Pure Wings 3 140mm PWM Fans | Optimized Air Pressure | Compact PC Case | Vertical GPU Installation | USB 3.2 Gen. 2 Type C | BG073
Without any distractions, Pure Base 501 is reduced to excel at its core functions and is aimed at...
As an affiliate, we earn on qualifying purchases.
As an affiliate, we earn on qualifying purchases.
The 'Rig in the Closet' Setup: How to Do It Without Cooking Your Hardware
Putting a powerful rig in a closet sounds perfect — until heat builds up. A sealed space traps hot air, causing temperatures to climb. That’s a recipe for throttling performance and loud fans. To keep your machine cool, you need airflow.
Use active ventilation: vents, exhaust fans, or ducted systems. Even a small, quiet fan can move hot air out and bring in cooler air. For truly quiet operation, consider dedicated soundproof cabinets with built-in cooling — they blend acoustic dampening with thermal management here. It’s essential to understand that the tradeoff between soundproofing and heat dissipation is real: over-sealing your space can trap heat, so balancing these elements is key to maintaining both silence and hardware longevity.
ventilated closet soundproof enclosure
As an affiliate, we earn on qualifying purchases.
As an affiliate, we earn on qualifying purchases.
Acoustic Dampening vs. Soundproofing: What's the Difference?
Acoustic dampening and soundproofing often get lumped together, but they serve different purposes. Dampening reduces echoes and internal reflections — making your recordings clearer and your room less echoey. Soundproofing blocks sound from leaking outside or into other rooms.
Understanding this difference is crucial because focusing only on dampening might improve your room’s internal acoustics but won’t prevent noise from escaping. Conversely, only soundproofing might trap heat and reduce airflow, risking overheating. For optimal results, combine both approaches thoughtfully: use foam panels to absorb internal reflections and seal gaps or add mass to contain sound. This layered approach ensures your rig stays quiet both inside and outside the closet, but be aware that increasing soundproofing can make airflow more challenging, so plan ventilation accordingly here.
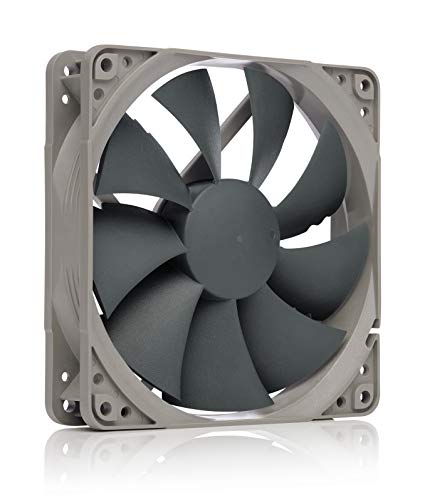
Noctua NF-P12 redux-1700 PWM, High Performance Cooling Fan, 4-Pin, 1700 RPM (120mm, Grey)
High performance cooling fan, 120x120x25 mm, 12V, 4-pin PWM, max. 1700 RPM, max. 25.1 dB(A), >150,000 h MTTF
As an affiliate, we earn on qualifying purchases.
As an affiliate, we earn on qualifying purchases.
How to Properly Place Acoustic Treatment in a Small Closet
Placement is everything. In tight spaces, focus on the reflection points — behind your microphone, side walls, ceiling, and even the floor. A common mistake is just sticking foam panels on the walls, but in a closet, you need coverage on all these surfaces for real results. For more tips, see this guide on acoustic placement.
Use a mirror to find where reflections bounce directly into your mic. Add thick bass traps in corners if you notice muddiness or booming low-end. Proper placement of acoustic treatment reduces harsh echoes and standing waves, which can distort your recordings or cause unwanted noise coloration. For example, placing foam at the side reflection points can cut harsh echoes by 50% in a small booth, but neglecting ceiling or floor reflections can leave residual echoes that compromise sound clarity. The goal is to create a balanced acoustic environment that minimizes internal reflections, which in turn reduces the need for excessive soundproofing and dampening materials.
Sealing Gaps and Doors: The Hidden Leaks That Kill Quiet
Sound leaks through cracks, gaps, and thin doors. Even a tiny opening — like an outlet or vent — can let noise escape. The best fix? Seal everything with weatherstripping, acoustic sealant, or draft stoppers. For more detailed methods, see this article on sealing gaps.
For instance, sealing the door with weatherstripping can reduce sound transmission by up to 20 dB. Add foam or mass-loaded vinyl behind panels for extra density. Remember: a tight seal makes your dampening efforts much more effective. However, sealing too tightly without considering airflow can cause heat buildup, so always balance sealing with adequate ventilation. The tradeoff is that the more you seal, the harder it may be to keep your hardware cool, so incorporate venting solutions that allow air exchange without sacrificing soundproofing.
Bass Traps and Low-Frequency Control in Tiny Spaces
Small closets tend to amplify bass and create standing waves, making your recordings sound boomy or hollow. Bass traps, especially thicker ones (4-inch or more), help tame these low frequencies. In a tiny room, they’re often a game-changer for sound quality.
For example, placing bass traps in corners can cut down on booming by 30-50%, resulting in clearer vocals and better-quality recordings. Without proper low-frequency control, your recordings might sound muddy or bass-heavy, which can be problematic for mixing or streaming. Bass traps absorb the energy of low-end sound waves, preventing them from bouncing around and creating resonances that distort audio clarity. This is especially critical in small, enclosed spaces where standing waves are more pronounced. Investing in quality bass traps and placing them strategically in corners or at reflection points can significantly improve your overall sound quality and make your recordings more accurate and professional.
Vibration and Mechanical Noise: Stop It From Traveling Through Walls
If your closet contains HVAC or mechanical equipment, vibrations can travel through the walls and floors. These noises often aren’t muffled by foam alone. Decouple the machine from the wall with rubber mounts or anti-vibration pads.
For example, placing a GPU on rubber feet can reduce transmitted vibrations by up to 70%. This method is often overlooked but crucial for quiet operation in equipment closets. Without proper decoupling, vibrations can travel through structural elements, creating noise that’s difficult to dampen with acoustic panels alone. Using vibration isolation materials helps contain these sounds locally, preventing them from becoming part of the overall noise footprint. This is especially important if your setup includes cooling fans or mechanical drives that produce constant vibration noise, which can be disruptive or even cause hardware issues over time.
Practical Tips for a Quiet, Cool Closet Setup
- Use a combination of dense materials like drywall, blankets, and foam to improve internal dampening.
- Seal all cracks and gaps around doors, outlets, and vents.
- Ensure proper airflow with quiet exhaust fans or ducting.
- Place bass traps at corners for low-frequency control.
- Decouple equipment with rubber mounts to reduce vibration noise.
When a Closet Setup Is Better Than a Full Room
In most cases, a closet is a smart compromise — especially if you’re remote and your rig doesn’t need direct access. A closet can cut noise by 20-30 dB if you add the right treatment and ventilation. It’s cheaper, faster, and less disruptive than building a dedicated soundproof room.
However, don’t forget: heat buildup is a real risk. The goal is to make it both quiet and cool. If done right, a closet becomes a perfect hybrid: a little bit of acoustic treatment, good airflow, and smart placement.
Frequently Asked Questions
Can a closet really work as a vocal booth?
Yes, but with caveats. Closets can be transformed into effective vocal booths if you add enough acoustic treatment at reflection points and seal gaps. Bass traps and low-frequency control are also key, especially in small spaces.
What is the difference between acoustic treatment and soundproofing?
Acoustic treatment reduces echoes and reflections inside a space, making recordings clearer. Soundproofing blocks sound from escaping or entering, preventing noise leaks. Both are essential but serve different roles.
Where should I place acoustic panels in a closet?
Place panels at reflection points — behind the microphone, on side walls, ceiling, and sometimes the floor. Covering these spots cuts harsh echoes and improves sound quality without cluttering the space.
Do I need bass traps in a small closet?
Yes, especially if you notice boomy low-end or standing waves. Bass traps in corners can tame these frequencies, resulting in cleaner recordings and more accurate sound.
How much treatment is too much in a tiny space?
Over-treating can make the space unusable or too dense, affecting airflow and comfort. Focus on critical reflection points and bass control, adding treatment gradually while monitoring heat and usability.
Conclusion
Transforming a closet into a quiet, functional space for your high-power rig is about balancing sound dampening and airflow. A well-placed, ventilated setup turns a noisy, cramped corner into your personal sound fortress.
Remember, the best noise solutions aren’t just about absorbing sound — they’re about controlling heat, sealing leaks, and smart placement. Your closet can become a surprisingly effective, silent hub of productivity and creativity.