To shoot and edit immersive 360° drone footage, guarantee your drone has advanced stabilization to keep your shots smooth and minimize jitters. Plan your shots carefully with thoughtful composition, using stable movements and foreground elements to guide viewers. After capturing, apply color grading to set the mood and unify the scene. Combining excellent stabilization, strategic framing, and expert editing will help you create breathtaking aerial experiences—keep exploring to learn more about perfecting your 360° footage.
Key Takeaways
- Use a drone with an advanced gimbal for stabilized, smooth 360° footage.
- Plan shot composition carefully, incorporating foreground elements and balanced framing.
- Apply color grading post-capture to set the mood and ensure scene consistency.
- Practice precise drone control with deliberate movements to avoid jitters and jerks.
- Follow a structured editing workflow, combining stabilization, color correction, and device testing.

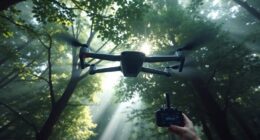
Capturing stunning aerial footage with a drone requires more than just flying and pressing record. To truly create immersive 360° drone videos, you need to focus on the details that elevate your footage from good to exceptional. One of the most critical aspects is camera stabilization. When filming in 360°, even minor shakes or jitters become magnified, disrupting the viewer’s experience. Invest in a drone equipped with advanced gimbal systems that keep the camera steady regardless of turbulence or rapid movements. Smooth, stabilized footage makes your viewer feel as if they’re right there, experiencing the scene firsthand. Practice controlling your drone’s movements to avoid sudden jerks, and plan your shots carefully to ensure fluid motion.
Invest in a drone with advanced gimbals for steady, immersive 360° footage.
Once you’ve captured your footage, the next step is to enhance it through color grading. Color grading allows you to set the mood and tone of your video, making the colors pop or creating a specific atmosphere. With 360° content, this step is even more crucial because it helps unify the entire immersive scene, preventing distracting color inconsistencies that can pull viewers out of the experience. When color grading, consider the natural lighting conditions during your shoot; for outdoor scenes, boost vibrancy and contrast without overdoing it, so your footage remains realistic. Use software that supports 360° video editing to ensure you’re adjusting the entire sphere uniformly, preserving the immersive effect. Additionally, understanding how contrast ratio affects image quality can help you make better editing decisions to achieve deeper blacks and brighter whites, enhancing overall visual impact.
In addition to stabilization and color grading, pay attention to your shot composition. Even in 360°, framing your scene thoughtfully ensures your audience’s attention is directed where you want it. Use smooth, deliberate movements when panning or tilting, and keep in mind that viewers will explore every direction, so you want to guide their gaze subtly. Incorporate foreground elements to create depth and perspective, making the scene feel more lifelike.
Lastly, consider the overall editing workflow. Start with high-quality, stabilized footage, then apply color grading to enhance the visual appeal. Test your edits on different devices to ensure consistency and immersion. When you combine meticulous stabilization, thoughtful color grading, and careful editing, your 360° drone videos will captivate your audience, immersing them in breathtaking aerial worlds that feel as real as stepping into the scene yourself.
Frequently Asked Questions
What Are the Best Weather Conditions for 360° Drone Filming?
You should film in sunny days or overcast conditions for the best 360° drone footage. Sunny days provide bright, clear visuals and vibrant colors, making your shots pop. Overcast weather reduces harsh shadows and glare, offering softer lighting that enhances detail and minimizes glare issues. Avoid windy days, rain, or fog, as these conditions can make flying difficult and compromise video quality, resulting in shaky or blurry footage.
How Do I Ensure Safety When Flying a 360° Drone?
Prioritize safety by practicing proper hazard identification, staying alert to potential obstacles, and respecting no-fly zones. Follow clear emergency procedures, such as quickly landing and shutting down your drone if something goes awry. Keep a safe distance from people and sensitive areas, check weather conditions, and always maintain visual line of sight. This proactive approach helps prevent accidents and guarantees safe, secure flights every time.
What Accessories Improve 360° Drone Video Quality?
You can improve your 360° drone video quality by adding camera filters, which reduce glare and enhance clarity, and gimbal stabilizers, ensuring smooth, steady footage. Using polarizing filters helps manage reflections and color accuracy, while gimbal stabilizers minimize shakes during flight. These accessories work together to deliver crisp, immersive footage, making your aerial videos look professional and engaging for viewers.
How Do I Stabilize Footage During Editing?
Imagine your footage as a delicate sculpture needing careful refinement. To stabilize during editing, use gimbal stabilization settings if available, then apply post production smoothing in your editing software. This combination reduces jitters and creates a seamless, immersive experience. Adjust the stabilization parameters gradually, and preview often, ensuring your aerial shots stay smooth and professional, capturing the full immersive potential of your 360° drone footage.
Can I Edit 360° Drone Videos on Mobile Devices?
Yes, you can edit 360° drone videos on mobile devices, but you need to verify app compatibility first. Many mobile editing apps like Adobe Premiere Rush, LumaFusion, or Insta360 offer mobile editing features suitable for 360° footage. Make certain your device has enough storage and processing power. Mobile editing is convenient for quick adjustments, but for more advanced edits, consider transferring files to a desktop for better control.
Conclusion
Now that you know how to capture stunning 360° drone footage, remember that the real magic lies in the editing. While the drone provides a breathtaking view, your edits can evoke emotion and tell a story. Think of the camera as your brush and editing as your canvas—together, they create an immersive experience. So, embrace both technical skill and artistic vision to transform raw footage into a mesmerizing journey that viewers will never forget.