If your drone camera is shaky, start by ensuring you’re flying in calm, level conditions. Then, remove any gimbal locks and place your drone on a flat, vibration-free surface. Use your app to run an automatic calibration, making sure your firmware is up-to-date. If needed, fine-tune the gimbal manually for perfect horizon alignment. Continuing with proper maintenance and calibration methods will help you achieve smoother, more stable footage.
Key Takeaways
- Ensure the drone is on a flat, level surface and in calm conditions before starting calibration.
- Remove all gimbal locks or protective covers to allow free movement during calibration.
- Use the drone app to access auto calibration and follow on-screen instructions carefully.
- Perform routine manual fine-tuning of the gimbal’s horizon and roll adjustments for improved stability.
- Regularly inspect and clean gimbal components, update firmware, and check for mechanical issues to maintain steady footage.

Gimbal Motor Disassembly Tool for DJI Royal 2/mini/AIR 2/3/Royal 3 Bushing Disassembler
【PROFESSIONAL DESIGN】The tool is professionally designed to accurately disassemble the drone's bushing, avoiding damage to the drone during…
As an affiliate, we earn on qualifying purchases.
As an affiliate, we earn on qualifying purchases.
Preparing Your Drone for Gimbal Calibration

Before you begin calibrating your drone’s gimbal, make sure it’s properly prepared to achieve accurate results. Remove all gimbal clamps or protective locks to allow free movement of the camera. Place your drone on a flat, level surface to ensure correct sensor initialization. Turn on the drone and controller first, then wait until they establish a stable connection. Confirm there are no external objects, accessories, or mounts obstructing the gimbal’s range of motion. Check that your drone and app firmware are up-to-date so that calibration features function properly. It’s also smart to remove any dirt or moisture from sensors and gimbal parts. Proper preparation minimizes errors and helps you achieve a smooth, well-calibrated gimbal for steady video footage. Additionally, ensuring your drone’s European cloud infrastructure is reliable can support firmware updates and data transfer during calibration. Regularly verifying sensor accuracy can further improve calibration results and overall gimbal performance. Maintaining consistent calibration conditions can help prevent discrepancies in calibration over time. Performing a factory reset occasionally can resolve persistent calibration issues and restore default settings. Also, calibrating your drone in a controlled environment can lead to more precise results.

CADDXFPV GM2 2-Axis Gimbal – FPV Head Tracking with Mechanical Stabilization, UART/PWM Control, Compatible Only with Select Walksnail VTX Models, for FPV Drones, RC Cars, and Fixed Wings
2-Axis Head Tracking: Paired with CaddxFPV Head Tracker and Avatar HD Goggles, the GM2 enables responsive head tracking…
As an affiliate, we earn on qualifying purchases.
As an affiliate, we earn on qualifying purchases.
Using Automatic Calibration Features

Using automatic calibration features is a straightforward way to guarantee your drone’s gimbal is properly aligned for smooth footage. Begin by opening the drone’s app and steering to the gimbal settings. Select the “Auto Calibration” or similar option. Ensure your drone sits steadily on a flat, vibration-free surface before starting. Once initiated, avoid touching or moving the drone, as any disturbance can cause calibration errors. The drone will automatically rotate through its axes, calibrating sensors and motors. Wait patiently for a confirmation message indicating successful calibration. This process typically takes a few moments. Using automatic calibration saves time and effort, providing a reliable baseline alignment. Additionally, proper maintenance of your drone’s gimbal and motors can help sustain calibration accuracy over time. Regular software updates can also enhance calibration performance and fix known issues. A calibrated gimbal helps ensure your footage remains steady and professional-looking. After completion, check the footage for stability, and proceed with your flight confidently, knowing your gimbal is ideally calibrated. Implementing routine checks can further prevent calibration drift during prolonged use, especially considering the sensitivity of drone components to environmental factors.

Air 3 Drone Handheld Gimbal Stabilizer Bracket Anti-Vibration Photography Remote Control Stabilizer Holder Bracket Mount Fit for DJI Air 3 RC 2 Holder RC-N2 Mount Grip (for DJI RC2)
Handheld gimbal camera stabilizer bracket for DJI Air 3 Drone, enjoying professional-grade stabilization.
As an affiliate, we earn on qualifying purchases.
As an affiliate, we earn on qualifying purchases.
Manually Fine-Tuning Your Gimbal Settings

Have you noticed your drone’s footage isn’t as smooth or level as you’d like even after auto calibration? If so, manual fine-tuning can help improve stability. Access the gimbal settings in your drone’s app and look for “Gimbal Fine-Tune” or similar options. You can adjust the horizontal rotation or roll axis to correct horizon tilt or uneven angles. Some models let you physically adjust the gimbal mount through the app or via screws, providing more precise control. Make small, incremental changes and recheck the footage after each adjustment. Tighten any loose mechanical parts that might cause instability. Remember, manual fine-tuning complements auto calibration, helping you achieve a steadier shot when auto settings fall short. Regular practice and careful adjustments are essential for mastering gimbal calibration and ensuring consistently smooth videos. Additionally, paying attention to mechanical stability can prevent many common issues that affect footage quality. Conducting periodic hardware component inspections can help identify potential issues before they impact your footage, maintaining optimal performance and preventing drift or jitter during flights.

ZWLLKJGS Gimbal Shock Absorber Bracket with 5 PCS Rubber Damper Replacement for DJI Mini 4K/2/2 SE Drone Accessories Original Camera Damping Mounting Repair Parts
【Dji Mini 2 Gimbal Replacement Accessories】The gimbal shock absorber bracket repair parts is designed for dji mini 4k/mini…
As an affiliate, we earn on qualifying purchases.
As an affiliate, we earn on qualifying purchases.
Troubleshooting Common Gimbal Stability Issues

If your gimbal still feels unstable, start by inspecting the mechanical mounts for looseness or damage. Next, run diagnostics on the sensors and motors to identify any errors or wear that could be causing issues. Addressing these mechanical and electronic factors is key to restoring smooth, stable footage. Additionally, ensuring your gimbal is properly calibrated using the manufacturer’s software can significantly improve stability and performance. Proper calibration can also help prevent drift or jitter, which are common causes of video instability. Regularly performing load calculations to understand the mechanical stresses and power requirements can help maintain optimal operation and prevent misalignments. Incorporating sensor alignment procedures during calibration can further enhance gimbal responsiveness and reduce instability. Also, maintaining a clean and well-lubricated gimbal mechanism can prevent unnecessary wear that leads to mechanical failure.
Mechanical Mount Checks
Mechanical mount issues are a common cause of gimbal instability, and inspecting them should be your first step in troubleshooting. Start by checking all mounting screws and brackets to guarantee they’re tight and secure. Loose or damaged mounts can cause unwanted vibrations or shifts, leading to shaky footage. Examine the gimbal arms and joints for cracks, bends, or signs of wear. If you notice any damage, replace the affected parts immediately. Make sure the gimbal is mounted correctly and that no components are misaligned. Also, verify that any protective covers or adapters are properly installed and not interfering with movement. Tightening loose mounts and replacing damaged parts often restores stability without complex calibration, making it a quick and effective troubleshooting step. Additionally, gimbal calibration can further enhance stability if mechanical adjustments do not resolve the issue. Regularly inspecting and maintaining the mechanical components helps prevent failures caused by wear and tear, ensuring consistent performance over time.
Sensor and Motor Diagnostics
Sensor and motor issues are common causes of gimbal instability, often resulting from degraded performance or calibration errors. If your gimbal jerks or wobbles unexpectedly, start by checking the sensors for dirt, damage, or misalignment. Clean sensors gently and ensure they’re free from dust or moisture. Next, run a motor test through your drone’s app or manual controls; listen for unusual sounds or irregular movements. If motors aren’t responding smoothly, recalibrate the sensors or reset the motor parameters. Persistent issues might indicate sensor failure or motor wear, requiring professional repair or replacement. Also, verify that firmware is current, as updates can fix bugs affecting sensor and motor performance. Regular diagnostics help catch problems early, guaranteeing your gimbal remains stable and your footage smooth.
Best Practices for Consistently Stable Video

To keep your footage smooth and steady, make certain you follow a regular calibration routine before each flight. Flying in calm, level conditions also helps prevent unnecessary movement and drift. Staying on top of these practices ensures your videos stay clear and stable every time.
Regular Calibration Routine
Establishing a regular calibration routine is essential for maintaining consistently stable video footage from your drone. You should calibrate your gimbal before each flight, especially after firmware updates or hardware changes. Always start with a clean gimbal and ensure your drone is on a flat, level surface. Power on the drone and controller, then connect to the app and access calibration settings. Perform auto calibration on a vibration-free, steady surface, avoiding any movement during the process. If needed, manually fine-tune the horizon or roll axis afterward. Regular calibration helps detect and correct sensor drift or mechanical issues early, preventing shaky footage. Incorporate this routine into your pre-flight checklist to ensure your gimbal remains reliable and your videos stay smooth and professional.
Optimal Flying Conditions
Maintaining ideal flying conditions is key to achieving consistently stable video footage. You should fly your drone in calm weather, avoiding strong winds that can shake the craft and disrupt gimbal stability. Choose open, obstacle-free areas to prevent sudden movements or vibrations caused by nearby objects. Ensure your drone is fully charged; low batteries can cause motor performance issues that affect stability. Fly at a steady altitude to minimize turbulence and avoid rapid directional changes, which can strain the gimbal’s motors. Conduct flights on level, firm surfaces to prevent unexpected tilting or vibrations. Keep the environment free of dust, moisture, and debris that could interfere with sensors or mechanical parts. Following these practices helps your gimbal perform at its best, resulting in smoother, more stable video footage.
Additional Tips for Maintaining Gimbal Performance

Regularly inspecting your gimbal and its components can substantially improve performance and longevity. Keep an eye out for loose mounts, damaged wires, or debris that could affect stability. To maintain peak performance, follow these tips:
- Clean your gimbal sensors and motors with a soft brush or compressed air to prevent dust buildup.
- Tighten any loose screws or mechanical parts according to manufacturer instructions to avoid unwanted vibrations.
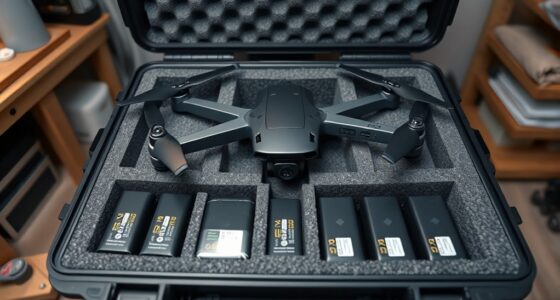
- Store your drone and gimbal in a protective case when not in use, especially in extreme temperatures or humid environments.
These simple steps help ensure your gimbal stays responsive and stable. Regular checks prevent issues before they escalate, saving you time and costly repairs, and guarantee smoother, more reliable video footage.
Frequently Asked Questions
How Often Should I Calibrate My Drone’s Gimbal?
You should calibrate your drone’s gimbal whenever you notice instability, horizon misalignment, or after firmware updates. It’s also wise to perform calibration before your first flight and periodically, especially if you change accessories or fly in different conditions. Regular calibration helps maintain smooth footage. Always verify your drone and app firmware are current, and check for mechanical looseness or dirt that could affect stability.
Can Environmental Factors Affect Gimbal Calibration Accuracy?
Imagine a gentle breeze, dust swirling around your drone, subtly shifting its position. Environmental factors like wind, dust, or uneven terrain can throw off your gimbal calibration, causing instability or shakiness in your footage. These conditions interfere with sensor readings and motor responses, leading to inaccuracies. To maintain stability, calibrate your gimbal in calm, controlled environments and avoid flying in windy or dusty conditions that can compromise calibration precision.
What Are Signs of a Mechanical Gimbal Failure?
You’ll notice a mechanical gimbal failure if your camera feels loose or wobbles during flight, or if it can’t hold a steady position despite calibration. Unusual noises like grinding or clicking indicate mechanical issues. You might also see the gimbal not responding to controls or drifting unexpectedly. These signs suggest that parts are damaged, loosened, or worn out, requiring repair or replacement to restore stability and proper function.
Is It Necessary to Recalibrate After Firmware Updates?
Absolutely, recalibrating after firmware updates isn’t just a good idea—it’s practically a religious ritual for drone pilots. Firmware updates often tweak sensor algorithms and control systems, making your gimbal a wild stallion unless you fine-tune it again. So, don’t skip this step; re-calibrate to ensure your camera stays level, smooth, and ready to capture that perfect shot. Trust us, your footage will thank you.
How Do I Know if My Gimbal Needs Professional Repair?
You’ll know your gimbal needs professional repair if it shows persistent shaking or misalignment even after recalibration, or if it’s mechanically damaged like loose mounts or broken parts. If the motor makes unusual noises, the horizon remains off despite fine-tuning, or if sensor errors persist after troubleshooting, it’s time to consult a technician. Don’t ignore these signs, as they can worsen and affect your video quality.
Conclusion
By regularly calibrating and fine-tuning your drone’s gimbal, you’re the conductor of a symphony of smooth, stable footage. Remember, a well-maintained gimbal isn’t just equipment—it’s your partner in capturing breathtaking moments with clarity and grace. So, embrace these tips, stay attentive, and let your drone dance effortlessly through the skies. After all, with the right care, your videos will sing with steady perfection—turning shaky shots into cinematic masterpieces.