To stop shaky drone footage, activate your drone’s stabilization features, like gimbals and smart flight modes. Fly smoothly with gentle controls, avoiding sudden movements and harsh turns. Adjust your camera settings for stability, keeping the horizon level and reducing vibrations. Use stabilizers or gimbals to further smooth footage during flight, and apply post-processing stabilization tools if needed. Keep practicing these techniques, and you’ll discover more ways to achieve professional, steady videos.
Key Takeaways
- Enable and regularly calibrate drone stabilization features like gimbals and sensors.
- Practice smooth, controlled flying techniques to reduce abrupt movements and jitters.
- Adjust camera settings such as horizon level, focal length, ISO, and shutter speed for optimal stability.
- Use gimbals and post-processing stabilization tools to smooth out footage in editing software.
- Fly in calm weather, manage battery life, and plan flight paths to maintain consistent, stable shots.

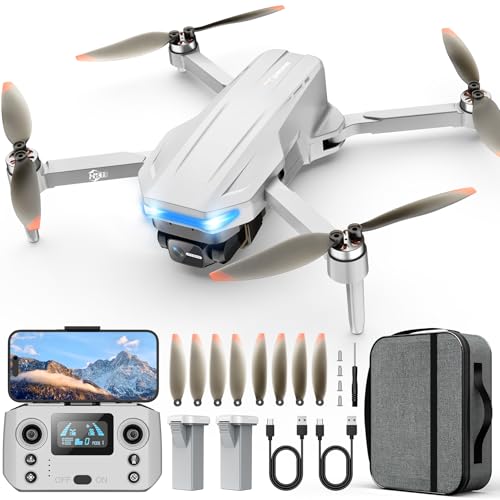
Oddire Drone with Camera - Drones for Adults, with 2 Batteries, Carrying Case, Propellers, 1080P HD Foldable Drone with Stable Hover, Trajectory Flight, Gravity Control, One Key Take Off/Land, 3D Flip
MULTIPLE FUNCTIONS: Based on the newest upgraded chip compared to others, this drone has multiple interesting functions. Such...
As an affiliate, we earn on qualifying purchases.
Use In-Flight Stabilization Features on Your Drone

To achieve steady footage, you should actively enable and utilize your drone’s in-flight stabilization features. Begin by ensuring your drone’s sensors are properly calibrated before each flight; accurate sensor calibration helps the stabilization system respond effectively to movements. Keep an eye on your battery management, as a well-charged battery maintains consistent power, preventing unexpected dips that can cause shaky footage. Many drones automatically stabilize during flight with built-in gimbal systems or flight modes designed for smooth video capture. Using these features reduces vibrations and compensates for minor turbulence. Regularly checking sensor calibration and managing your battery life guarantees your stabilization system performs at its best, giving you clear, steady footage without the need for post-production stabilization. Additionally, understanding navigation and mapping helps you plan stable flight paths that minimize abrupt movements or turbulence. Being aware of sensor accuracy can further enhance your ability to maintain stable footage during complex maneuvers. Properly configuring your drone’s flight settings can also contribute to more consistent and stable video recording. Also, paying attention to environmental conditions, such as wind speed and obstacles, can significantly improve your footage stability. For added reliability, consider consulting backup power options to ensure your drone remains operational during extended flights or unexpected power issues.
Oddire Drones with Camera for Adults 4K, GPS Auto Return, Waypoint Flight, Orbit Fly, GPS Follow, Gesture Control, Foldable Drone with Brushless Motor, 249g Light, 48 Mins Flight Time with 2 Batteries
【Intelligent GPS Technology】With the advanced GPS module, our Oddire drone with camera will automatically return home when battery...
As an affiliate, we earn on qualifying purchases.
Adjust Your Flying Technique for Smoother Footage

Practicing smooth and deliberate control over your drone’s movements can substantially improve the stability of your footage. Manual piloting allows you to make precise adjustments, reducing sudden jerks or quick turns that cause shaky videos. Focus on maintaining steady, slow movements, especially during key shots. Be mindful of weather considerations; wind or gusts can challenge your control, so wait for calmer conditions or adjust your flight path accordingly. Use gentle joystick inputs instead of aggressive maneuvers, and keep your throttle steady to avoid abrupt altitude changes. Planning your flight path ahead of time helps you stay composed and avoid unnecessary corrections. Incorporating adaptive flight techniques such as real-time stabilization features or automatic gimbal controls can further enhance footage quality. Developing a consistent flying rhythm and understanding your drone’s navigation capabilities will also contribute to smoother footage. Additionally, understanding how projector technology impacts image stability can help you better analyze and troubleshoot footage issues. Staying informed about advancements in Suprem fabric can inspire innovative stabilization accessories or techniques. With consistent practice and attention to weather, you’ll develop a more stable flying technique that results in smoother, more professional-looking footage. Moreover, staying updated on the latest drone stabilization technology can give you an edge in capturing flawless footage.

GPS Drone with Camera for Adults, 2K HD GPS Drones with Auto Return, Follow Me, Circle Fly, Waypoint Fly, Optical Flow, Brushless Motor, Foldable 5G Transmission FPV Quadcopter
【2K HD Camera & 5G Real-time Transmission 】The 2K drone is equipped with a 90° electrically adjustable camera,...
As an affiliate, we earn on qualifying purchases.
Choose the Right Settings for Your Camera

Choosing the right camera settings is essential for capturing stable, high-quality footage. Start by adjusting your camera angle to keep the horizon level and avoid tilting, which can cause shaky appearances. Experiment with focal length; a wider lens offers a broader view and reduces the impact of minor movements, while a longer focal length emphasizes detail but can exaggerate shakes. Keep your ISO low to minimize grain, and set a proper shutter speed—ideally double your frame rate—to ensure smooth motion. Use a balanced aperture for consistent exposure. These settings help your footage appear steady and professional, even without additional stabilization tools. Fine-tuning your camera angle and focal length is key to reducing the effects of unintentional movement and achieving clear, smooth drone videos. Proper camera setup can dramatically improve your footage quality and stability, especially when combined with stabilization techniques. Additionally, understanding how to detect passive voice can improve your overall writing clarity and professionalism. To further enhance stability, consider using additional stabilization tools such as gimbals or post-processing software.

G11PRO 6K Drone with Camera for Adults, 4K/30fps Video, 3-Axis Brushless Gimbal, 70mins Flight Time with 2 Batteries, 10000ft Long Range, FAA compliance, Professional Drone with Auto Return
【𝗜𝗡 𝗦𝗘𝗔𝗥𝗖𝗛 𝗢𝗙 𝗧𝗛𝗘 𝗜𝗗𝗘𝗔𝗟 𝗙𝗟𝗜𝗚𝗛𝗧, 𝗖𝗔𝗣𝗧𝗨𝗥𝗘 𝗬𝗢𝗨𝗥 𝗔𝗘𝗥𝗜𝗔𝗟 𝗠𝗢𝗠𝗘𝗡𝗧𝗦】Are you spending more for better aerial footage or...
As an affiliate, we earn on qualifying purchases.
Incorporate Gimbals and Stabilizers for Enhanced Control

Using gimbals and stabilizers can dramatically improve the smoothness of your drone footage, especially when flying in challenging conditions. Proper gimbal calibration is vital to guarantee your stabilizer functions at its best, preventing unwanted movements and jitters. Regularly check and adjust the calibration to match your drone’s specific requirements. The stabilizer weight also plays an important role; choosing a lightweight yet sturdy stabilizer reduces strain on your drone’s motors and enhances maneuverability. A well-balanced stabilizer minimizes vibrations and provides steady footage, giving you greater control over your shots. Ensuring the use of the right oil for airless sprayers can also help maintain your equipment’s performance, preventing mechanical issues that might affect stabilization. Incorporating these tools allows you to capture professional-quality videos with minimal effort, making your drone flying experience more enjoyable and producing consistently smooth results. Additionally, paying attention to equipment maintenance ensures your stabilizer remains in optimal condition for reliable operation. Being aware of vibration dampening techniques can further enhance footage stability, especially in turbulent flying conditions. Properly balancing your drone before each flight can also significantly reduce vibrations, leading to more stable footage.
Apply Post-Processing Stabilization Techniques

When in-flight stabilization isn’t enough, post-processing stabilization techniques can considerably improve your footage. Using dedicated post processing software, you can apply stabilization algorithms to smooth out shaky scenes. Here’s what you should do:
- Import your footage into a stabilization-enabled software like Adobe Premiere Pro or DaVinci Resolve.
- Select the stabilization feature and tweak the settings, such as smoothness level and cropping, to optimize results.
- Review the preview, then export the stabilized video for a professional finish.
- Remember that effective stabilization algorithms can compensate for camera jitters and vibrations that occur during flight, ensuring a more professional look. Additionally, understanding the role of digital processing can help you choose the right tools for optimal results. Exploring the principles of Haute Couture craftsmanship can inspire more meticulous editing techniques, leading to higher-quality outputs. Incorporating these advanced techniques and understanding the underlying technologies behind stabilization can further enhance your footage quality. Utilizing motion tracking features can also help stabilize specific objects within your footage, providing more precise control over the stabilization process.
These steps help correct unwanted jitters and shakes that slipped through during filming. By leveraging effective stabilization algorithms in post processing software, you can transform shaky footage into smooth, watchable videos, saving you time and effort on the field.
Tips for Preventing Shaky Shots During Filming

To keep your footage steady, start by using proper flight techniques and avoid sudden movements. Maintain calm, smooth controls to prevent unnecessary vibrations, and adjust your drone settings for peak stability. These simple tips can make a significant difference in capturing clear, shake-free videos.
Use Proper Flight Techniques
Maintaining steady drone footage starts with mastering proper flight techniques. To minimize shakiness, focus on these key points:
- Monitor wind conditions—avoid flying in strong gusts, which can cause unpredictable movements. Check the weather before takeoff.
- Manage your battery wisely—ensure you have enough power for smooth, controlled flights, and avoid abrupt maneuvers as battery life wanes.
- Use gentle, deliberate movements—shift your drone slowly and smoothly, especially when changing direction or altitude, to prevent sudden jolts.
Maintain Calm Movements
Keeping your drone movements calm and controlled is essential for steady footage. To achieve this, focus on balancing drone weight properly; an uneven load can cause instability and shake. Make sure all components are secure and evenly distributed before flying. Additionally, selecting appropriate flight speeds helps prevent sudden jerks and abrupt movements. Slow, smooth movements minimize vibrations that lead to shaky shots. Practice gentle control inputs, avoiding rapid turns or quick altitude changes. Maintaining a steady hand and deliberate movements reduces the risk of introducing shake into your footage. By balancing your drone weight and choosing steady flight speeds, you create a stable platform for capturing smooth, professional-looking videos. Consistent, calm flying techniques are the foundation for high-quality, shake-free drone footage.
Optimize Drone Settings
Adjusting your drone’s camera and flight settings is essential for capturing stable footage. Start by setting the appropriate camera resolution—higher resolutions look sharp but can strain your battery. Find a balance that suits your needs. Next, optimize your battery life by reducing unnecessary functions like Wi-Fi or excessive gimbal movements, which can cause shaky shots. Finally, consider these tips:
- Lower your camera resolution if you notice instability during high-res recording.
- Use a stable flight mode, such as GPS-assisted hover, to reduce sudden movements.
- Keep your batteries fully charged and carry extras to avoid power dips that might lead to shaky footage.
Implementing these adjustments helps prevent shaky shots and ensures smoother, more professional-looking videos.
Frequently Asked Questions
What Are the Best Drone Models for Ultra-Smooth Footage?
You should consider drones with advanced gimbal technology and high-quality camera sensors for ultra-smooth footage. Models like DJI Inspire 2 and Mavic 3 feature three-axis gimbals that stabilize your camera effectively, reducing shakiness. The larger, more sophisticated camera sensors also capture sharper, clearer images. These drones are perfect for professional-quality videos, ensuring you get seamlessly smooth footage even in challenging conditions.
How Does Weather Impact Drone Stabilization?
Weather can turn your smooth footage into a rollercoaster ride, making stabilization a real challenge. Wind interference is like an unruly beast, pushing your drone off course and causing shaky footage. Temperature effects can impact battery life and sensor performance, leading to inconsistent stabilization. Always check weather conditions before flying, and consider using wind-resistant drones or stabilizers to keep your shots steady, no matter how wild the weather gets.
Can Software Stabilize Footage Captured Without Gimbals?
Yes, software stabilization can fix shaky footage captured without gimbals. In post-production, you can use software stabilization tools to smooth out unwanted movements and jitters. These post-production techniques analyze your footage frame-by-frame, adjusting the video to create a steadier look. While not as perfect as gimbal stabilization, software stabilization helps improve video quality, especially when gimbals aren’t available or practical for your shoot.
What Accessories Improve Drone Flight Stability?
Propeller upgrades and proper weight distribution considerably boost your drone’s stability. Upgrading to high-quality, balanced propellers reduces vibrations, ensuring smoother flights and sharper footage. Additionally, adjusting weight distribution—like adding counterweights or repositioning batteries—helps maintain balance in turbulent air. These accessories work together to enhance flight stability, making your drone more responsive, reliable, and capable of capturing steady, professional-quality videos with less effort and more confidence.
How Do I Troubleshoot Unstable Footage During Editing?
When you encounter unstable footage during editing, start by analyzing camera shake and applying the right editing techniques. Use stabilization tools like Warp Stabilizer or equivalent software features to smooth out jitters. Adjust the settings for smoothness and cropping to maintain quality. If needed, manually keyframe stabilization for specific shaky sections. Always preview your edits to verify your footage looks steady and professional before finalizing.
Conclusion
By using in-flight stabilization, adjusting your flying technique, and choosing the right camera settings, you can considerably reduce shaky footage. Incorporating gimbals and applying post-processing techniques further enhance your results. Remember, the key is to stay mindful of your movements and equipment. So, next time you’re capturing stunning aerial shots, ask yourself: aren’t smooth, professional-looking videos worth the extra effort? With these tips, you’ll be filming steadier footage in no time.