
To elevate your drone footage, explore classic shots like overhead reveals for scene introductions, dynamic flythroughs to guide viewers, and orbit shots to emphasize subjects. Use rising and falling movements for emotional impact, while tracking shots keep your subject front and center. Incorporate sweeping panoramics and creative angles when showcasing landscapes or architecture. If you want to master each technique and know exactly when to use them, keep going — you’ll find plenty of tips ahead.
Key Takeaways
- Overhead and top-down shots are ideal for revealing landscapes, patterns, and scene structure, emphasizing scale and symmetry.
- Dynamic movement techniques like flythroughs and sweeping panoramics create engaging transitions and showcase vast environments.
- Circular and tracking shots focus on subject engagement, emphasizing motion, energy, and detailed storytelling.
- Scene composition benefits from pattern highlighting and aerial stability to capture intricate details and large crowds effectively.
- Vertical movements such as rise and fall add emotional depth, making scenes more dramatic and impactful.
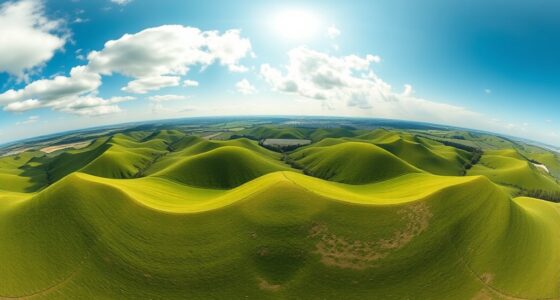
The Classic Overhead Reveal

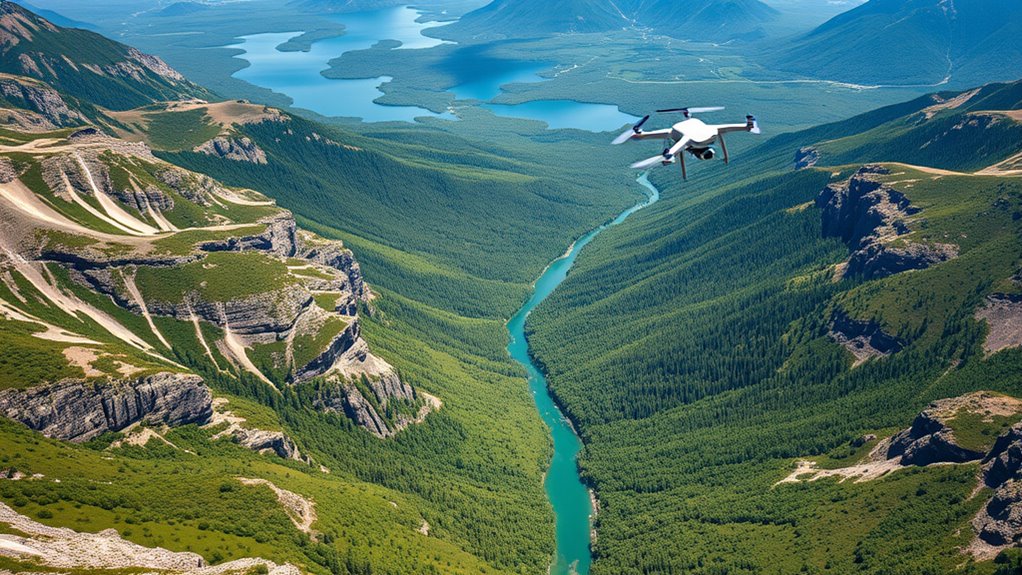
The classic overhead reveal is a tried-and-true drone shot that instantly grabs viewers’ attention. As you lift your drone upward, you reveal a scene’s full scope, highlighting aerial symmetry and landscape framing. This shot works especially well for showcasing expansive environments, where the symmetry of natural or man-made features creates visual harmony. When executed correctly, it offers a sense of scale and grandeur, drawing viewers into the scene. Keep your drone steady as you ascend, ensuring the framing remains balanced. Use this shot to introduce a location or emphasize its beauty from above. Its simplicity and effectiveness make it a staple in many videographers’ arsenals, delivering a clean, impactful reveal that sets the tone for what’s to come. Incorporating local automation can enhance your drone footage by synchronizing camera movements with other smart devices for a seamless viewing experience. Paying attention to contrast ratio during post-production can also help emphasize details in scenes with varying light conditions, making your shots more dynamic. Additionally, understanding Free Floating techniques can help maintain stability and fluidity during the ascent, resulting in smoother footage. Practicing proper drone control can further improve the precision and quality of your overhead shots. Moreover, mastering aerial composition can elevate the visual storytelling of your drone footage, capturing compelling scenes from above.
The Tracking Shot

A tracking shot involves smoothly following a subject or moving through a scene to create a dynamic, immersive experience. To achieve this, you need proper camera stabilization and control over drone altitude. Here are key tips:
A tracking shot smoothly follows subjects for immersive, dynamic scenes with stabilized camera and altitude control.
- Maintain steady camera stabilization to avoid shaky footage.
- Keep a consistent drone altitude for smooth motion.
- Adjust your speed based on the subject’s pace.
- Plan your path to avoid abrupt turns or sudden altitude changes.
- Use power tools and heavy-duty equipment to ensure your drone setup is secure and reliable, especially when operating in challenging environments. Additionally, understanding flight stability principles helps in maintaining smooth footage during complex shots. Applying knowledge of aerodynamics can further enhance your ability to anticipate and counteract environmental factors that affect stability. Regularly practicing flight control techniques enhances your ability to execute complex tracking shots confidently. Incorporating environmental awareness into your planning allows for better adaptation to changing conditions, ensuring consistent shot quality.
The Orbit or Circular Flight

An orbit shot is perfect for capturing dynamic movement around your subject, making it feel alive and engaging. It emphasizes the subject’s importance by circling closer and farther, creating a sense of energy. Use this technique to highlight your main focus while adding visual interest and depth to your footage. To ensure safety during your drone flights, always perform a pre-flight safety check, especially when flying around obstacles or in changing weather conditions. Additionally, understanding flight planning can help you anticipate obstacles and optimize your shot paths for smoother footage. Being familiar with drone safety protocols can further help prevent accidents and ensure a successful shoot. Incorporating tech recommendations can also help you select the best equipment and settings for your orbit shots. For example, mastering auditory processing can aid in better understanding environmental cues that impact drone navigation and safety.
Capturing Dynamic Movement
Capturing dynamic movement with a drone becomes especially engaging when you execute an orbit or circular flight around your subject. This technique keeps your footage lively and immersive, highlighting the subject from multiple camera angles. To guarantee smooth shots, prioritize aerial stability, which prevents jittery footage during the orbit. When planning your shot, consider these tips:
- Maintain a consistent altitude for a balanced view.
- Keep a steady speed to avoid abrupt motions.
- Use smooth yaw rotations to enhance fluidity.
- Adjust camera angles dynamically to add visual interest.
- Incorporate precision and automation to improve shot consistency and reduce operator fatigue. Additionally, ensuring proper drone calibration can significantly enhance stability during complex maneuvers. Regular calibration routines help maintain optimal flight stability and ensure your drone responds accurately during intricate shots.
Highlighting Central Subjects
Highlighting a central subject with a drone involves executing a smooth orbit or circular flight that keeps the subject consistently centered in the frame. This technique emphasizes the scale of your subject relative to its surroundings, creating a dynamic visual impact. As you circle around, pay attention to framing to guarantee the subject remains prominent and well-positioned. Use a steady speed to avoid shaky footage and maintain a clean, professional look. This shot is perfect when you want to showcase the subject’s importance or its relation to the environment. By controlling both scale and framing, you highlight the subject’s significance, drawing viewers’ attention and adding depth to your footage. Incorporating essential oils for visual storytelling can enhance the mood and atmosphere of your drone footage, making it more engaging and expressive. Additionally, adjusting your altitude during the orbit can provide different perspectives, further emphasizing the visual storytelling aspect of your shot. Being aware of drone flight techniques ensures smooth execution and helps capture compelling shots that effectively communicate your intended message. Monitoring camera stabilization methods can also improve the overall quality and professionalism of your orbit shots. Understanding heat distribution and materials can help in planning optimal flight paths and camera angles for outdoor shoots.
The Top-Down Perspective

The top-down perspective offers a striking way to showcase landscapes, architecture, or even crowded scenes from above. It emphasizes patterns and structures, making your shots visually compelling. Use this angle for:
- Aerial mapping to get precise, all-encompassing views of terrain or urban layouts.
- Creating a top-down composition that highlights symmetry or chaos in scenes.
- Capturing intricate details in architecture or natural formations that are hidden from ground level.
- Showcasing large crowds or events from above, providing context and scale.
This perspective helps viewers appreciate the bigger picture and emphasizes patterns, making it ideal for storytelling, analysis, or creative visuals. Mastering this shot can elevate your drone footage with clean, impactful images.
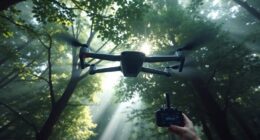
The Drone Flythrough

A drone flythrough lets you create smooth pathways that guide viewers through your scene. By choosing dynamic perspectives, you can keep the shot engaging and visually interesting. Focus on fluid motion to highlight key features and craft an immersive experience.
Smooth Pathways
To create a smooth drone flythrough, plan your route carefully to guarantee seamless movement from one point to another. Focus on maintaining flight stability to avoid jitters and assure a polished look. When mapping your path, consider these key factors:
- Choose a steady altitude for consistent camera angles.
- Maintain slow, controlled movements to enhance fluidity.
- Avoid abrupt turns by planning gentle curves.
- Synchronize camera angles with your route to highlight key features.
Dynamic Perspectives
Building on smooth pathways, shifting your drone’s perspective adds excitement and visual interest to your flythrough. To achieve dynamic perspectives, adjust your drone camera settings for ideal aerial stability, ensuring smooth movement and clear shots. Use rapid transitions or angled shots to highlight variations in scenery, making viewers feel immersed in the environment. Keep your drone steady during these maneuvers by maintaining proper aerial stability, especially when changing altitude or direction. Experiment with different angles—low, high, or tilted—to create a sense of depth and motion. Always plan your flight path carefully, so your drone movements are fluid and intentional. By fine-tuning your drone camera settings and maintaining stability, you’ll produce engaging, eye-catching flythroughs that captivate your audience.
The Panoramic Sweep
The panoramic sweep is a dynamic drone shot that captures a wide, breathtaking view of the landscape or scene below. It’s perfect for emphasizing scale and grandeur, providing viewers with a sense of immersion. To maximize its impact, consider these points:
- Plan your starting point to include interesting foreground elements.
- Maintain a steady, smooth movement for seamless landscape integration.
- Gradually increase altitude to reveal more of the scene.
- Use this shot to highlight expansive terrains or cityscapes.
This technique works best when you want to showcase the vastness of a scene or create a sense of awe. With proper planning, a panoramic sweep can beautifully capture the essence of any location, offering viewers a breathtaking perspective.
The Rise and Fall Movement

When executed skillfully, the Rise and Fall Movement creates a dramatic visual effect that guides viewers’ eyes smoothly through a scene. To pull this off, maintain excellent aerial stability, ensuring your drone’s ascent and descent are steady and controlled. Weather considerations are essential; avoid windy or stormy conditions that can cause instability or sudden movements. A slow, deliberate rise followed by a gentle descent adds depth and emotion, highlighting scale or emphasizing a subject. This movement works well in landscapes, architecture, or storytelling shots where you want to reveal vertical elements or create a sense of awe. Keep your camera settings consistent during the move to prevent jitter or focus shifts, and practice smooth control inputs for seamless execution.
The Dynamic Moving Away or Toward

Have you ever wanted to create a sense of movement that draws viewers into or pulls them away from your scene? Using dynamic moving away or toward shots can achieve this effect. Focus on camera angles and shot composition to enhance the impact. Here are key tips:
- Start close-up to create intimacy or tension, then slowly move away for a broader view.
- Use low or high angles to add drama or emphasize scale during the move.
- Plan your shot composition so the subject remains centered or follows the movement naturally.
- Maintain smooth camera control to ensure fluid motion, avoiding jerky shifts that distract viewers.
This technique works best when you balance movement with thoughtful framing, heightening engagement and emphasizing your scene’s depth.
The High-Speed Chase
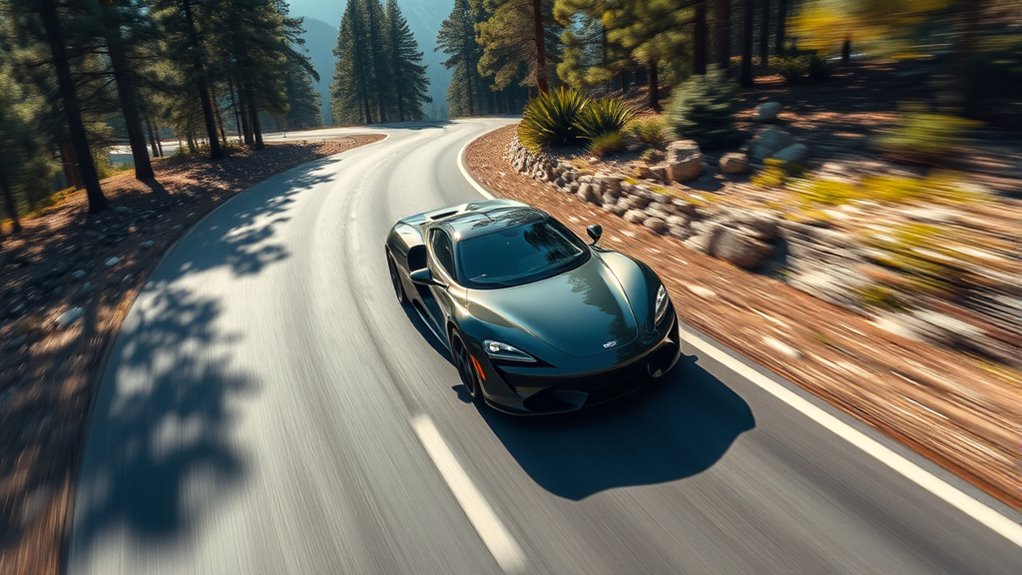
Capturing a high-speed chase with a drone requires precise planning and quick reflexes to keep the action exciting and clear. Your goal is to showcase speed and agility, so choose camera angles that emphasize motion—low, sweeping shots or side perspectives work well. Use a combination of tracking shots to follow the chase seamlessly and wide shots to establish the scene’s intensity. Keep your drone steady and responsive to sudden movements to avoid losing focus or clarity. Timing is essential; anticipate turns and accelerate smoothly to maintain a dynamic feel. By focusing on sharp camera angles and fluid movements, you’ll create a visceral, adrenaline-pumping sequence that immerses viewers in the chase.
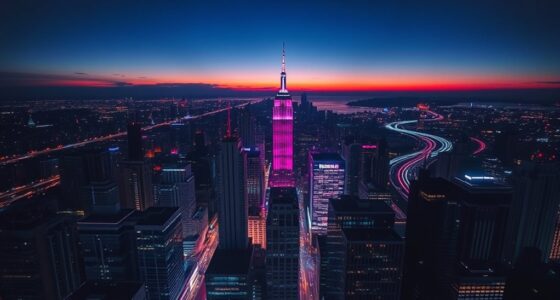
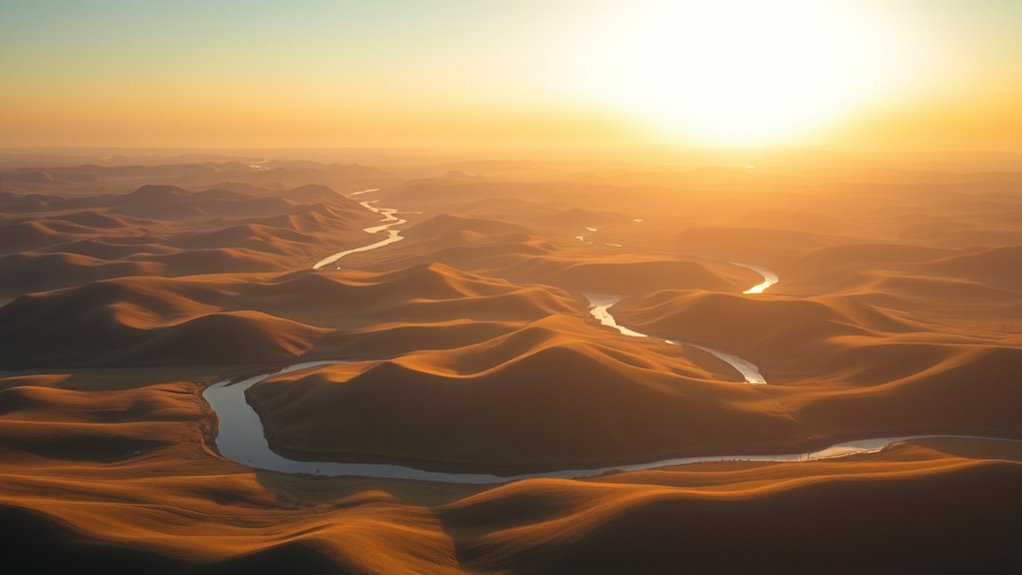
The Sunset or Golden Hour Shot

During the golden hour, you’ll capture warm, rich colors that instantly boost the mood and atmosphere of your shot. This is the perfect time to take advantage of the soft, natural lighting that enhances your footage’s overall quality. Don’t miss out on this ideal lighting window to create stunning, emotionally impactful drone shots.
Warm, Rich Colors
Golden hour offers a stunning opportunity to capture warm, rich colors that transform your drone shots into breathtaking visuals. To maximize this effect, focus on key techniques:
- Choose a lens with a wide aperture to enhance low-light conditions and create a pleasing background blur.
- Adjust your camera settings for ideal color grading, emphasizing warm tones without overdoing saturation.
- Use filters or graduated ND filters to balance exposure between the sky and landscape.
- Plan your shot to include reflective surfaces or water, amplifying the warm hues and adding depth.
Enhance Mood & Atmosphere
To truly enhance the mood and atmosphere of your drone shots during sunset, focus on timing and composition to evoke emotion. Capture scenes with aerial symmetry to create visually striking images that draw viewers in and convey harmony. Use atmospheric lighting to emphasize warm hues and soft shadows, adding depth and mood to your footage. Position your drone to showcase expansive landscapes or symmetrical patterns, highlighting the serenity and beauty of the golden hour. Pay attention to how the light interacts with the environment, casting a gentle glow that elevates the scene’s emotional impact. This approach not only amplifies the visual appeal but also immerses your audience in the tranquil, reflective mood that sunset lighting naturally evokes.
Optimal Time for Lighting
The most favorable time for capturing stunning drone shots is during the sunset or golden hour when natural light is at its most flattering. During this period, the golden hour provides soft, diffused light that minimizes harsh shadows and creates a warm, inviting atmosphere. To maximize your shot, consider these key points:
- Timing: Arrive early to set up before the golden hour begins.
- Lighting: Utilize diffused light for even illumination and rich colors.
- Angles: Shoot from high or low angles to enhance the warm glow.
- Subjects: Capture landscapes or architecture that benefit from the gentle, golden hue.
This timing guarantees your footage has a natural, cinematic quality that’s difficult to achieve at other times.
Frequently Asked Questions
How Do I Choose the Best Drone Shot for My Project?
To choose the best drone shot for your project, focus on the story you want to tell. Use composition techniques and shot framing to highlight key elements and create visual interest. Consider the mood and message you aim to convey, and select angles and distances that enhance these aspects. Test different shots to see which best complements your narrative, ensuring your visuals align with your overall creative vision.
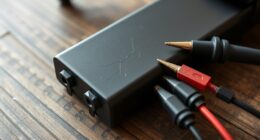
What Camera Settings Are Ideal for Different Drone Shot Types?
Did you know that 80% of stunning drone shots rely on proper camera settings? For different shot types, prioritize camera stability by using a low ISO and a fast shutter speed to reduce motion blur. Lens selection also matters—wide-angle lenses are great for expansive landscapes, while telephoto lenses work well for distant subjects. Adjust these settings based on your shot’s movement and environment to capture sharp, professional footage.
How Can I Ensure Smooth Motion During Complex Drone Shots?
To guarantee smooth motion during complex drone shots, focus on stabilization techniques like using gimbals and maintaining steady throttle control. Plan your motion carefully with detailed motion planning, outlining the path and speed beforehand. Practice slow, deliberate movements and avoid sudden jerks. Smooth transitions and consistent altitude help create fluid footage, giving you professional-looking results even in challenging shot scenarios.
What Safety Precautions Are Essential for Advanced Drone Maneuvers?
Think of your drone as a wild stallion—you need to tame it with safety. Before advanced maneuvers, check your battery life to avoid mid-air surprises and review legal regulations to steer clear of trouble. Wear your safety gear, keep a safe distance from obstacles, and have a spotter if possible. These precautions keep your drone ride smooth, ensuring you stay in control and out of trouble.
How Do Weather Conditions Affect Drone Shot Planning and Execution?
Weather conditions critically impact your drone shot planning and execution. You need to watch for wind turbulence, which can cause instability and safety risks, especially during complex maneuvers. Lighting considerations are also vital; the best shots are during golden hour or when lighting is even, reducing shadows and glare. Always check the forecast beforehand, and be ready to adjust your plans to guarantee safety and ideal footage quality.
Conclusion
Picture your drone as a painter’s brush, capturing moments from breathtaking angles. With these shot ideas, you’ll turn ordinary scenes into cinematic stories—like a bird soaring over a bustling city or a chase scene that feels alive. Just as a skilled chef combines ingredients for a perfect dish, combining these shots at the right moment can elevate your footage. So, get your drone ready and start creating visuals that truly take flight.