To get stunning drone footage over water, shoot during golden hours like sunrise or sunset for soft lighting and minimal glare. Use smooth, steady movements and set your camera for long exposures with low ISO and appropriate ND filters to reduce reflections and create silky water effects. Plan your shots carefully, monitor weather conditions, and keep safety in mind. If you keep exploring, you’ll discover more tips to perfect your ocean and lake captures.
Key Takeaways
- Capture footage during golden hours for optimal lighting and minimal glare on water surfaces.
- Use ND and polarizing filters to reduce reflections and achieve silky water effects with long exposures.
- Maintain smooth, steady drone movements and choose angles that enhance water textures and depth.
- Regularly check equipment, plan safe flight paths, and monitor weather conditions to ensure safety and quality.
- Enhance water footage in post-processing with color grading, stabilization, and strategic composition techniques.
Choosing the Right Time of Day for Water Shots

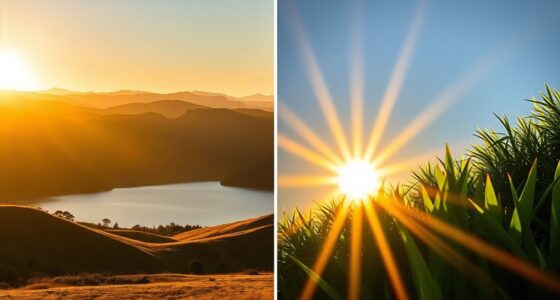
Choosing the right time of day is essential for capturing stunning water shots with your drone. Shooting during golden hours—sunrise or sunset—provides warm, soft lighting that enhances water color and reveals textures. The low sun angle reduces harsh reflections, making details on the water surface more visible. Midday sunlight creates intense glare and washed-out images, so avoid flying when the sun is directly overhead. If you must shoot then, angle the camera away from the sun to minimize glare. Calm conditions during these times also improve stability and image quality. Additionally, energy-efficient drone technology can help extend your flight time and optimize image capture during optimal lighting conditions. Proper drone settings such as shutter speed, ISO, and aperture can also make a significant difference in capturing high-quality footage under varying lighting conditions. Using advanced stabilization features can further enhance your footage quality across different lighting environments. By choosing the right time, you’ll achieve richer colors, better contrast, and smoother water effects, resulting in more enthralling footage that truly highlights the beauty of your water scenes. Incorporating proper drone settings can also enhance your footage quality across different lighting environments.
Managing Camera Settings for Smooth Water Effects

To capture smooth water effects with your drone, adjusting camera settings properly is key. First, set your shutter speed between 1 to 4 seconds to create silky water surfaces; longer exposures smooth out ripples and waves. Use a low ISO, around 100-200, to reduce noise and enhance clarity, especially in bright conditions. Keep your aperture wide to allow more light, but balance it to maintain sharpness across the frame. Avoid rapid camera movements by using tripod mode or slow stick inputs, resulting in steadier footage. Additionally, monitor environmental factors like wind, which can cause instability. Regularly reviewing and adjusting camera settings based on changing light and water conditions can significantly improve your footage quality. Properly managing camera stability and environmental factors can make a significant difference in your footage quality. Remember to practice with different settings to find what works best for your specific water and lighting conditions. Incorporating navigation and mapping techniques can also help you plan better shots and maintain consistent framing. Being aware of drone flight regulations is also essential to ensure safe and legal operation during your water shoots.
Utilizing ND Filters to Control Bright Reflections

Using ND filters helps you manage water glare by reducing excess brightness, giving your shots clearer detail. They also enable you to achieve smooth, long exposures that create silky water effects. Additionally, ND filters enhance water color depth, making the scene more vibrant and visually appealing. Incorporating free floating techniques can further improve your shots by allowing the camera to move smoothly over water surfaces for dynamic footage.
Managing Water Glare Effect
Bright reflections on water can be stunning but often pose a challenge for drone videography, as glare can wash out details and create harsh highlights. To manage this, using ND filters is essential. They reduce incoming light, allowing you to shoot with slower shutter speeds and better control reflections. Select an appropriate ND filter, like ND 8 or ND 16, based on the brightness. This helps minimize glare without sacrificing image quality. Additionally, changing your drone’s angle relative to the sun can reduce direct reflections. Keep in mind that over-filtering can darken your footage too much, so test different filters for ideal results.
- Choose the right ND filter strength for lighting conditions
- Adjust drone angle to minimize direct glare
- Use polarizing filters for additional glare reduction
- Monitor reflections during flight to adapt settings
Achieving Smooth Long Exposures
Achieving smooth long exposures over water with a drone requires careful control of light and reflections. ND filters are essential tools, reducing the amount of light reaching the sensor and allowing you to extend shutter speeds without overexposing. For bright water scenes, use ND filters from ND 4 up to ND 32, depending on lighting conditions. This enables you to capture motion blur, creating silky, glassy water effects that enhance the scene’s serenity. Make certain your drone’s camera settings are adjusted for longer exposures, typically between 1 to 4 seconds. Keep the drone steady during the shot, and shoot during golden hours for softer light. Using ND filters lets you balance exposure, control reflections, and achieve stunning, smooth water effects that elevate your footage’s cinematic quality. Additionally, understanding water surface dynamics can help you anticipate how the water will move and affect your shot. Being aware of solar position and weather conditions can further improve your planning for optimal lighting and reflection control.
Enhancing Water Color Depth
Ever wondered how to make water appear richer and more vibrant in your drone footage? Using ND filters helps you control bright reflections and manage exposure to enhance water color depth. By reducing glare, your footage captures the water’s true hues and textures more vividly. Select an ND filter like ND 8 or ND 16 to balance brightness and detail, especially during sunny days. This allows longer exposures, smoothing out motion and revealing subtle color variations. Adjusting filters prevents overexposure and highlights water’s natural richness. Incorporating proper filter selection ensures optimal results in diverse lighting conditions. Additionally, understanding light management techniques can further improve your water shots for stunning visuals. Proper filter use is essential for capturing water color depth effectively, making your footage stand out with rich, dynamic visuals.
Essential Drone Flight Techniques for Water Landscapes

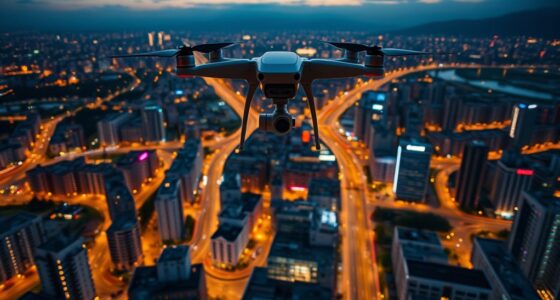
To capture stunning water landscapes, you need smooth movement controls to keep footage steady and flowing naturally. Planning your flight path strategically helps you frame the scene and avoid obstacles or unwanted reflections. Choosing ideal camera angles enhances the depth and drama of your shots, making your water scenes truly stand out. Additionally, understanding drone maintenance ensures your equipment remains reliable during critical water shoots, preventing interruptions or mishaps. Properly managing your networking hardware can also facilitate remote control or data transfer, especially in challenging outdoor environments. Being familiar with compact living principles can help you organize your gear efficiently for portable outdoor shoots, ensuring quick setup and takedown. Incorporating smart habits into your preparation routine can further improve your overall shooting experience and safety during water drone flights. Moreover, regular equipment checks are essential to identify potential issues before your shoot, reducing the risk of equipment failure when it matters most.
Smooth Movement Controls
Smooth movement controls are essential for capturing serene water landscapes with drone footage. They help you create seamless, professional-looking shots that emphasize calmness and beauty. To achieve this, use gentle, deliberate stick inputs, avoiding sudden jerks or quick turns. Maintain a steady altitude to prevent unnecessary vibrations or shake. Utilize modes like tripod or cinematic mode for finer control, especially over water. Practice slow, controlled movements to keep footage smooth and flowing. Keep your movements consistent with the scene’s mood, whether you’re pulling away or tilting up.
- Use slow, steady stick inputs for fluid motion
- Employ tripod or cinematic mode for precision
- Maintain consistent altitude and speed
- Practice smooth transitions between movements
Strategic Flight Planning
Effective flight planning is essential for capturing stunning water landscapes with your drone, ensuring you maximize safety, image quality, and shot variety. Before flying, research the location’s weather, wind, and lighting conditions. Map out key points of interest and establish safe flight paths that avoid obstacles and respect no-fly zones. Consider the water’s movement and plan for smooth, steady shots during calmer periods. Use a checklist to verify battery levels, signal strength, and equipment function.
| Planning Step | Focus Area | Purpose |
|---|---|---|
| Weather Check | Wind, sunlight, rain | Safety and shot consistency |
| Location Mapping | Obstacles, shoreline features | Efficient navigation |
| Timing Optimization | Golden hours, tides | Enhance visuals, minimize glare |
| Equipment Prep | Filters, batteries | Maximize quality and duration |
| Flight Path Design | Smooth transitions | Dynamic, stable footage |
Optimal Camera Angles
Choosing the right camera angles is essential for capturing compelling water landscapes with your drone. Your goal is to showcase the water’s beauty, movement, and surrounding features effectively. Start with wide, eye-level shots to emphasize vastness, then experiment with low angles near the surface for dramatic reflections. Overhead angles reveal shoreline contours and water patterns, providing context and depth. Dynamic tilt-up shots from the water’s surface create a sense of motion and scale, while pull-away shots highlight the expanse of the scene. Keep your camera steady and adjust angles to minimize glare. Using these perspectives, you’ll create visually engaging footage that captures the essence of water landscapes.
- Wide landscape shots for scale
- Low angles near the water surface
- Overhead shots for layout
- Tilt-up for dynamic perspective
Safety Practices When Flying Over Water

Flying over water presents unique safety challenges that demand careful preparation and vigilance. Before taking off, check your drone’s battery life and signal strength to prevent unexpected drops. Maintain a safe altitude and hover distance from the water surface to avoid gusts that can destabilize your drone. Use visual markers like painted stakes onshore to help with orientation and navigation. Keep a close eye on weather conditions; high winds can cause crashes or loss of control. Trust your drone’s diagnostics warnings about battery and signal status. Limit your flight time to ensure you have enough reserve for a safe return, especially if conditions change suddenly. Avoid pushing the drone to its limits, and always have a plan for quick recovery if things go awry.
Composition Tips for Dynamic Ocean and Lake Footage

To create compelling ocean and lake footage, focus on dynamic composition techniques that highlight the vastness and movement of water. Use framing to emphasize the horizon, placing it on the upper or lower third to balance the shot. Incorporate leading lines, like shoreline curves or waves, to guide viewers’ eyes through the scene. Capture reflections and surface textures to add depth and interest. Vary your camera angles—overhead, low, or tilted—to create dynamic perspectives that showcase water motion and landscape features.
Use dynamic composition, framing, and angles to showcase water’s movement and vastness effectively.
- Use the rule of thirds to position key elements like boats, rocks, or shoreline features
- Incorporate foreground objects for depth and scale
- Capture movement by filming with slow, smooth pans and tilts
- Highlight water patterns and textures through close-ups and wide shots
Post-Processing Strategies to Enhance Water Footage

Effective post-processing transforms raw drone footage into visually stunning water scenes that captivate viewers. Start by selecting your best shots, then use editing software to correct lens distortion and stitch images for accurate maps or panoramas. Adjust color grading and contrast to enhance water textures, bringing out subtle hues and reducing glare. Applying HDR or bracketing techniques can balance bright reflections with darker areas, revealing underwater details. Stabilize shaky footage to ensure smooth motion, and crop or straighten horizons for better composition. Export in high resolutions like 4K or 5.1K to preserve detail. These strategies will help you produce polished, professional water visuals that highlight the beauty and dynamics of your drone captures.
Leveraging Equipment for Accurate Water Mapping and Data Collection

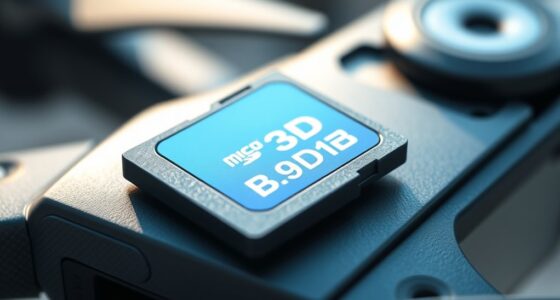
Leveraging the right equipment is essential for achieving accurate water mapping and reliable data collection with drones. You need tools that capture detailed, high-quality images and precise measurements. Using multispectral or LiDAR sensors enhances your ability to analyze water surfaces and underwater features accurately. High-resolution cameras with adjustable focal lengths allow you to switch between wide-area surveys and detailed close-ups. Stabilization equipment, like gimbals, ensures sharp images even in windy conditions. Additionally, employing GPS-enabled drones provides georeferenced data critical for mapping projects. Proper equipment choice directly impacts data accuracy and analysis depth.
- Use multispectral or LiDAR sensors for detailed mapping
- Select drones with multiple camera focal lengths
- Incorporate stabilization tools for steady footage
- Opt for GPS-enabled systems for georeferenced data
Frequently Asked Questions
How Can I Minimize Glare on Water Surfaces During Drone Flights?
To minimize glare on water surfaces, you should shoot during golden hours like sunrise or sunset when the sun is lower, reducing harsh reflections. Angling your drone’s camera away from direct sunlight also helps. Use polarizing filters or ND filters to cut down on glare and reflections. Keep the drone steady and avoid flying directly into the sun, which enhances water visibility and guarantees clearer, more vibrant footage.
What Are the Best Drone Settings for Capturing Fast-Moving Water?
Capturing fast-moving water feels like trying to catch lightning in a bottle, so your drone settings need to be precise. Use a fast shutter speed around 1/1000s to freeze motion, and set ISO low (100-200) to keep clarity. Keep your camera in high frame rate mode, like 60fps, for smooth footage. Adjust your focus for sharpness, and stabilize your drone with gimbal settings to follow quick currents seamlessly.
How Do Wind Conditions Affect Drone Stability Over Large Water Bodies?
Wind conditions can markedly impact your drone’s stability over large water bodies. When winds pick up, your drone may become harder to control, leading to shaky footage or even crashes. You should monitor weather reports before flying, avoid gusty days, and fly at lower altitudes where wind effects are less pronounced. Using gentle stick inputs and maintaining a safe altitude helps to counteract wind turbulence and keep your shots smooth.
What Post-Processing Techniques Improve Water Surface Reflections?
To enhance water surface reflections in your drone footage, start with color grading to boost contrast and saturation, making reflections pop. Use software stabilization to smooth out shaky footage, ensuring reflections appear clear. Apply lens correction to reduce distortion and glare, and consider using HDR or bracketing techniques to balance bright reflections with darker water areas. Finally, fine-tune with contrast adjustments to emphasize the reflective qualities and create a more cinematic look.
Which Drone Accessories Are Recommended for Mapping Underwater Features?
Did you know drones equipped with LiDAR can map underwater features with 98% accuracy? To enhance your underwater mapping, invest in waterproof or water-resistant accessories like sealed camera housings and flotation devices. Add polarized filters to reduce glare and improve clarity beneath the surface. Using additional GPS modules or RTK systems boosts positional accuracy, ensuring detailed, reliable underwater maps. These accessories help you capture precise data and expand your environmental research capabilities.
Conclusion
Flying your drone over water can create stunning, cinematic footage—just remember that over 70% of the Earth’s surface is covered in water, making it a essential subject for aerial photography. By choosing the right time, managing your settings, and practicing safety, you’ll capture breathtaking ocean and lake scenes. Keep experimenting with angles and post-processing to elevate your shots. With patience and practice, you’ll turn simple water shots into engaging visual stories.