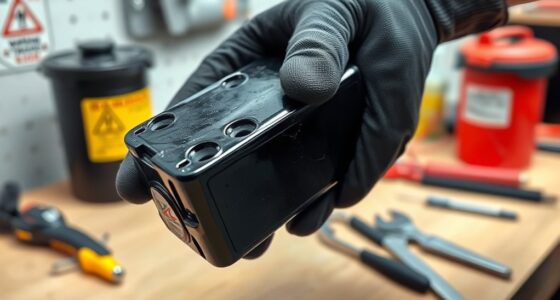

To unstick a drone motor safely, start by removing the propeller and carefully inspecting the motor for dirt, debris, or damage. Clean out grime with compressed air or a soft brush, and apply a tiny amount of lubricant to the shaft if it moves stiffly. Check electrical connections for loose wires or corrosion, and make sure the bearings are smooth. If issues persist, replacing the motor might be necessary; explore these tips to guarantee proper fixes every time.
Key Takeaways
- Remove the propellers and clean debris from the motor shaft and bearings using compressed air or a small brush.
- Apply a tiny amount of lightweight lubricant to the motor shaft, then rotate it manually to check for smooth movement.
- Inspect electrical connections for loose wires or corrosion; re-seat or replace damaged wiring as needed.
- Disassemble the motor casing carefully to inspect internal parts and bearings for wear or damage, replacing if necessary.
- Test the motor with a multimeter to ensure proper voltage supply and look for shorts or open circuits before reassembling.
If your drone motor has become stuck, addressing the issue promptly can prevent further damage and get your drone back in the air. A stuck motor can be caused by dirt, debris, corrosion, or mechanical failure, and tackling it quickly is essential. Start by inspecting the motor carefully; remove the propellers to access the motor more easily. Use a small brush or compressed air to clear away dust, dirt, or debris that might be clogging the shaft or bearings. Sometimes, grime builds up over time, and a thorough cleaning can restore smooth operation. If the motor still feels stiff or resistant, it might be due to corrosion or lack of lubrication. Applying a tiny amount of lightweight lubricant or machine oil to the motor’s shaft can help free up any sticking parts. Be cautious not to over-lubricate, as excess oil could attract dirt or cause further problems.
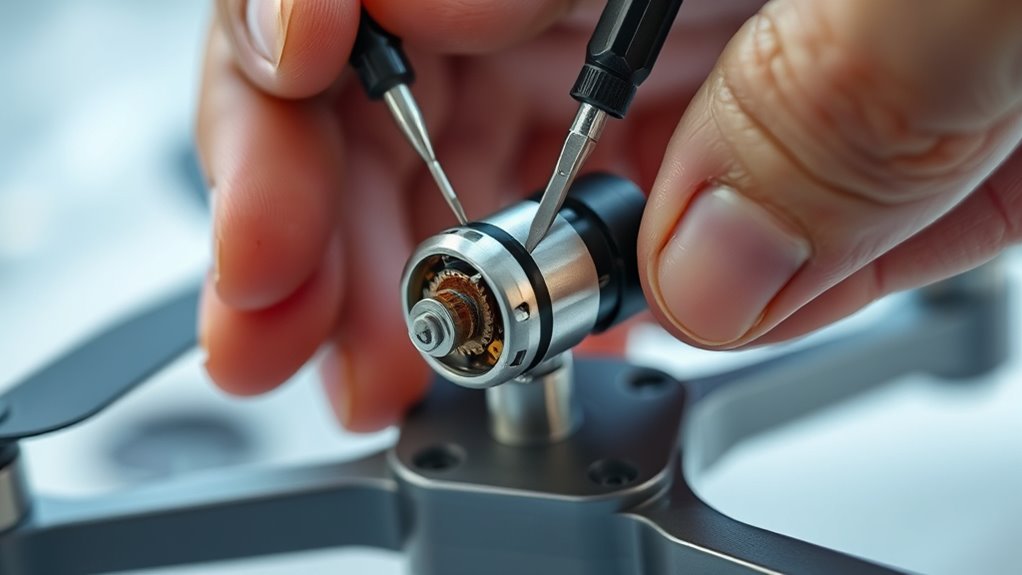
Next, consider troubleshooting techniques related to the motor’s electrical connections. Loose or damaged wiring can sometimes cause the motor to appear stuck or unresponsive. Check the motor’s wiring harness for any frayed wires, loose connectors, or corrosion. Re-seat any loose connections and replace damaged wires if needed. It’s also worth testing the motor with a multimeter to ensure it’s receiving proper voltage and isn’t shorted or open-circuited. If the motor is receiving power but not turning freely, mechanical issues are likely at fault. Sometimes, small foreign objects like tiny stones or bits of grass can jam the rotor. Gently rotate the shaft by hand to see if it moves freely. If resistance persists, disassemble the motor carefully—most motors have screws or clips securing the casing. Check for bent or broken parts inside, and replace them if necessary.
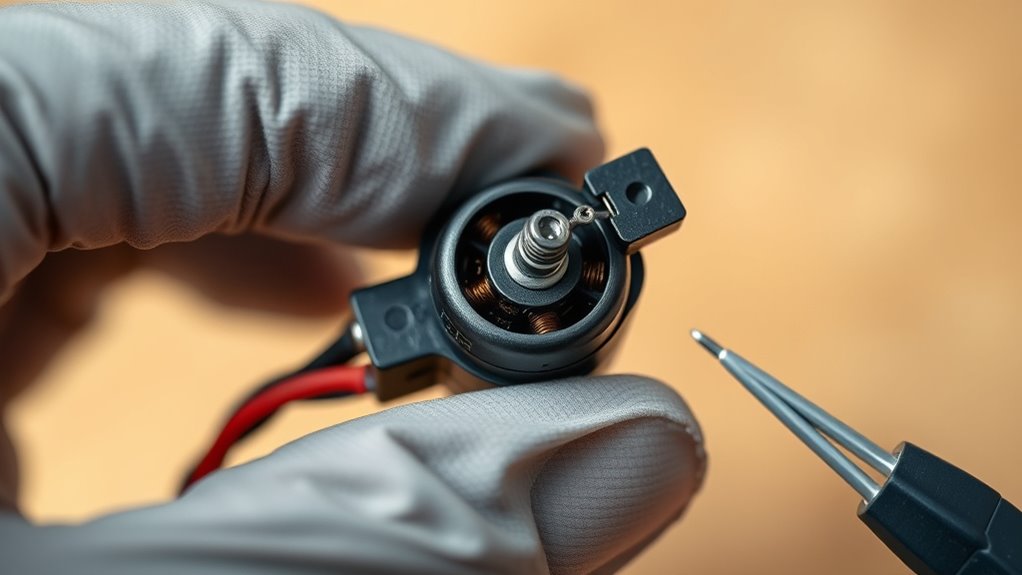
In some cases, motor maintenance involves inspecting the bearings. Worn or damaged bearings can cause the motor to seize or stick. If accessible, remove and inspect the bearings for signs of wear or corrosion. Replacing faulty bearings can often restore smooth motion. If these troubleshooting techniques don’t resolve the issue, it might be time to replace the motor entirely. Always ensure you follow manufacturer guidelines for disassembly and reassembly. Remember, regular motor maintenance can prevent many sticking problems, so keep your drone’s motors clean, well-lubricated, and properly inspected. Performing proper maintenance practices can significantly extend your drone’s operational lifespan and reduce the likelihood of motor failure. By staying proactive, you can extend the life of your drone and avoid the frustration of a stuck motor in mid-flight.
Frequently Asked Questions
Can I Use WD-40 on My Drone Motor?
You shouldn’t use WD-40 on your drone motor because it’s not lubricant compatible and could cause damage. For DIY repair tips, stick to lightweight, drone-specific lubricants or silicone-based sprays designed for electronics. These products won’t harm delicate parts and help free up stuck motors safely. Avoid penetrating oils like WD-40, as they can attract dirt and compromise motor performance, making repairs riskier rather than easier.
How Long Should I Wait After Applying Lubricant?
Think of your drone’s motor like a delicate seedling; you don’t want to rush watering it. After applying lubricant, wait the recommended drying time—usually around 10-15 minutes—to guarantee it penetrates properly. The ideal wait period allows the lubricant to work without causing residue buildup. Rushing this step can lead to issues, so be patient and give your drone time to recover and operate smoothly after applying lubricant.
Is It Safe to Manually Force the Motor Loose?
You should avoid manually forcing the motor loose, as it can damage the delicate components. Instead, consider manual intervention only after applying lubricant and waiting for it to work. Always follow safety precautions, like disconnecting power and handling parts carefully. Forcing the motor might seem quick, but it risks causing further damage. If you’re unsure, it’s best to consult a professional to ensure safe and effective repairs.
Can Overheating Cause My Drone Motor to Stick?
Yes, overheating can cause your drone motor to stick. Overheating risks include thermal expansion and lubricant breakdown, which can lead to increased friction and motor damage. When a motor gets too hot, parts might seize or stick, making it hard to spin freely. To prevent this, guarantee proper cooling and avoid prolonged use at high speeds. Regular maintenance and monitoring motor temperature can help keep your drone functioning smoothly.
When Should I Replace a Stuck Drone Motor?
You should replace a stuck drone motor during a motor inspection if you notice persistent sticking, unusual noises, or decreased flight performance. If cleaning and troubleshooting don’t resolve the issue, motor replacement is your best option to guarantee safety and peak operation. Regularly inspect your motors for signs of wear or damage, and don’t delay replacing them if they’re compromised, to prevent further damage to your drone.
Conclusion
Remember, a stuck drone motor is like a stubborn door—sometimes all it takes is a gentle push or a bit of lubricant to get it moving smoothly again. I once fixed a drone that refused to spin by carefully cleaning and lubricating the motor, and it soared like new. With patience and the right tools, you’ll turn a frustrating glitch into a quick fix. Think of it as tuning an instrument—small adjustments can restore harmony to your flight.