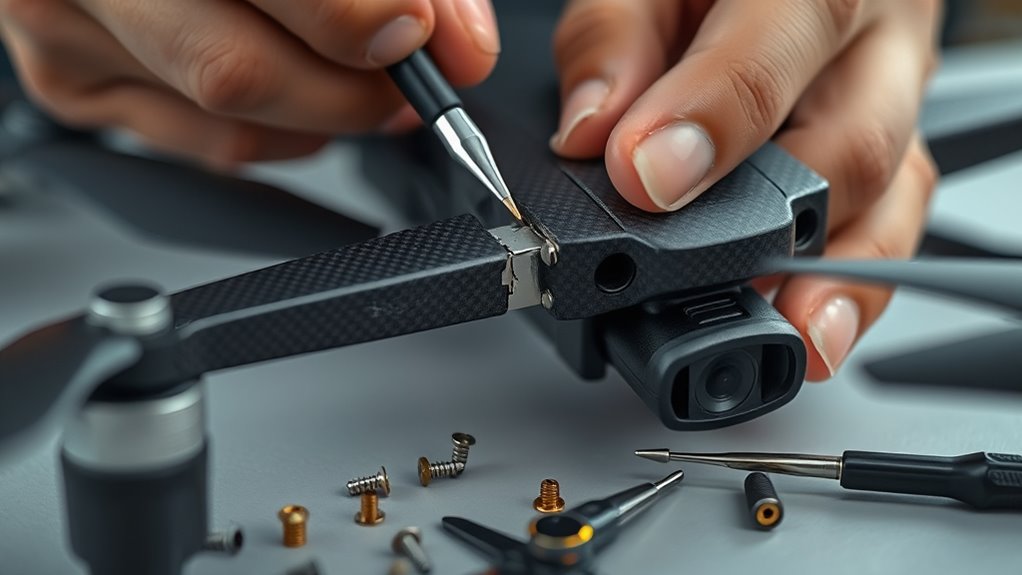

If your drone’s frame or arms crack, start by evaluating the damage to decide if repairs are possible. For minor cracks, use epoxy or a strong adhesive suitable for plastic or carbon fiber. If damage is severe, replacing the part is best, especially since many drone parts are modular. Always disconnect the battery before fixing, and ensure your props are balanced afterward for stable flights. Keep going, and you’ll discover more tips to restore your drone quickly and safely.
Key Takeaways
- Carefully inspect the crack to assess if it can be repaired with epoxy or requires replacing the part.
- Disconnect the drone’s battery before starting repairs to ensure safety.
- Use strong adhesive suitable for plastics or carbon fiber to fix minor cracks; replace severely damaged arms or frames.
- After repair, check and balance the propellers to maintain flight stability and reduce vibrations.
- Use appropriate tools and follow tutorials or manuals for precise and effective repair procedures.
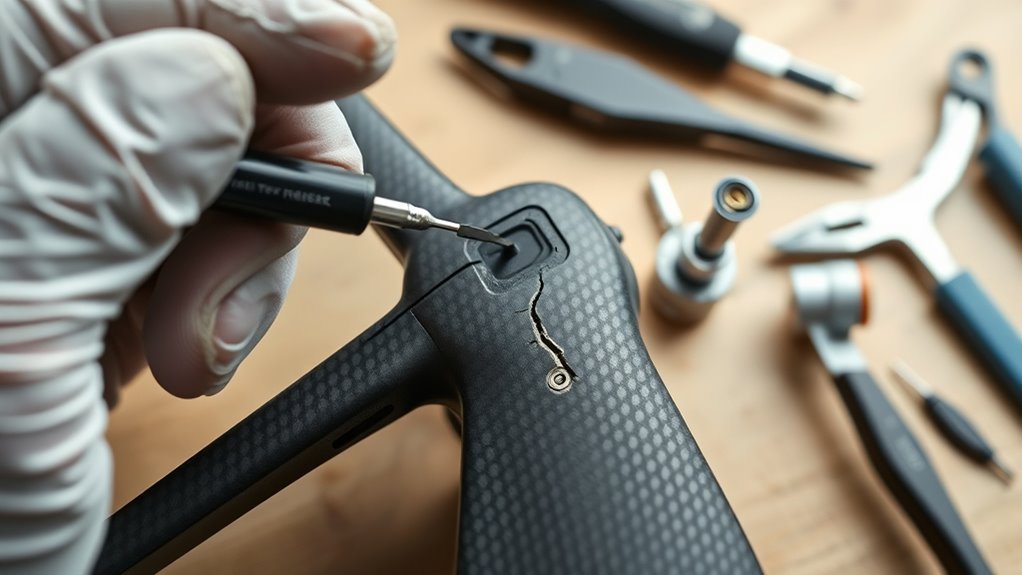
Repairing your drone yourself can save time and money, especially if you know the right steps to take. When your drone’s frame or arms crack, it might seem intimidating, but with the right approach, you can handle it efficiently. Start by evaluating the damage carefully. If the crack is minor, you might be able to repair it with some epoxy or strong adhesive designed for plastics or carbon fiber. For more severe damage, replacing the entire arm or frame piece might be necessary. Many drone parts are modular, making them easier to swap out with basic tools. Before diving into repairs, disconnect the battery to avoid any electrical hazards. Safety first.
Once you’ve addressed the cracked frame or arm, it’s essential to check the drone’s balance, especially the propellers. Proper propeller balancing ensures smooth flight and reduces motor strain, which is key after any impact. To balance your propellers, place the propeller on a balancing stand or a finger at its center. If one side dips lower, add a tiny bit of tape or use a propeller balancing clip to fine-tune it. This simple step can dramatically improve flight stability and extend your drone’s lifespan. Remember, unbalanced propellers can cause vibrations that stress the motors and batteries, leading to potential failures.
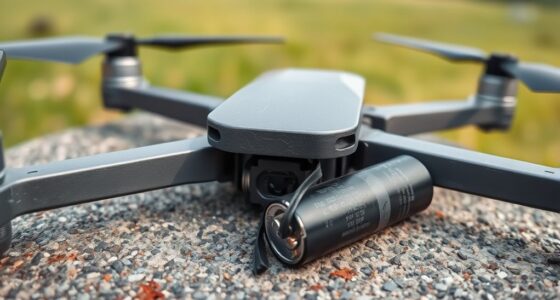
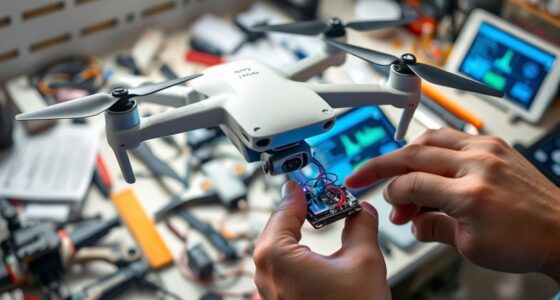
Battery replacement is another vital aspect of DIY drone repair. Over time, batteries degrade, leading to shorter flight times or sudden power drops. If your drone’s battery no longer holds a charge or shows signs of damage like swelling or leaks, replacing it is essential. Use a compatible battery model and follow the manufacturer’s instructions for removal and installation. When handling new batteries, avoid puncturing or exposing them to extreme temperatures. Properly dispose of old batteries at designated recycling centers, never in regular trash. A fresh, high-quality battery not only restores flight time but also ensures your drone operates safely.
In addition, understanding the importance of market reputation can help you choose reliable replacement parts and accessories, ensuring longevity and safety for your drone. Throughout your repair process, keep your workspace organized and tools handy. Use small screwdrivers, tweezers, and pliers for delicate work, and avoid forcing components apart. If you’re unsure about replacing a part or balancing your propellers, consult online tutorials or the drone’s manual. Taking your time and being precise will lead to better results and a longer-lasting repair. By mastering these basic maintenance and repair skills — from fixing cracks to ensuring balanced propellers and fresh batteries — you empower yourself to keep your drone flying smoothly without expensive trips to a repair shop.
Frequently Asked Questions
Can I Repair a Cracked Drone Frame Without Specialized Tools?
Yes, you can repair a cracked drone frame without specialized tools by using alternative tools and repair kits. Grab a plastic welder or strong adhesive from a repair kit, and carefully apply it to the crack. make certain you align the pieces properly and let the adhesive cure fully. While it’s a temporary fix, this method can help you get your drone flying again without needing professional tools or expertise.
What Safety Precautions Should I Take During DIY Drone Repairs?
You should always wear protective gear like gloves and safety goggles to prevent injuries. Make certain your workspace is clean, well-lit, and free of clutter to avoid accidents. Keep tools organized and handle sharp or hot parts carefully. Ventilate the area if you’re using adhesives or solvents. Prioritize safety by taking your time, following instructions precisely, and disconnecting the drone’s battery before starting repairs. This keeps you safe and your workspace secure.
How Do I Identify if a Crack Affects Drone Flight Stability?
You can tell if a crack affects your drone’s flight stability by doing a thorough visual inspection first—look for any signs of structural damage or deformation. Afterward, perform a controlled flight test in a safe area; if you notice unusual vibrations, drifting, or instability, the crack likely impacts flight. Don’t ignore small cracks—they might worsen over time, so always double-check your drone before flying.
Are There Specific Adhesives Best Suited for Drone Frame Repairs?
For drone frame repairs, you’ll want adhesives with strong adhesive strength and quick curing time. Epoxy resins are ideal because they bond well and cure fast, providing durability and stability. Look for two-part epoxy that sets within a few hours. Avoid weaker glues like super glue for structural repairs, as they lack the necessary adhesive strength and may require longer curing times, compromising your drone’s safety and performance.
How Long Does a Typical DIY Drone Repair Process Take?
Ever feel like fixing your drone is a race against time? Typically, a DIY drone repair takes about 1 to 3 hours, depending on your skill level and the damage’s complexity. If you’re a beginner, expect a longer repair timeline, as you’ll need to carefully follow steps without rushing. With practice, your repair speed will improve, making each project quicker and more efficient.
Conclusion
Now that you’ve learned how to mend that cracked drone frame or arm, you’re not just fixing a machine — you’re restoring its wings to soar again. Think of each repair as fueling your confidence and skill, turning a broken drone into a flying phoenix rising from the ashes. With a little patience and these tips, you hold the power to keep your drone in the sky, transforming setbacks into soaring comebacks. Fly on, and never let a crack ground your dreams.