To pick the right FPV goggles, you need to understand key specs like display technology, resolution, refresh rate, aspect ratio, and field of view. Higher resolution and refresh rates provide clearer, smoother images, while a wider FOV boosts immersion. Compatibility with your camera output and adjustable IPD and focus settings guarantee comfort and clarity. Knowing these details helps you choose gear that matches your flying style. Keep exploring to discover how each feature affects your flying experience.
Key Takeaways
- Understand display technology, resolution, and image quality to ensure clarity and detail during flights.
- Consider refresh rate and motion clarity for smooth, responsive video, especially in high-speed maneuvers.
- Match aspect ratios and camera output compatibility to avoid distortion and ensure seamless video transmission.
- Adjust IPD and focus settings for optimal visual comfort and sharpness during extended flying sessions.
- Choose receiver types and FOV based on immersion preferences, signal reliability, and environmental interference.
Display Technology and Screen Types
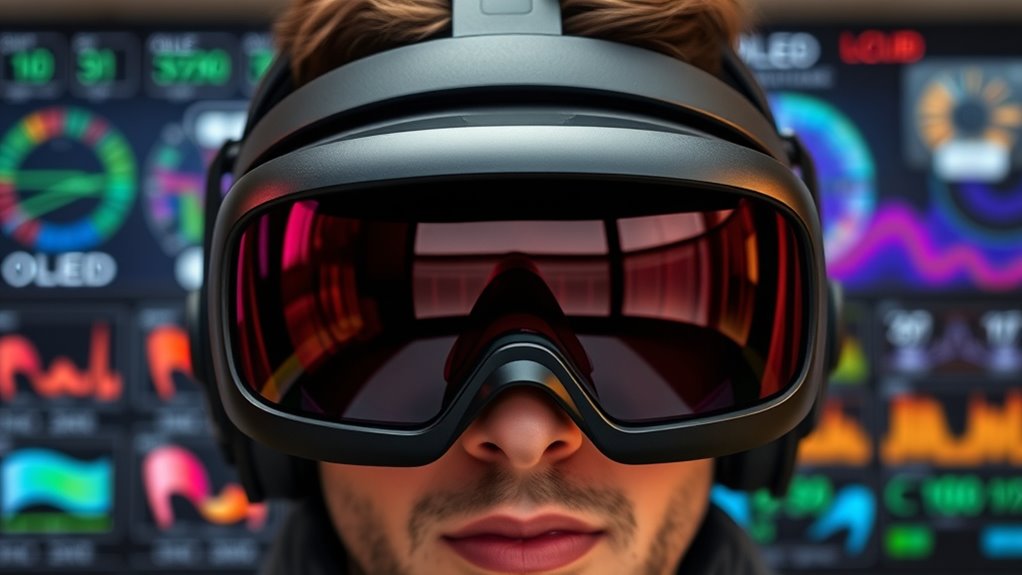
Have you ever wondered how different display technologies impact your FPV flying experience? OLED screens deliver higher contrast and deeper blacks than LCDs, making images sharper and more vibrant. This enhancement improves visibility especially in varied lighting conditions. A 100Hz refresh rate reduces motion blur, giving you smoother video—crucial for fast-paced flying. Most modern goggles support aspect ratios like 16:9 and 4:3, ensuring compatibility with various cameras. High-end models often feature 1920×1080 resolution, providing crisp detail, while some use 1280×960 OLED screens, balancing resolution with performance. These display technologies directly influence how clearly you see the environment, helping you spot obstacles and navigate accurately. Understanding contrast ratios can help you choose a headset that enhances your visual experience further. Choosing the right screen type enhances your overall FPV experience, making flying more immersive and enjoyable.
Resolution and Image Quality Considerations
Choosing the right resolution is essential for clear FPV visuals, as higher resolutions reveal more detail and improve your ability to navigate and avoid obstacles. A minimum of 480p (640×480) is acceptable, but most pilots prefer 720p (1280×720) for sharper images. Top-tier goggles feature 1080p (1920×1080), delivering the clearest view, especially useful in digital FPV systems. While analog systems see less benefit from higher resolutions due to lower camera output quality, increasing resolution still enhances detail recognition. This helps you spot obstacles sooner and fly more precisely. Keep in mind that higher resolutions demand better hardware and may impact latency or battery life. Balancing resolution with your overall setup ensures superior image clarity without sacrificing performance or comfort during long flights.
Refresh Rate and Motion Smoothness

A higher refresh rate makes fast-moving footage look smoother and clearer, reducing motion blur during quick maneuvers. When you’re flying at high speeds, this can give you better control and less eye strain. Compatibility with your video system guarantees you get the full benefit of these smoother visuals. Ensuring your headset’s specifications align with your video system is essential for optimal performance and viewing experience. Additionally, understanding the differences between various display technologies can help you select a headset that offers the best clarity and responsiveness for your needs. Incorporating adaptive lighting and other features can further enhance your immersive flying experience, especially in dynamic environments. Considering power requirements ensures your FPV goggles operate efficiently without interruptions during extended flights. A thorough understanding of technical specifications will help you make informed decisions and avoid compatibility issues.
Impact on Motion Clarity
High refresh rates markedly enhance motion clarity in FPV goggles by providing smoother video feeds, which is essential when flying at high speeds or performing quick maneuvers. A higher refresh rate reduces motion blur, allowing you to see fast-moving objects clearly and respond accurately. This smoother video helps minimize eye strain and improves overall visual comfort during extended flights. When the refresh rate is low, fast movements may appear choppy or blurred, making it harder to track objects or judge distances accurately. For ideal motion clarity, look for goggles with at least 90Hz or higher. This ensures your video feed remains fluid, sharp, and reliable, giving you the confidence needed to execute precise maneuvers and maintain situational awareness. Additionally, understanding Free Floating technology can help you grasp how certain displays maintain image stability even during rapid movements.
Fast-Paced Flying Benefits
Fast-paced flying demands smooth motion to keep you fully aware of your surroundings and maintain control. Higher refresh rates substantially improve your experience, making rapid movements feel natural and reducing motion blur. This clarity helps you react faster and avoid obstacles with confidence. To maximize these benefits, consider:
- Refresh Rate: Opt for goggles with at least 90Hz or higher for ultra-smooth video, especially in aggressive flying styles.
- Motion Smoothness: Higher frame rates ensure fluid motion, reducing eye strain and increasing situational awareness.
- Latency: Lower latency paired with high refresh rates ensures your controls respond instantly, vital during quick maneuvers.
These features work together to give you a seamless, immersive experience, elevating your flying precision and confidence in fast environments.
Compatibility With Video Systems
Choosing a compatible video system is essential for ensuring your goggles deliver smooth motion and accurate visuals. Your goggles need to match the refresh rate and video output of your camera or receiver to prevent lag, motion blur, or tearing. For fast-paced flying, look for goggles with a 100Hz or higher refresh rate, which reduces motion blur and creates fluid video feeds. Digital systems often support higher refresh rates, providing smoother experiences compared to analog setups, which generally have lower frame rates. Compatibility also involves matching aspect ratios, resolutions, and connector types to your camera and transmitter. Ensuring proper pairing minimizes latency and maximizes clarity, giving you a seamless, immersive FPV experience. Always verify your system’s specifications before purchasing to avoid mismatches that could hinder your flight performance. Additionally, considering refresh rate compatibility helps ensure your goggles deliver consistent, high-quality video during rapid movements. Understanding video signal standards and how they interact with your goggles can further improve your overall FPV setup.
Aspect Ratios and Compatibility
Your FPV goggles need to match your camera’s aspect ratio for a seamless viewing experience. Most modern goggles support common options like 16:9 and 4:3, but compatibility depends on your camera output. Ensuring these align prevents distorted images and maximizes clarity during flight.
Aspect Ratio Options
Most modern FPV goggles support multiple aspect ratio options, primarily 16:9 and 4:3, to guarantee compatibility with different camera systems and video sources. Your choice affects how the image appears and how well it aligns with your camera output. To optimize your experience, consider these factors:
- Compatibility with your camera’s output format to avoid stretching or black bars.
- The intended use—wider aspect ratios like 16:9 suit cinematic footage, while 4:3 can match older or specific camera models.
- The display’s native aspect ratio, which influences image distortion and clarity.
- Being aware of vetted compatibility ensures your goggles work seamlessly with various video sources for the best flight experience.
Switching aspect ratios can help you achieve the best visual fidelity, reduce eye strain, and ensure seamless video playback during your flights.
Compatibility With Camera Outputs
Ensuring compatibility between your FPV goggles and camera outputs is essential for a seamless viewing experience. You need to match the camera’s output format—especially aspect ratio and signal type—to your goggles’ inputs. Most modern goggles support 16:9 and 4:3 aspect ratios, but check your device specs to confirm. Some models accept HDMI, AV, or analog signals, while others are digital-only. Compatibility issues can cause black screens, distorted images, or improper framing. Use the following table to compare common camera output types and goggle compatibility:
| Camera Output | Compatible Goggles | Signal Type | Notes |
|---|---|---|---|
| HDMI | Many high-end models | Digital | Check resolution support |
| AV (composite) | Most analog goggles | Analog | Use adapters if needed |
| 4:3 Output | Many older models | Analog | May require aspect ratio adjustment |
| 16:9 Output | Modern digital goggles | Digital | Ensure resolution matches |
| Analog | Many analog goggles | Analog | Compatibility varies |
Matching outputs prevents image issues and ensures ideal viewing. Additionally, understanding video signal types can help in selecting the right adapters and connections for your setup. Being aware of aspect ratio compatibility is vital to avoid image distortion and framing problems.
Adjusting Interpupillary Distance (IPD) for Comfort

Adjusting the interpupillary distance (IPD) on your FPV goggles is vital for comfortable viewing and clear image perception. Proper IPD ensures each eye aligns perfectly with the display, reducing eye strain and enhancing clarity. Most goggles have a physical slider or dial to make this adjustment. To optimize comfort and performance, follow these steps:
Adjust your FPV goggles’ IPD for clearer images and comfortable viewing.
- Measure your IPD using a ruler or visit an optometrist for an accurate reading.
- Set the goggles’ IPD slider to match your measurement, ensuring both lenses align with your pupils.
- Test the image clarity and comfort, making small adjustments until the display appears sharp and comfortable for extended use.
Correct IPD adjustment is essential for long flights and maintaining visual comfort.
Focus and Prescription Lens Options

Your FPV goggles need clear vision for precise flying, so adjustable focus ranges from -8.0 to +4.0 diopters can help you see sharply without strain. Compatibility with prescription lenses makes it easier to customize your setup, whether you wear glasses or need specialized optics. Exploring custom optical solutions can enhance image clarity and comfort, especially during long flights.
Adjustable Focus Range
Many FPV goggles feature adjustable focus ranges from -8.0 to +4.0 diopters, allowing you to fine-tune image sharpness to match your vision needs. This flexibility helps guarantee clear visuals without the need for prescription glasses, especially during long flights. When considering focus adjustment, keep these points in mind:
- The wider the focus range, the better it accommodates various vision corrections.
- Precise focus control reduces eye strain and enhances overall clarity.
- Compatibility with prescription lenses can sometimes be achieved through integrated adjustment or aftermarket solutions.
Adjustable focus is essential for pilots with uncorrected or corrected vision, providing a comfortable, immersive flying experience without sacrificing image quality. Proper focus ensures you see details clearly and respond quickly to your environment.
Prescription Lens Compatibility
Prescription lens compatibility in FPV goggles guarantees you can enjoy clear visuals without relying solely on glasses. Some models support direct insertion of custom ophthalmic lenses, while others require aftermarket solutions. Check if your goggles have a dedicated slot or removable optical inserts. Focus adjustment ranges from -8.0 to +4.0 diopters, helping fine-tune sharpness for your vision. For ideal comfort, ensure your goggles accommodate your prescription type. Use the table below to understand compatibility options, with environmental considerations playing a role in selecting suitable models. Additionally, understanding ocular health can influence the choice of lens support features for prolonged use. Moreover, optical customization options can enhance clarity and comfort tailored to your specific needs.
Custom Optical Solutions
Custom optical solutions enhance your FPV experience by guaranteeing clear visuals tailored to your vision needs. Proper focus and prescription lenses can markedly improve comfort and image sharpness. Here are key options to consider:
- Focus Adjustment: Many goggles offer a diopter range from -8.0 to +4.0, allowing you to fine-tune clarity without glasses.
- Prescription Lens Compatibility: Some models support custom ophthalmic lenses, providing precise correction for your vision.
- Use of Regular Glasses: Certain goggles are designed to accommodate glasses or have inserts, reducing the need for aftermarket solutions.
Choosing the right optical setup minimizes eye strain, enhances situational awareness, and guarantees long-term comfort during extended flights. Properly tailored lenses make a noticeable difference in your flying performance.
Field of View (FOV) and Immersion Levels

A wider Field of View (FOV) considerably enhances your immersive experience by expanding the visible area in your FPV goggles. Higher FOV makes you feel more present in the flight, increasing situational awareness. Premium goggles typically offer FOVs between 44° and 54°, providing a more natural and engaging view. However, larger FOVs can sometimes reduce image sharpness at the edges. Adjustable FOV models let you customize your experience, balancing immersion and clarity. Here’s a quick comparison:
| FOV Range | Immersion Level | Edge Clarity |
|---|---|---|
| 30° – 40° | Moderate | High |
| 44° – 50° | High | Slightly Reduced |
| 54° | Very High | Noticeable Drop |
Choosing the right FOV depends on your preference for immersion versus image sharpness.
Receiver Types and Antenna Performance

Choosing the right receiver type is essential for maintaining a stable and clear video feed during your FPV flights. Your receiver’s quality directly impacts signal strength and interference resilience. Consider these key factors:
Selecting the right receiver ensures stable, clear FPV video with minimal interference.
- Digital vs. Analog: Digital receivers deliver interference-free, crisp images, ideal for clear visuals, while analog systems are more forgiving over long distances but may suffer from interference. Digital systems can also provide features like telemetry data and lower latency, enhancing the flying experience. Additionally, digital systems often have improved signal integrity, ensuring a more reliable connection during complex maneuvers.
- Built-in vs. Modular: Built-in receivers simplify setup, but modular systems, like RapidFire, provide flexibility, upgrades, and enhanced sensitivity. Modular options often allow for easier repairs and component replacements, extending their lifespan.
- Antenna Performance: High-quality antennas boost range and signal stability. Omnidirectional antennas suit general flying, while directional ones focus on specific directions for longer distances. Proper antenna placement and quality are crucial for optimal signal quality.
- Vetted options ensure you select reliable components that deliver consistent performance. Opting for reputable brands and verified products minimizes the risk of unexpected failures during critical moments.
Connectivity Features and Input Options
Connectivity features and input options expand your FPV goggles’ versatility by allowing seamless integration with various video sources and accessories. Many goggles include HDMI or AV inputs, enabling you to connect external devices like gaming consoles, cameras, or recording equipment. Some models support USB ports for firmware updates, charging, or data transfer. Wireless options, such as Wi-Fi or Bluetooth, facilitate remote control or streaming from smartphones and tablets. Compatibility with different video protocols guarantees you can use both analog and digital systems smoothly. Additionally, certain goggles offer SD card slots for recording footage directly, boosting your flying experience. Choosing a headset with versatile connectivity means you can customize your setup, easily update hardware, and expand your capabilities without needing multiple devices.
Practical Tips for Selecting the Best FPV Goggles

When selecting the best FPV goggles, it’s vital to prioritize your specific flying style and needs. Consider how you’ll use them—racing, freestyle, or long-range touring—as this influences key features. To make an informed choice, focus on these aspects:
- Display Quality: Opt for higher resolution and refresh rates for smoother, clearer video, especially if you prioritize sharpness and quick response.
- Comfort and Fit: Guarantee adjustable IPD and focus settings match your eyes for extended flights without fatigue.
- Compatibility and Connectivity: Check if the goggles support your camera type, video system, and have necessary input options like HDMI or analog modules.
Frequently Asked Questions
How Does OLED Compare to LCD in FPV Goggles?
You’ll notice that OLED screens in FPV goggles offer higher contrast and deeper blacks compared to LCDs, making images look more vibrant and detailed. OLEDs provide better color accuracy and faster response times, reducing motion blur during fast flying. While LCDs are often cheaper and more common, OLEDs give you a richer, more immersive experience, especially in low-light conditions, helping you see more clearly and react faster while flying.
What Is the Optimal Resolution for Digital FPV Systems?
The ideal resolution for digital FPV systems is 1080p, or 1920×1080, because it offers the sharpest, most detailed image. This resolution considerably improves visibility, helping you recognize obstacles and fly precisely. While 720p (1280×720) is common and adequate for many pilots, 1080p provides a clearer picture for high-end systems. Keep in mind, higher resolution demands better processing power and bandwidth for smooth, low-latency video.
How Does FOV Influence Situational Awareness and Immersion?
A wider FOV boosts your situational awareness and immersion by offering a more expansive view of your surroundings, making you feel like you’re actually there. It helps you spot obstacles earlier and enhances your overall flying experience. However, a very wide FOV might reduce image sharpness at the edges. Most premium goggles provide a FOV between 44° and 54°, balancing immersion with clarity for ideal flying.
Which Antennas Improve Range and Signal Stability?
Antennas that improve range and signal stability are like reliable beacons guiding your drone through foggy skies. High-performance antennas, such as directional or patch types, focus signal strength and extend transmission distance. Upgrading to omnidirectional antennas enhances signal reception from multiple angles, reducing interference and dropouts. Using antennas with better gain, like 7dBi or higher, guarantees your connection stays strong and stable, even at longer ranges, giving you confidence during flight.
Can I Use My Regular Glasses With FPV Goggles?
Yes, you can use your regular glasses with FPV goggles. Many models are compatible with glasses, but verify if they have enough space or adjustable features for comfort. Some goggles offer built-in focus adjustments, while others support prescription lenses through aftermarket solutions. If your glasses don’t fit comfortably, consider using clip-on lenses or custom inserts to guarantee clear vision and prevent eye strain during long flights.
Conclusion
Choosing the right FPV goggles means understanding specs, balancing comfort with performance, and prioritizing your flying style. By comparing display tech and resolution, evaluating refresh rates and FOV, and considering connectivity and adjustability, you guarantee a seamless, immersive experience. Ultimately, selecting goggles that match your needs, enhance your vision, and support your skills creates not just better flights but a more enjoyable, confident, immersive, and satisfying FPV journey.