You should replace your drone’s propellers when you notice cracks, chips, or signs of wear, or if the drone vibrates or makes unusual noises during flight. To swap them, power off your drone, secure the motor shaft, and use the right tools to remove old propellers carefully. Align new ones precisely, tighten screws correctly, and double-check stability before flying again. For tips on a smooth, safe replacement process, keep exploring the details ahead.
Key Takeaways
- Replace propellers when visible damage, cracks, or chips are present to ensure safe and optimal flight performance.
- Use the correct size, pitch, and orientation (CW or CCW) matching your drone’s specifications.
- Gather necessary tools and organize your workspace before removing old propellers to prevent losing small parts.
- Remove screws carefully with a precision screwdriver, holding the motor shaft steady, then install new propellers aligning holes properly.
- Double-check all screws and propeller alignment before test flying to ensure stability and safety.

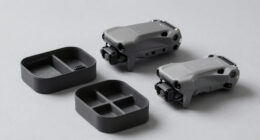
16PCS Foldable Replacement Propellers with Screws, Compatible with HS360S Drone, Lightweight Spare Blades Kit.
Compatible with HS360S quadcopter drones. Please compare the original propeller shape and size before purchase.
As an affiliate, we earn on qualifying purchases.
As an affiliate, we earn on qualifying purchases.
Signs That Indicate Your Propellers Need Replacing
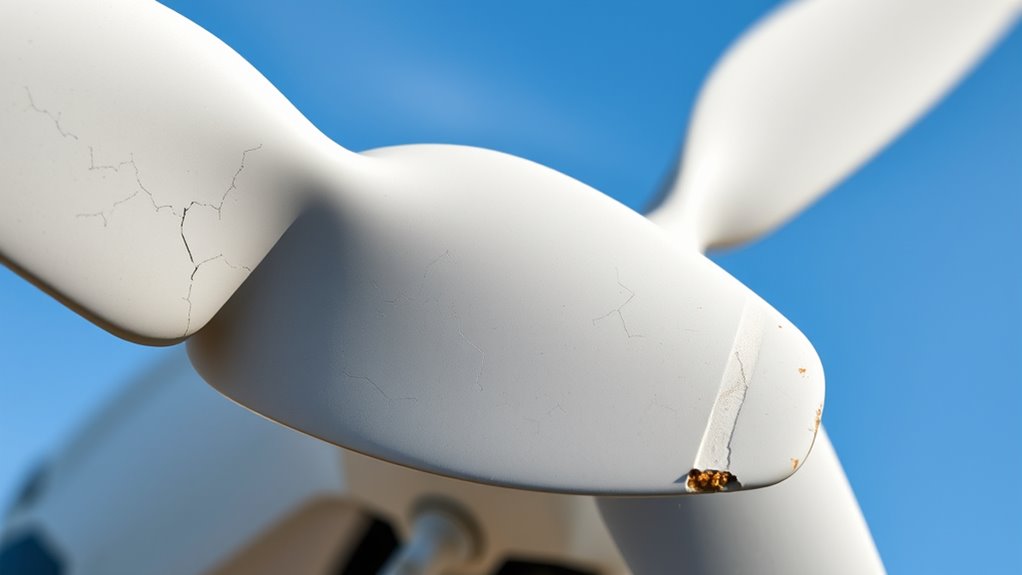
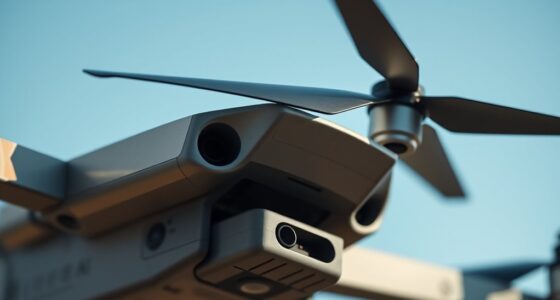
Your drone’s propellers show signs they need replacing when you notice visible damage like cracks, chips, or bends, which can compromise flight stability. These damages can cause uneven rotor performance, leading to vibrations or wobbling during flight. If you hear unusual noises or experience unexpected vibrations, it’s a clear sign something’s wrong. After a crash or collision, inspect the blades carefully, as hidden cracks might not be immediately obvious but still affect safety. Additionally, if the edges of the blades look worn or the plastic appears fatigued, it’s time to substitute them to prevent mid-flight failures. Regularly check for these signs to ensure your drone remains safe and performs ideally. Ignoring damage can lead to unpredictable flight behavior or even crashes. Maintaining propeller integrity is essential for safe and efficient drone operation, as damaged blades can also affect flight stability and overall performance. Being proactive with inspection and maintenance helps prolong the lifespan of your drone and ensures reliable flights. Moreover, understanding the signs of wear and tear can help you catch issues early before they cause more serious problems. Keeping an eye on propeller condition and addressing issues promptly can significantly reduce the risk of accidents during flight.

Readytosky 6Pairs 1045 Propellers CW CCW 10×4.5" FPV Props for F550 F450 S500 S550 FPV Quadcopter Multirotor
1045 10"*4.5" blade propeller for RC multicopter quadcopter.
As an affiliate, we earn on qualifying purchases.
As an affiliate, we earn on qualifying purchases.
Choosing the Correct Replacement Propellers

Selecting the right replacement propellers is essential to guarantee your drone performs safely and efficiently. First, identify whether your drone uses clockwise (CW) or counter-clockwise (CCW) blades, often marked on the propellers. Second, match the size and pitch exactly to your original, ensuring the correct diameter and blade angle for ideal flight. Third, verify the orientation marks, like dots or printed indicators, to install them correctly. Fourth, check compatibility with your drone model and motor shaft design, using manufacturer-recommended or certified replacement parts. Choosing the wrong propellers can cause imbalance, poor flight performance, or even crashes. Always double-check markings and specifications before purchasing to ensure a perfect fit and smooth operation. Additionally, understanding proper installation practices helps maintain optimal drone performance and safety. Proper propeller balancing also plays a crucial role in reducing vibrations and extending your drone’s lifespan.

VGEBY RC Propeller Balancer, Precision Balance for Smooth Flight, Prop Balance Tool for RC Helicopters, Model Airplanes, Drones, Hobbyists and Enthusiasts
Each balancer is equipped with easytooperate accessoriesfollow assembly and support balancing instructions.,Model Plane Prop Balancer
As an affiliate, we earn on qualifying purchases.
As an affiliate, we earn on qualifying purchases.
Preparing Tools and Workspace for Propeller Replacement
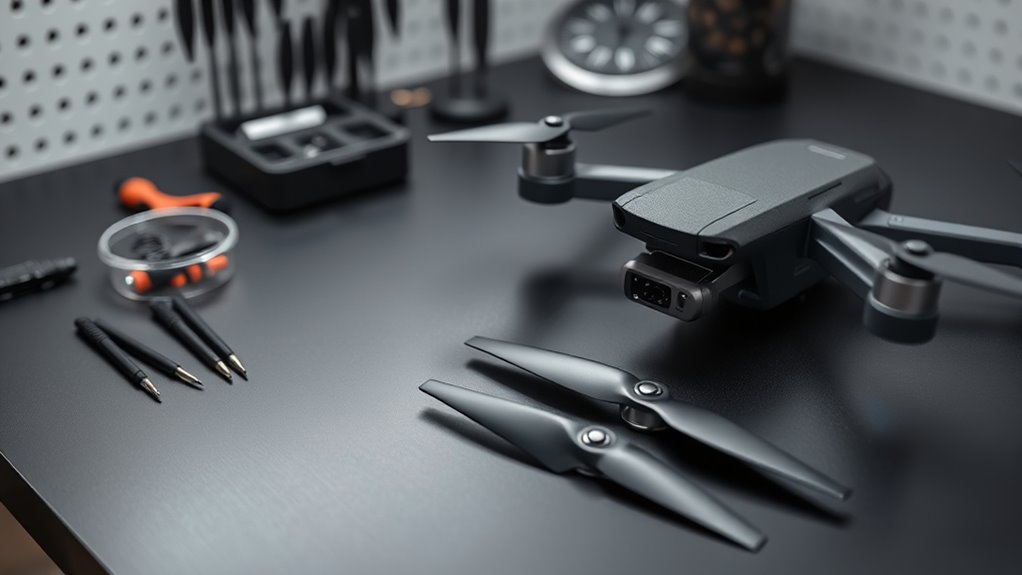
Start by gathering all the essential tools, like screwdrivers, replacement screws, and cleaning supplies, so everything’s within reach. Make sure your workspace is clear and organized to prevent losing small parts or making mistakes. Good lighting is vital, so set up an adequate setup to see details clearly during the replacement process. Incorporating smart tools can also improve precision and efficiency during the task. Additionally, inspecting your propeller condition beforehand helps identify if replacement is necessary, saving time and effort. Regular practice of visual and auditory cues can further enhance your ability to perform precise repairs efficiently. Being aware of battery safety precautions is also crucial to prevent accidents during maintenance.
Gather Essential Tools
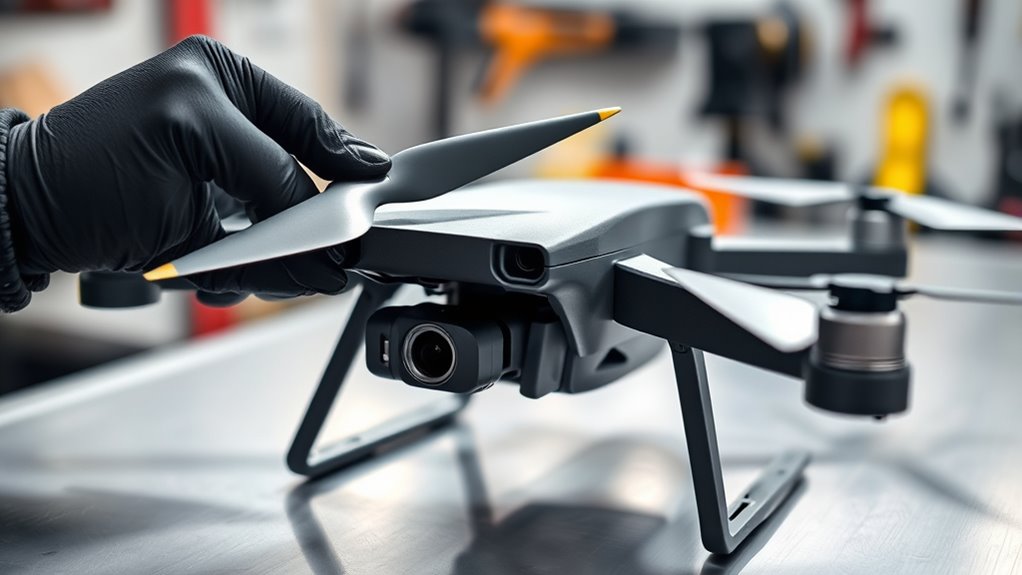
Are you ready to replace your drone’s propellers? Before starting, gather the essential tools to guarantee a smooth process. First, grab a precision screwdriver suited for small screws, so you can remove and secure propellers without stripping them. Second, have replacement screws on hand, matching the original specifications for proper fit. Third, consider a threadlock if needed, to prevent screws from loosening during flight. Fourth, keep a cleaning cloth or brush nearby to clear debris from the motor shaft and mounting surface. Organizing these tools in a clean, well-lit workspace with enough room to work comfortably is crucial. Having everything ready and within reach minimizes delays and helps you focus on the task, ensuring a safe and efficient propeller replacement. Additionally, reviewing professional services or consulting detailed guides can enhance your understanding and confidence during the process. Incorporating a proper understanding of drone maintenance can also help prevent issues during future replacements. Being familiar with drone component specifications ensures you select the correct replacement parts and avoid compatibility problems. Moreover, understanding the science behind propeller dynamics can improve your overall drone handling and performance. To further ensure safety and success, consider researching drone safety protocols before beginning your repair.
Clear and Organized Area
Creating a clear and organized workspace sets the foundation for a smooth propeller replacement. You want enough space to access your drone easily and keep tools within reach. Clear the area of clutter to prevent losing screws or dropping parts. Use a flat surface to stabilize your drone and prevent accidental falls. Keep essential tools nearby to avoid searching mid-process. Label or separate screws and replacement parts to streamline the process. Additionally, maintaining a clean workspace minimizes the risk of losing small components and enhances overall efficiency. A well-organized environment also helps reduce caregiver stress by making the task more manageable. Proper storage of tools and parts is essential for Luggage & Bags to ensure everything stays organized and accessible. Being aware of electrical safety principles can help prevent accidents during this task. The use of personal protective equipment such as safety glasses can further safeguard against unexpected incidents. Here’s a quick guide:
| Tool Needed | Purpose | Storage Tip |
|---|---|---|
| Precision screwdriver | Remove screws | Keep in a small container |
| Replacement screws | Secure new propellers | Organize in a labeled box |
| Cleaning cloth | Clear debris | Have on hand for quick access |
| Threadlock (optional) | Prevent screw loosening | Store separately for easy access |
Adequate Lighting Setup
Proper lighting is essential to see small screws, delicate parts, and detailed labels clearly during propeller replacement. Without adequate light, you risk misplacing screws or damaging components. To set up your workspace effectively, consider these essentials:
- Use a bright, adjustable LED lamp to eliminate shadows and focus light exactly where needed.
- Position the light source to avoid glare on reflective surfaces like drone bodies or glass tables.
- Keep a spare flashlight nearby for extra illumination or tight spots.
- Ensure your workspace is clean and clutter-free to prevent losing tiny screws or tools in the dark.
A well-lit area minimizes errors, speeds up the process, and keeps your drone’s components safe. Proper lighting creates a clear view, enabling precise, confident propeller replacement.

iMusk 2 pcs Reinforced Pivot Hinges for DJI Mini 4 Pro/Mini 3 Pro Front Arm Axis Shaft with T5 Screwdriver and Tweezer Repair Tools
【Compatible Drones】The pivot hinge is specifically and accurately designed for DJI Mini 4 Pro and DJI Mini 3…
As an affiliate, we earn on qualifying purchases.
As an affiliate, we earn on qualifying purchases.
Step-by-Step Guide to Swapping Out Propellers
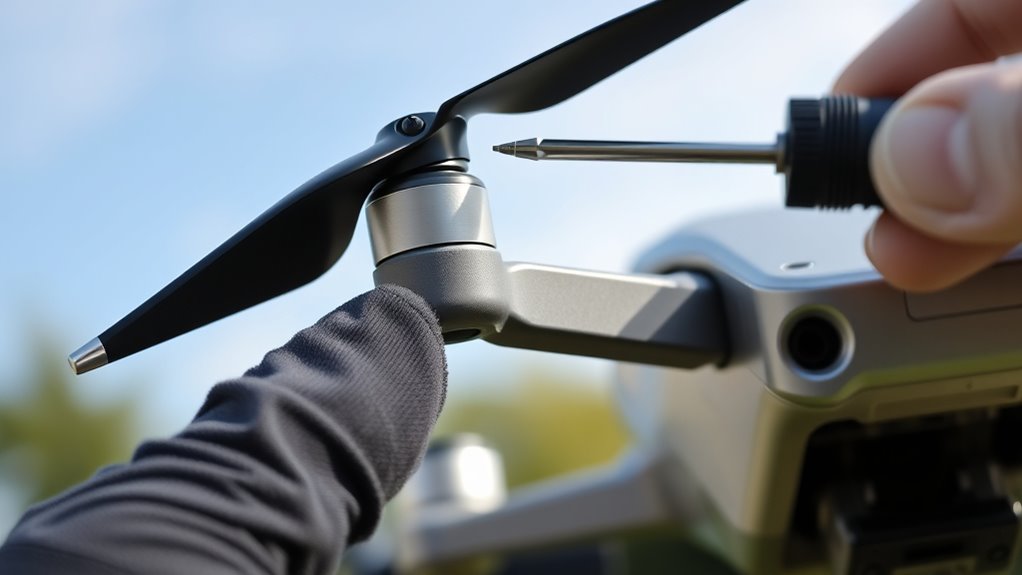
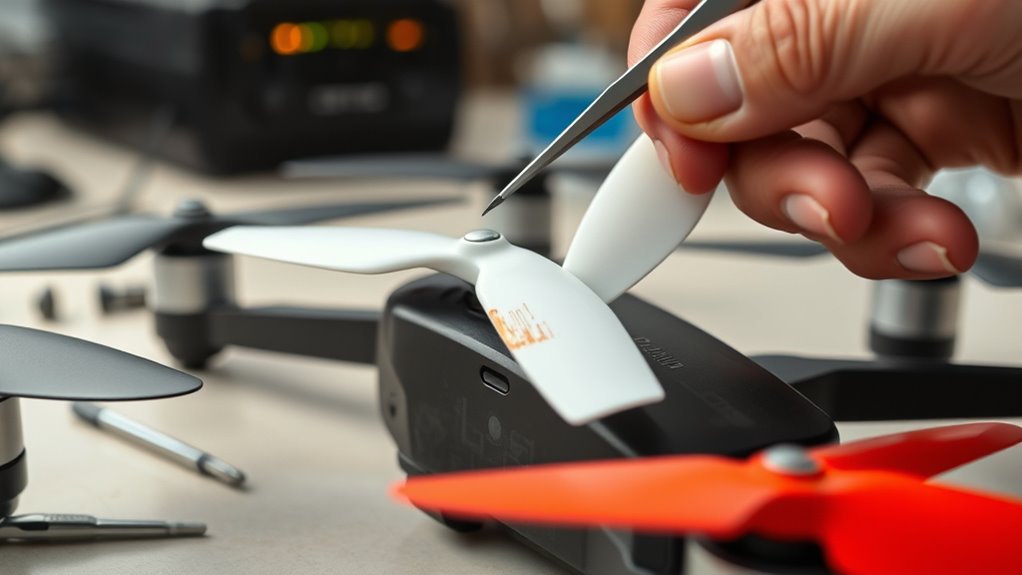
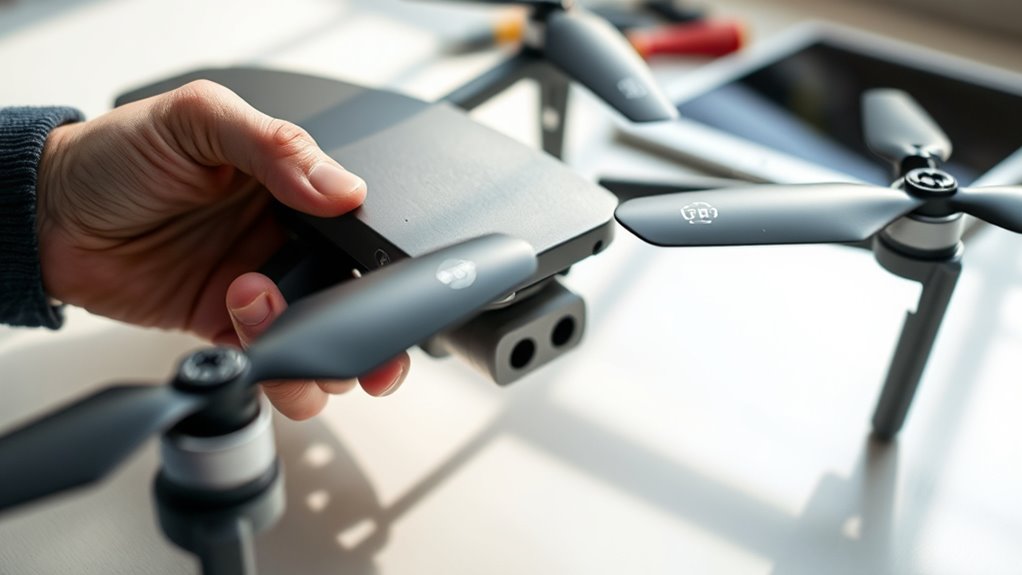
Swapping out drone propellers is a straightforward process that requires careful attention to detail to guarantee safety and peak performance. First, use a precision screwdriver to remove the screws securing the old propellers, holding the motor shaft steady to prevent spinning. Gently lift the damaged propeller away, inspecting the motor shaft for debris or damage. Before installing the new propeller, check that it’s the correct type and orientation—CW or CCW—and ensure it’s free of cracks or warping. Align the holes precisely with the motor shaft and tighten the screws to the manufacturer’s recommended torque, avoiding over-tightening. After installation, spin the propeller manually to confirm it moves smoothly. Always double-check the screws are secure before conducting a test flight.
Ensuring Proper Installation and Safety Checks

Make certain your propellers are installed with the correct orientation, matching the markings or labels, so your drone flies smoothly. Tighten the screws properly—firm enough to stay secure but not so tight that you damage the threads or blades. After installation, double-check everything before your first test flight to guarantee safety and peak performance.
Confirm Correct Orientation
Before securing the propellers, it’s essential to verify they’re installed in the correct orientation to ensure safe and stable flight. Proper orientation prevents imbalance and potential crashes.
To confirm, check these key points:
- Look for markings or labels indicating CW or CCW on each propeller.
- Align the top side of the propeller so it faces upward, matching the drone’s design.
- Verify the printed or marked indicators on the blades are correctly positioned relative to the motor.
- Ensure each propeller matches the motor’s rotation direction—clockwise or counter-clockwise—based on the drone’s specifications.
Taking these steps helps prevent flight issues caused by misaligned or improperly installed propellers, ensuring your drone operates smoothly and safely.
Tighten Screws Properly
To guarantee your drone flies safely and smoothly, it’s essential to tighten the propeller screws properly during installation. Use a precision screwdriver to avoid stripping screws, and tighten them gradually in a crisscross pattern. Check that each screw is snug but not overtightened, which can damage threads or warp the propeller. Use a torque wrench if possible for consistent tightening. Ensure screws are evenly secured to prevent vibrations or imbalance during flight.
| Screw Type | Tightening Tip |
|---|---|
| Regular screw | Tighten firmly, avoid over-tightening |
| Threadlock screw | Apply lightly, then tighten to manufacturer specs |
Double-check all screws after initial test spins, making adjustments as needed to maintain stability and safety.
Troubleshooting Common Issues During Replacement
Troubleshooting common issues during propeller replacement can save you time and prevent flight problems. If you encounter difficulties, here are some key solutions:
Troubleshooting propeller issues ensures safe, smooth flights and quick resolution.
- Misaligned screw holes: Slightly rotate the propeller until the holes line up smoothly, avoiding forcing it into place.
- Stripped screws: Back out the damaged screw carefully, then rethread it or replace it with a new one to ensure secure fastening.
- Incorrect propeller: Double-check that you’ve selected the right orientation, size, and type to prevent instability or flips.
- Motor not spinning freely: Test the motor independently; if it’s stiff or noisy, troubleshoot or replace it before installing the propeller.
Address these issues promptly to ensure safe, smooth flight performance.
Maintaining Your Propellers for Long-Term Performance
Regular maintenance of your drone propellers is essential to guarantee they perform reliably over time. Start by inspecting them before each flight, looking for cracks, chips, or warping. Clean the blades and hub with a soft brush or cloth to remove dirt and debris that can cause imbalance. Check for wear on the edges and replace any blades showing signs of fatigue or damage. Ensure screws are tight but not overtightened to prevent stress fractures. Store propellers in a cool, dry place away from sunlight to prevent warping. Avoid exposing them to chemicals or rough handling. Regularly replacing worn or damaged propellers and keeping them clean helps prevent mid-flight failures and maintains ideal flight performance.
Frequently Asked Questions
Can I Replace Only One Propeller or Should I Replace All at Once?
You can replace only one propeller if it’s damaged or worn out, but it’s best to replace all at once for balanced flight. Mixing new and old propellers can cause instability, vibrations, or uneven wear. If you notice a difference in performance, replace the remaining propellers to guarantee smooth, safe operation. Always match the replacement propellers to the original specifications for ideal results.
How Do I Identify the Correct Size and Pitch for Replacement Propellers?
You identify the correct size and pitch for replacement propellers by checking your drone’s manual or current propellers for markings indicating size, usually in inches (like 5×3). Match the pitch, which affects lift and speed, to the original specifications. Make certain you distinguish between clockwise (CW) and counter-clockwise (CCW) blades, and verify compatibility with your drone model before purchasing. Always use exact replacements for peak flight performance.
Is It Necessary to Calibrate My Drone After Replacing the Propellers?
Think of your drone as a finely tuned orchestra; replacing the propellers is like tuning the strings. You should calibrate your drone afterward to guarantee harmony and precise control. Calibration aligns sensors and motor responses, preventing vibrations or drift. Skipping this step is like playing a symphony out of tune—your drone might wobble, lose stability, or even crash. So, yes, calibration helps keep your drone performing flawlessly after propeller replacement.
What Are the Risks of Using Non-Certified or Third-Party Propellers?
Using non-certified or third-party propellers risks imbalance, poor fit, and reduced flight stability. They may cause vibrations, noise, or even damage to your drone’s motors and frame. Compatibility issues can lead to mid-flight failures or crashes. Plus, inferior materials might wear out faster or break unexpectedly, risking safety. To keep your drone reliable and safe, always opt for certified or manufacturer-approved propellers that match your model’s specifications.
How Often Should I Perform Maintenance or Replace My Drone’s Propellers?
Like a trusty steed in a bygone era, your drone needs regular care. You should replace or maintain your propellers when you notice cracks, chips, or warping, or after a crash. Follow your manufacturer’s guidelines, usually based on flight hours or time intervals. Conduct visual inspections before each flight, and replace damaged or worn propellers promptly to keep your drone flying smoothly and safely.
Conclusion
Remember, a stitch in time saves nine—so don’t ignore signs your drone’s propellers need replacing. By choosing the right parts, preparing properly, and following the steps carefully, you guarantee smooth flights and avoid costly repairs. Regular maintenance keeps your drone in top shape, letting you enjoy the skies without worry. Stay attentive to your propellers’ condition, because when it comes to flying, safety and care make all the difference.